A Quick and Easy Vintage Sofa Makeover
Week 1 | Week 2 | Week 3 | Week 4 | Week 5 | Week 6 | Week 7 | Week 8
The eighth and final week of the One Room Challenge came to an end, and it is time to share the room makeover reveals. As predicted, I am not finished with the built-ins yet, so this is not my final room reveal.
I made only a tiny bit of progress on the built-ins because it was an eventful week. Stephen’s parents came to visit, and obviously, I wanted to spend a little time with them. They arrived this week because it was also our youngest daughter’s graduation ceremony and prom! Needless to say, our week was full of joy and excitement, but it was also emotional and a little exhausting.
Between all the exciting events, I created a seating area in my home office. I gave a vintage three-seater sofa (that belonged to my grandmother) a makeover.
In “The Story of My Grandmother’s Upholstery,” you can read the whole backstory of this sofa, so I’m jumping straight to how it gave it a new look.
The Vintage Sofa’s Makeover
When the sofa (and two matching chairs) first arrived at my house, I completely refinished the wood by sanding off all the old varnish and resealing it. It was a mammoth task, and I would prefer never to do it again. That’s why I decided to paint over the existing coat of sealer after a quick prep.
List of Products Used to Refinish the Wood
- Dixie Belle White Lightning Cleaner
- Dixie Belle Chalk Paint – French Linen
- Dixie Belle Clear Coat – Gloss
- Dixie Belle Best Dang Wax – White (these are all clickable, shoppable links)
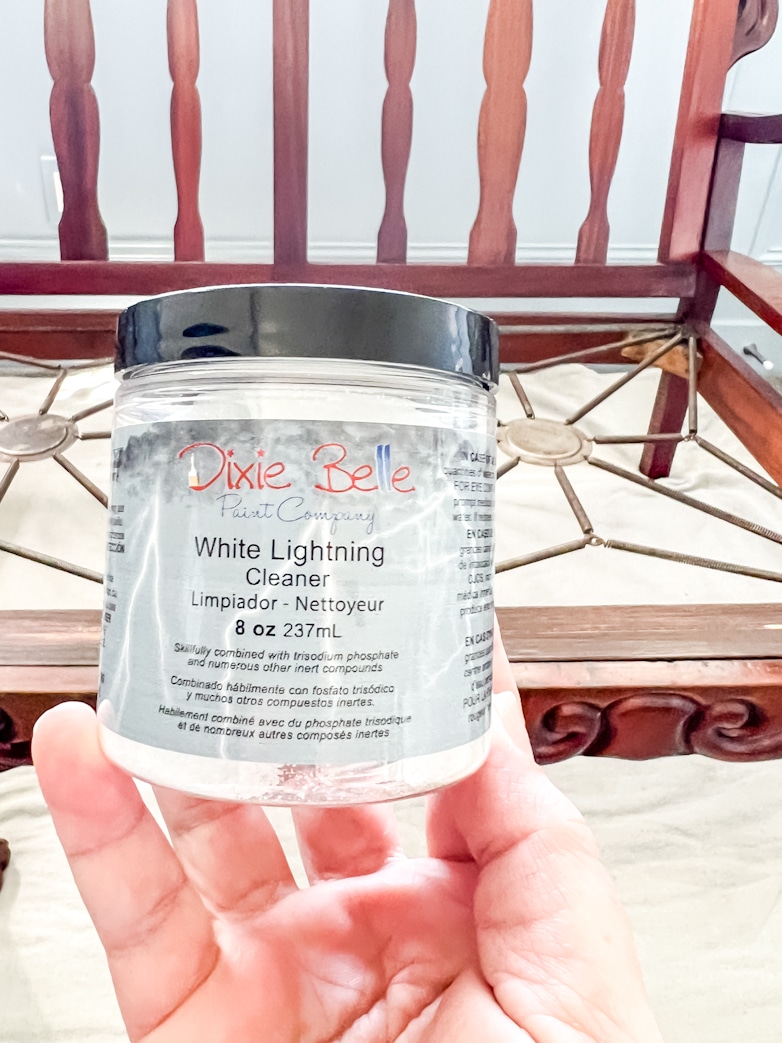
First, I washed the wood with White Lightning Cleaner (granules dissolved in water) to remove anything that would cause the paint not to adhere well. This step should always be followed with another wash with just clean water.
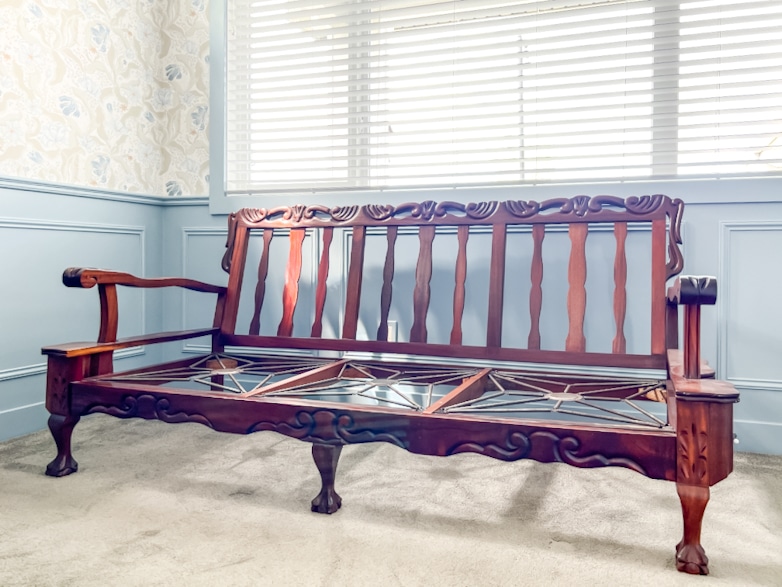
I decided it was time to get rid of the springs that tend to pinch the fabric of the seat cushions. The super heavy and bulky seat cushions could take the punch, but I wanted to replace them with one continuous foam seat cushion that needed more support.
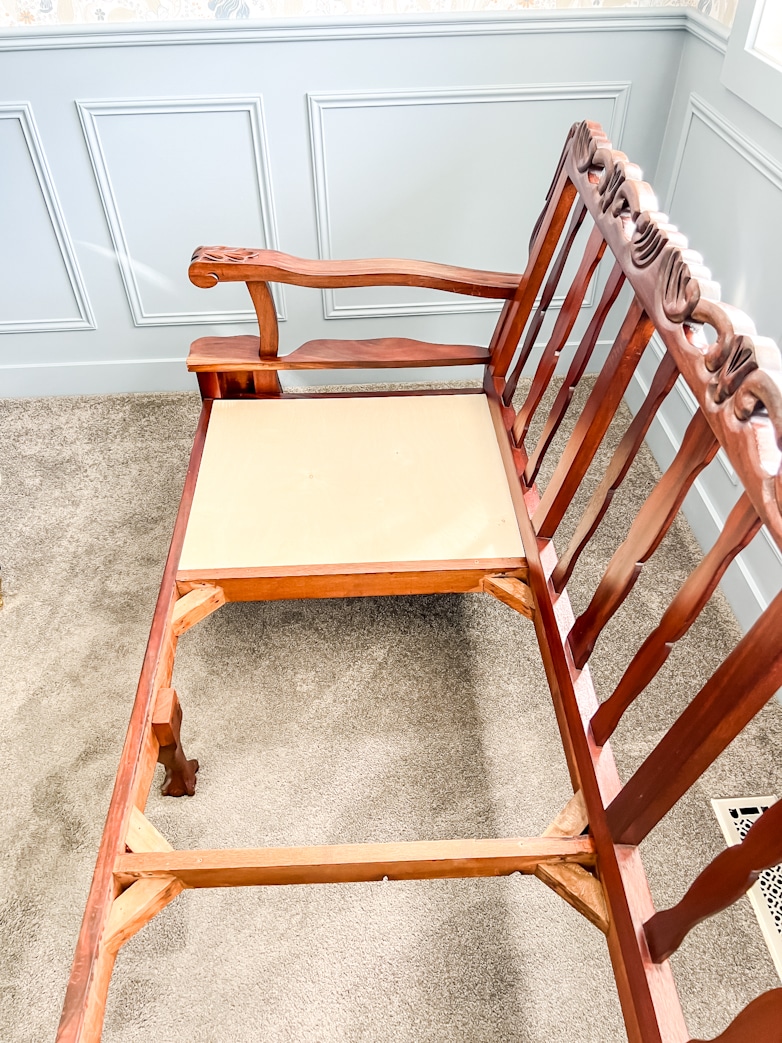
I cut a piece of 3/4-inch plywood for each opening. The existing corner supports were perfect to rest the plywood on.
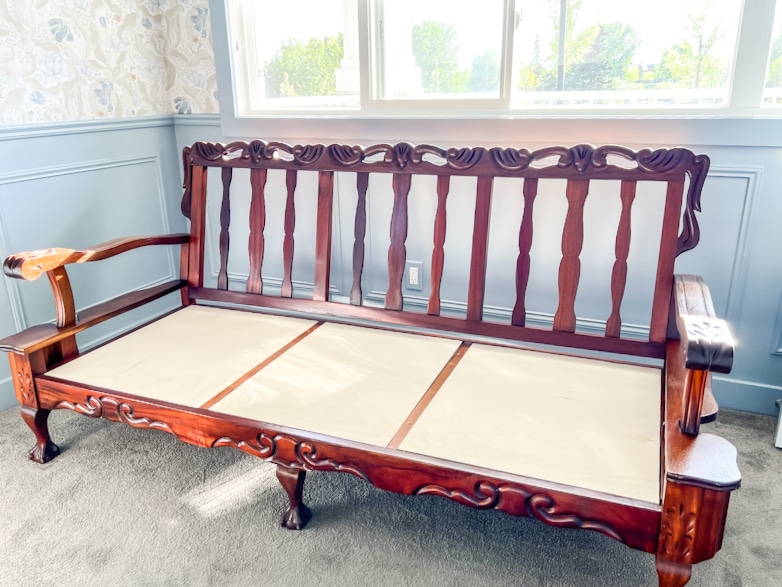
This is so much better! I should have done it a long time ago.

I have wanted to paint this sofa for the longest time, but I never had the perfect place for it, so I had no idea what color to paint it. For its new home in my office, I had a few color options to pick from the wallpaper and decided to try French Linen.
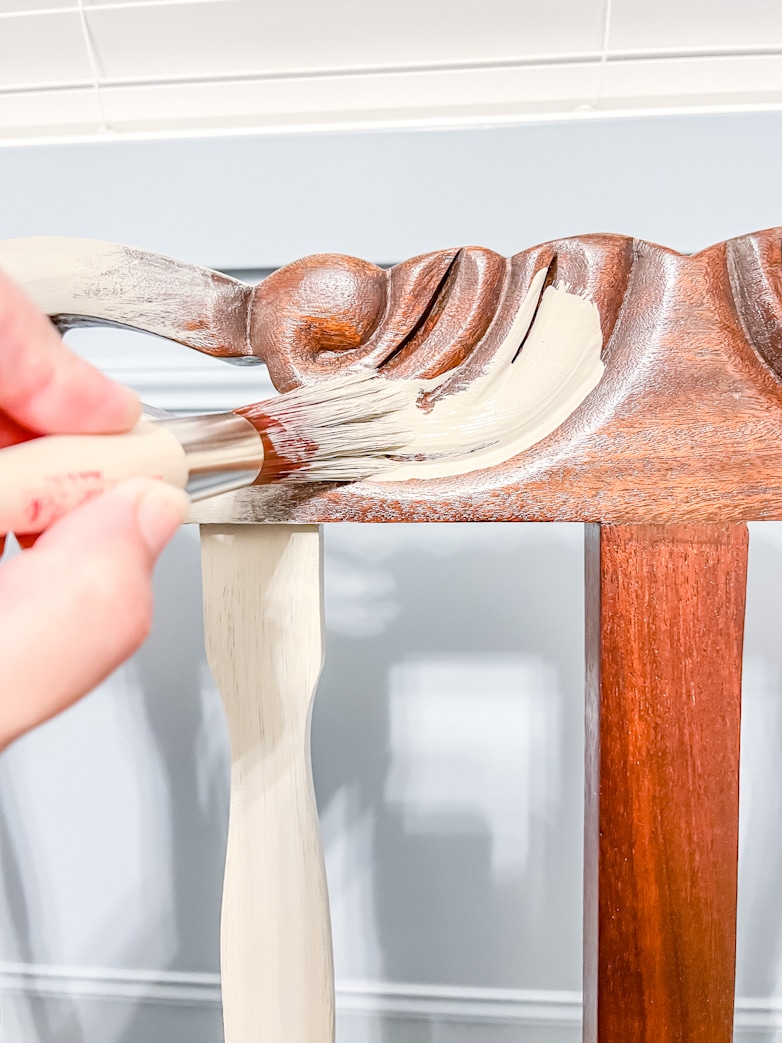
I loved painting all the carved detail and couldn’t wait to see how the piece looked painted.
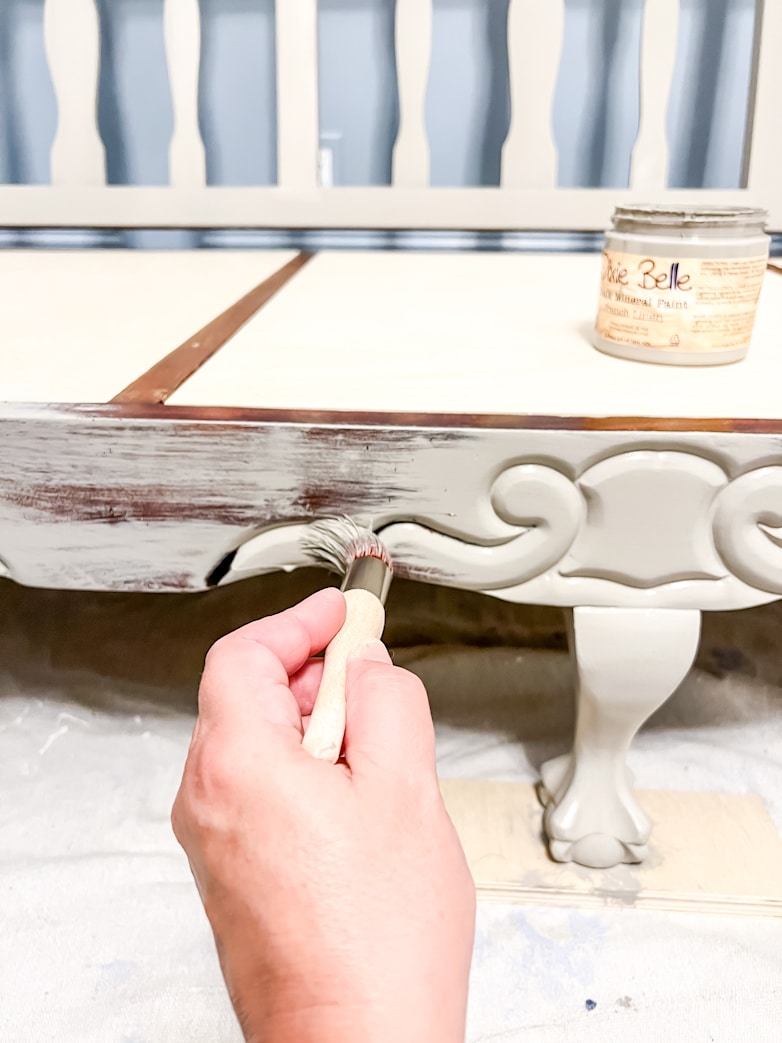
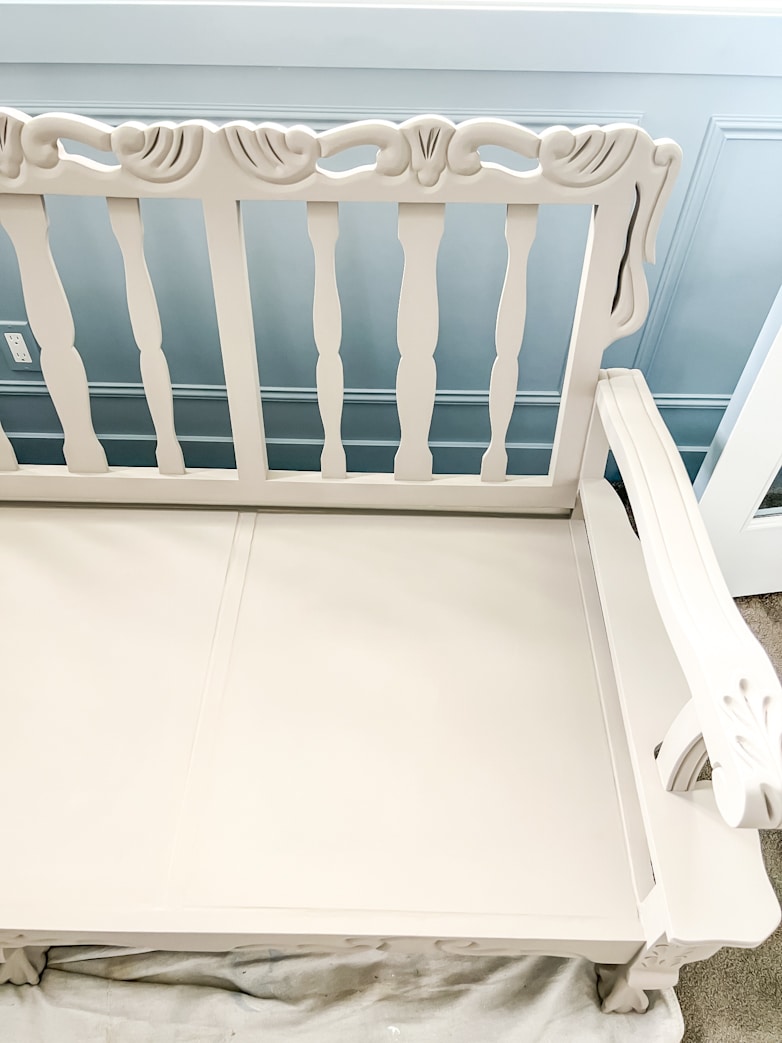
I was on a roll and painted everything, including the plywood.
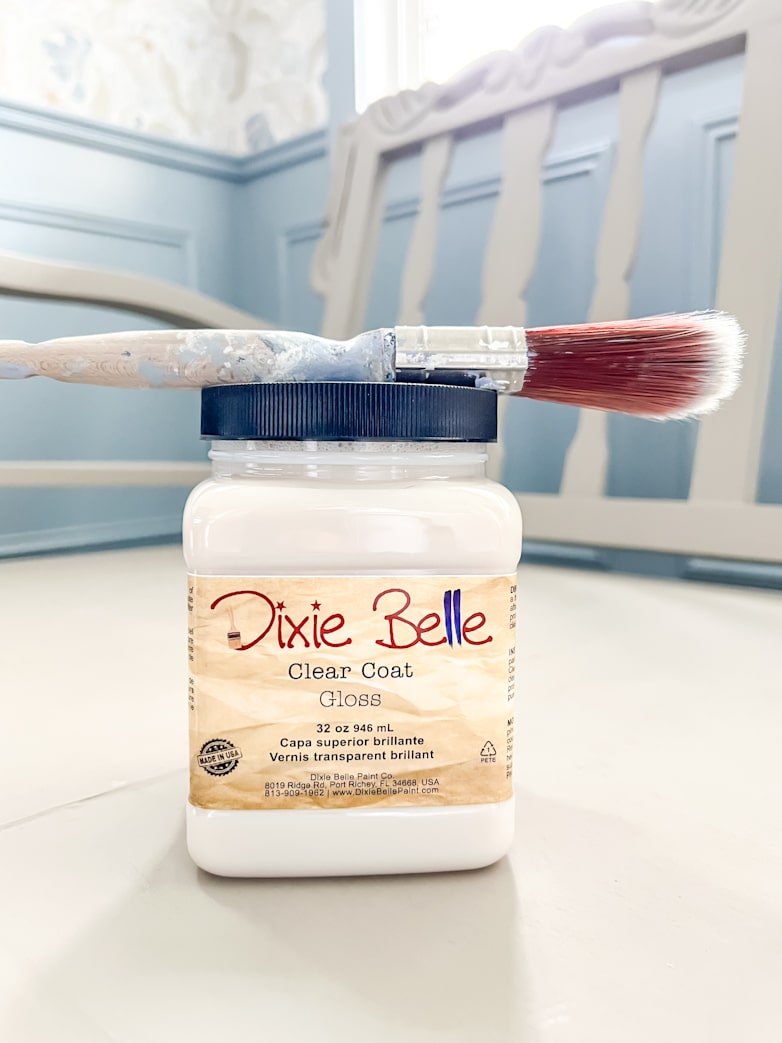
Time to seal and protect the painted finish. I have been a little obsessed with glossy finishes lately and wanted to try out a gloss sealer on the sofa.
Replacing the Vintage Sofa’s Seat and Back Cushions
There was no time for a complete upholstery project, so I had to find a quick and easy solution. Amazon to the rescue! I ordered a piece of foam for the seat, a stretchy velvet seat cover, and pillow covers.
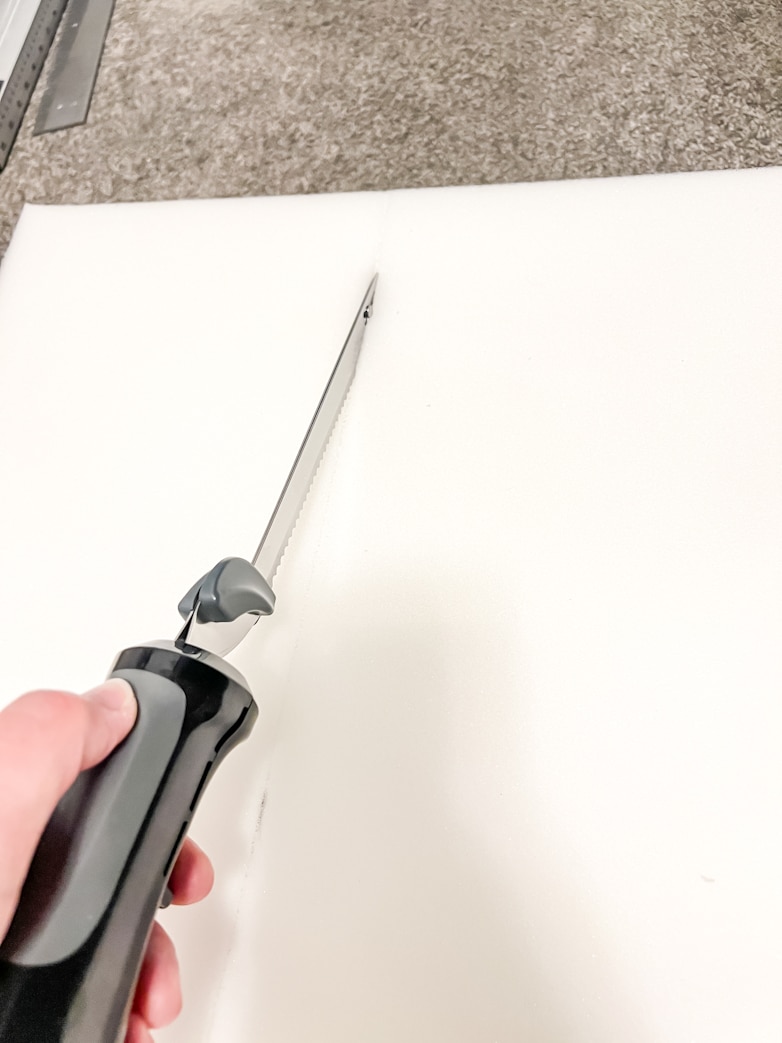
The upholstery foam was 72 inches long, and I had to cut it to 63 inches. Do you know the best way to cut foam straight? See my tip below!
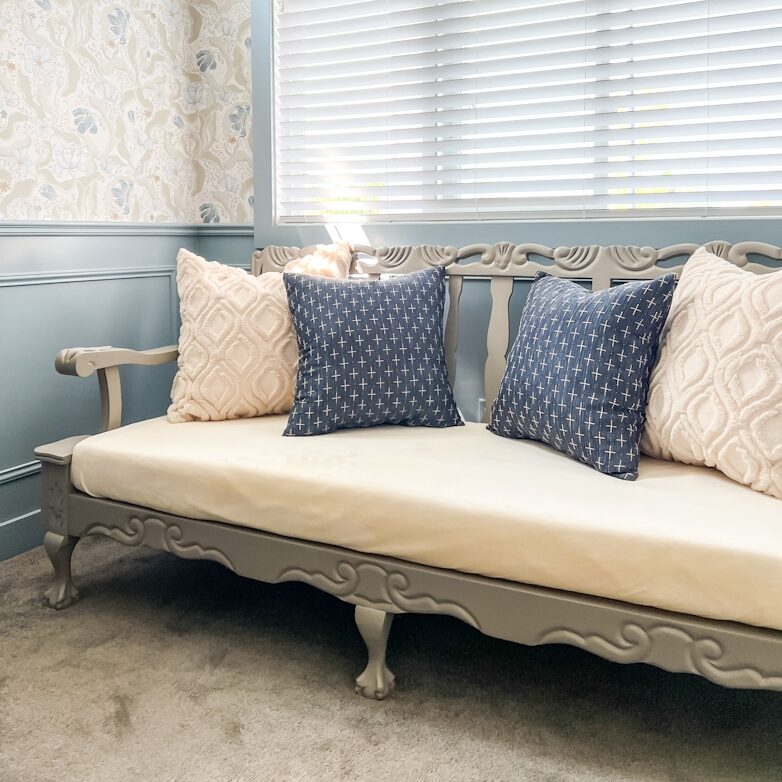
The Vintage Sofa Makeover – A Brand New Look
Mmm, almost, but not quite right. The velvet seat cover looked a tad too buttery yellow, and the painted wood…just a little too brown. How could I fix this quickly and easily? I mulled over it for a day, and then more inspiration hit me!
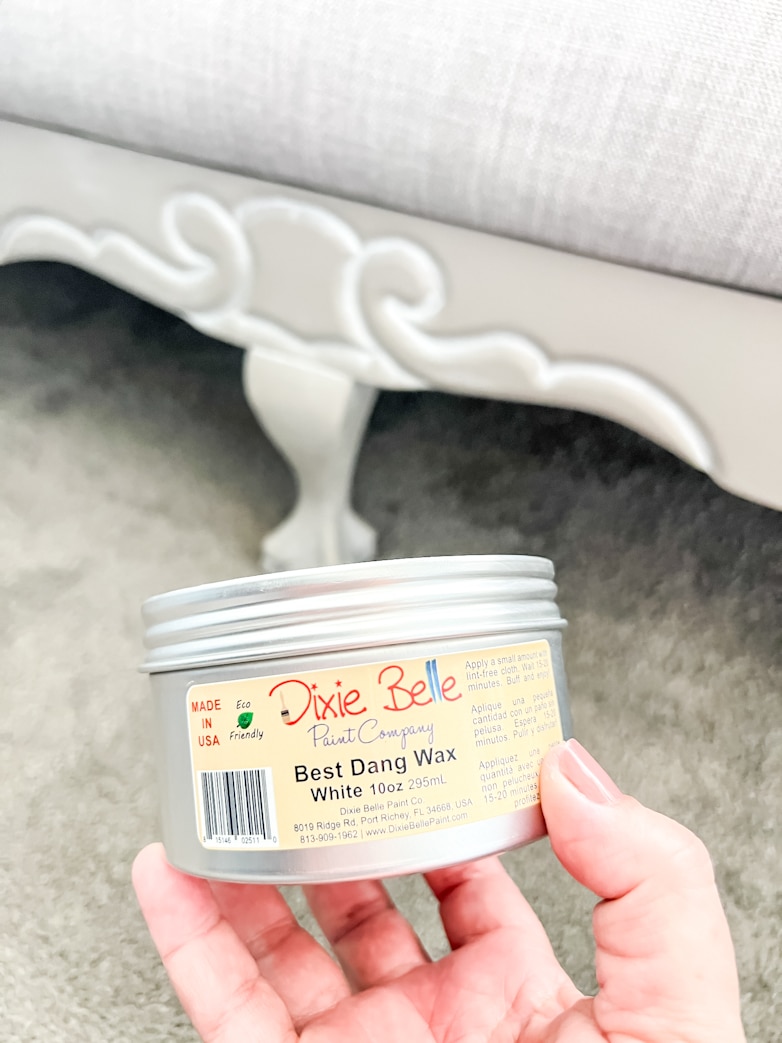
A bit of white wax gave the carved wood more dimension and toned down the gloss, which didn’t turn out as great as I had hoped. I now realize that the problem was not the glossy sealer but the fact that the wainscoting as a backdrop already had a bit of shine to it.
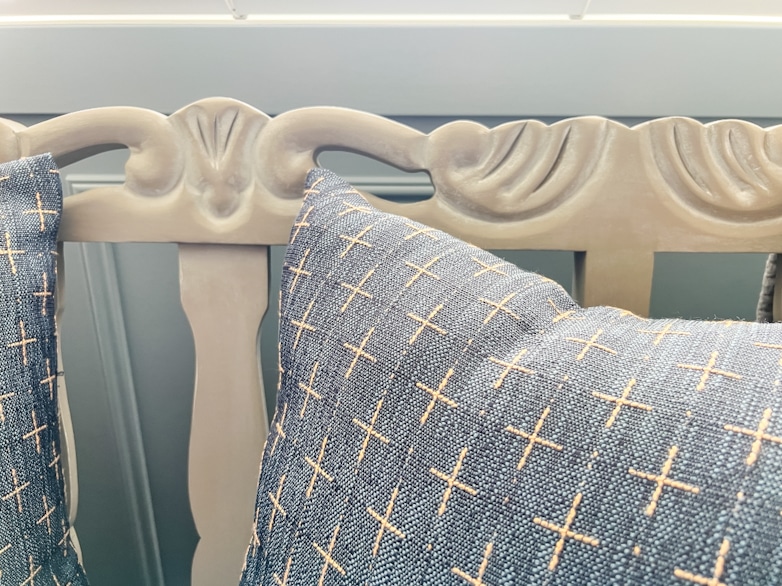
The wax did the trick. The painted wood now almost has a driftwood look, and I love it.
As for the seat cover, I rummaged through my fabric stash and linen closet to find a solution. I found the perfect texture and color for the seat in the form of a curtain panel!
The REAL New Look!
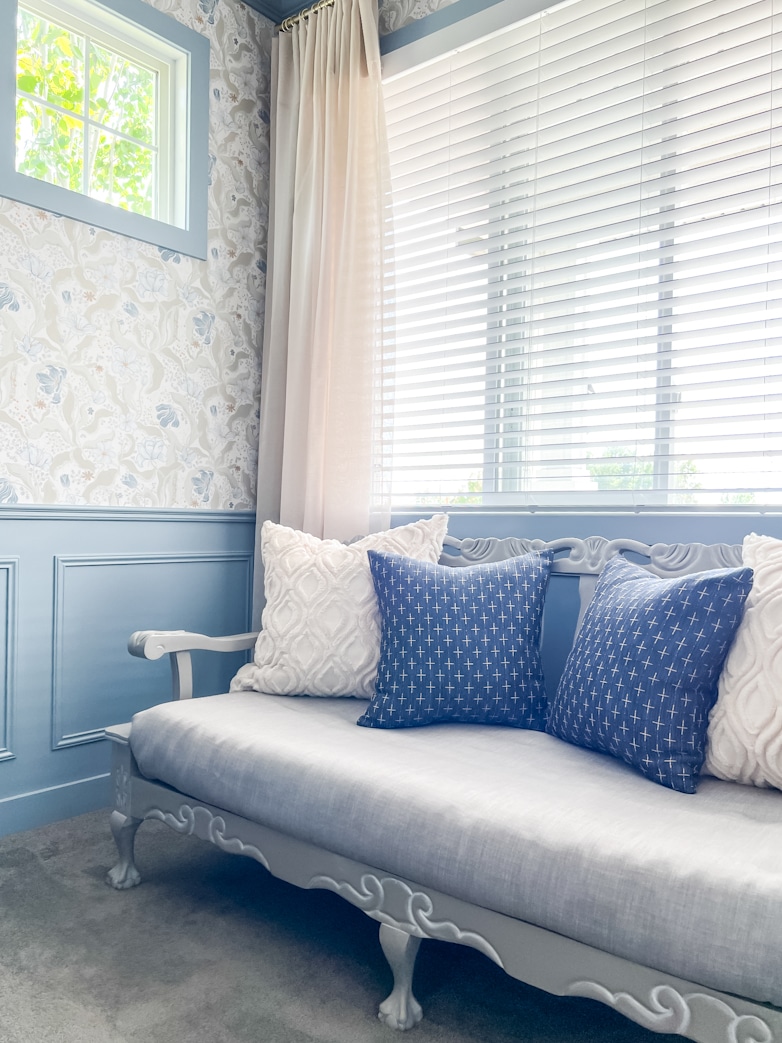
And we have a winner! This looks so much better; it’s a contemporary makeover for this vintage sofa. It is also super comfy; you can bet the pets will sleep on it constantly while I work.
My last addition was dressing the window with sheer curtains.
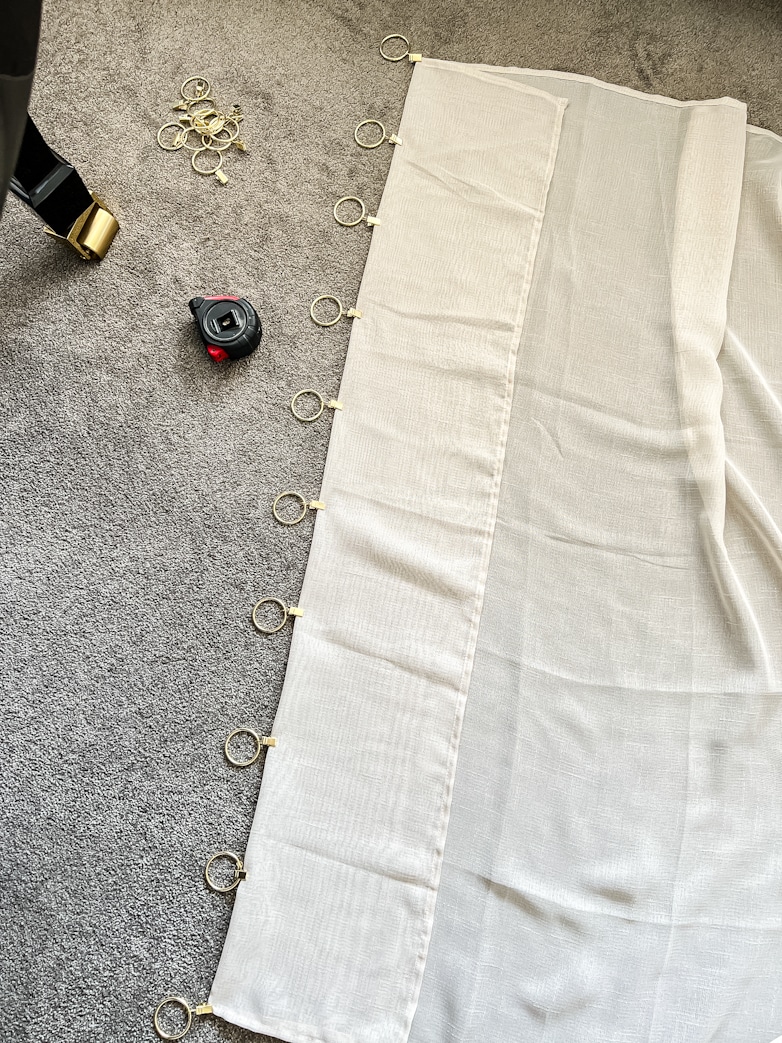
I needed 100-inch long curtains and ordered 108″. I simply folded over the excess and used rings with clips to save time. Easy peasy! I can always alter them later. I hung two panels on each side for a fuller look.
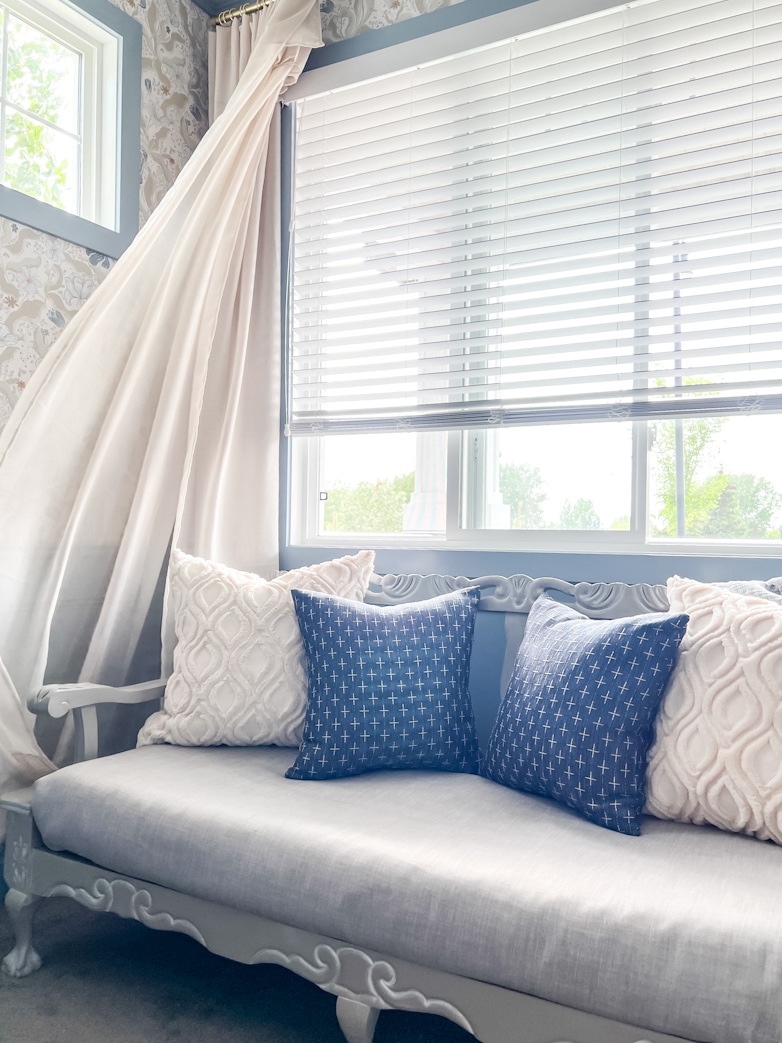
There is just something about sheer curtains blowing in the breeze, don’t you think?
Adding curtains gave the room a whole new vibe. It looks even more feminine, which is what I had in mind for my office.
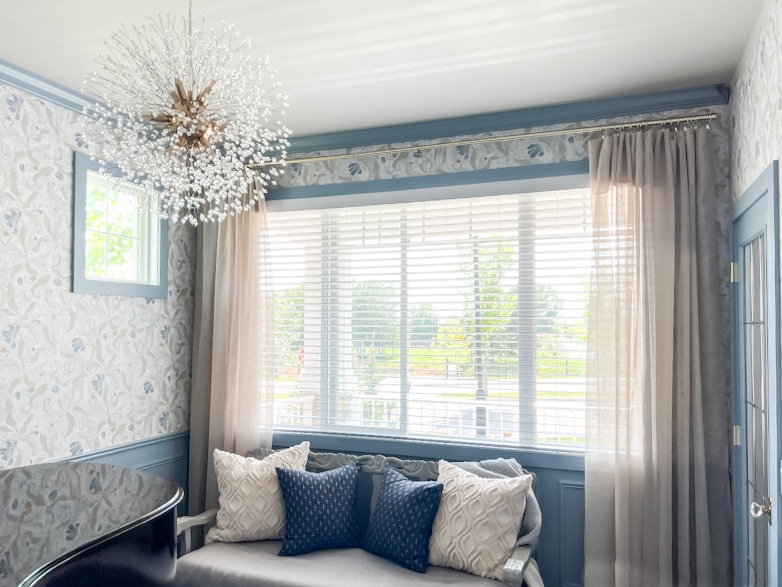
This is as much of the office as I can show without including the half-done wall where the built-ins will go.
The only missing part in this home office is the actual working space. I can assure you, the irony is not lost on me!

Stephen is joining his parent on a trip to Toronto, and I have four, almost five, days of uninterrupted work ahead. I will be building frantically to get it done as soon as possible, and I can’t wait to share it all with you!
I would like to thank Emtek and A-Street Prints for being brand partners on this project. It has been a blast, and I hope we can do it again.
To see the room reveals of all the participants, head over to the One Room Challenge website for the last time this season!
This room looks amazing. You did a wonderful job on the sofa. I love how soft and easy this room feels but it still has an air of formality. Just beautiful.
Oh that sofa is lovely Marieza – you did a fantastic job! I’m always so impressed with how do-able you make your projects. You inspire me to do my own, and when I follow your example, they’re not overwhelming at all! Congratulations on how far you’ve come, and good luck for the final stretch!
Beautiful!
Thank you, Heather!
Definitely like the final look of the sofa, the quick change you made to the seat cushion. The whole room is beautiful. Not sure I would get much work done tho, it’s so calming and relaxing. 😊
I’m so glad you like it, Suzie! Hopefully it won’t be too relaxing when I need to be productive, lol!
The window area and sofa are glorious. (Could not think of a better word!)
That makes me so happy to hear! Thank you, Barb!