Preparing for a Room Makeover – Getting the Basics Right
Week 2 of the One Room Challenge is done, and it was a week of practical solutions and preparing for a room makeover – getting the basics right.
Task 1 – Taking Down The Ceiling Fan
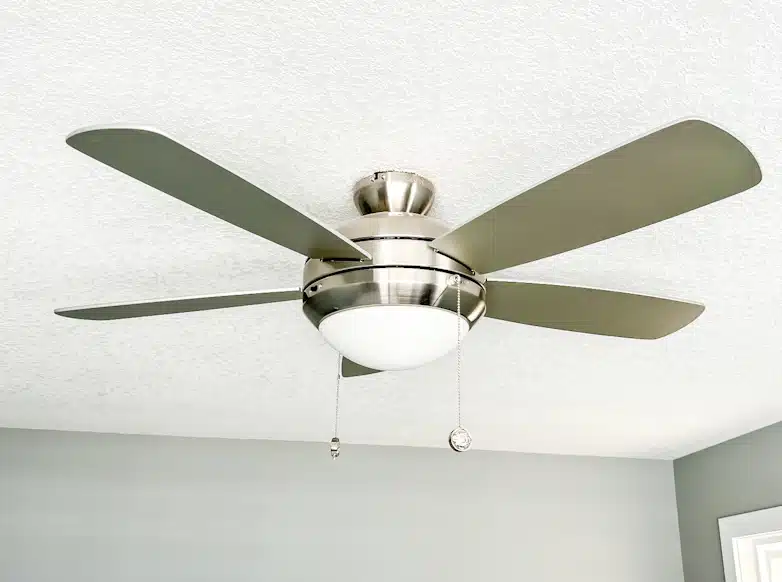
The ceiling fan was in excellent condition; it was just not what I wanted for this room. I managed to sell it on Marketplace. I’m still looking for a light fixture to replace it with.

Because I needed to work on the ceiling, we installed one of these small and inexpensive fittings to have light when needed. This is our usual temporary go-to.
Task 2 – Wrapping Up The Piano
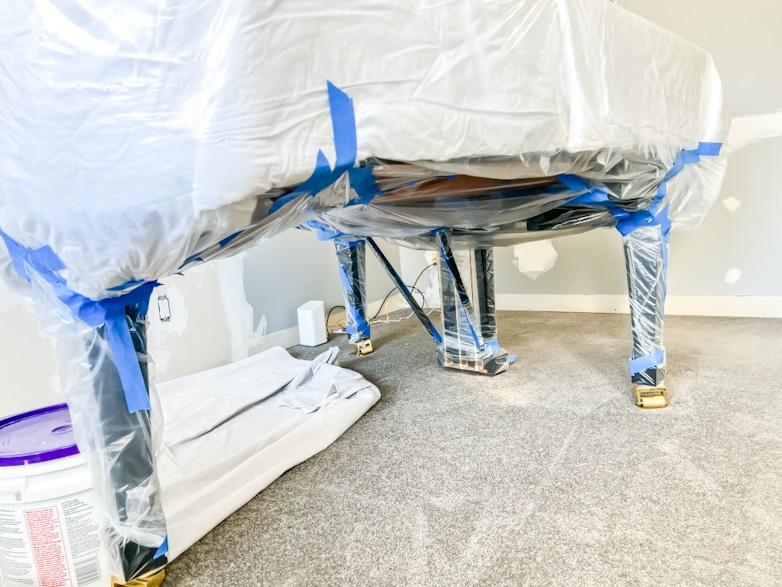
To ensure the piano is fully protected, I covered the top with two old duvet inners before wrapping the whole piano in a plastic cover. I taped every seem and opening; not a spec of dust can reach the inside now!
Task 3 – Electrical Work
I called in the help of my electrical expert (my husband, Stephen). He replaced all five old electrical outlets with tamper-proof/child-safe outlets now required by code in our area. We decided to replace them room by room as I renovate.
He also moved two outlets, one stud over to accommodate the planned built-ins and to conceal the cables in one of the cabinets.
Before we finished our basement, Stephen studied the building and electrical code. That, combined with his previous knowledge and experience with electrical work, meant he could do all the electrical work in the basement. He passed all inspections and was also complimented on his neat work.

This guy has saved us a boatload of money and continues to do so with every project!
Disclaimer: We do not advise anyone to attempt electrical work without the necessary skills and knowledge! Even when done by a professional person, know when you need to apply for a permit and have the job inspected. Safety first, always!
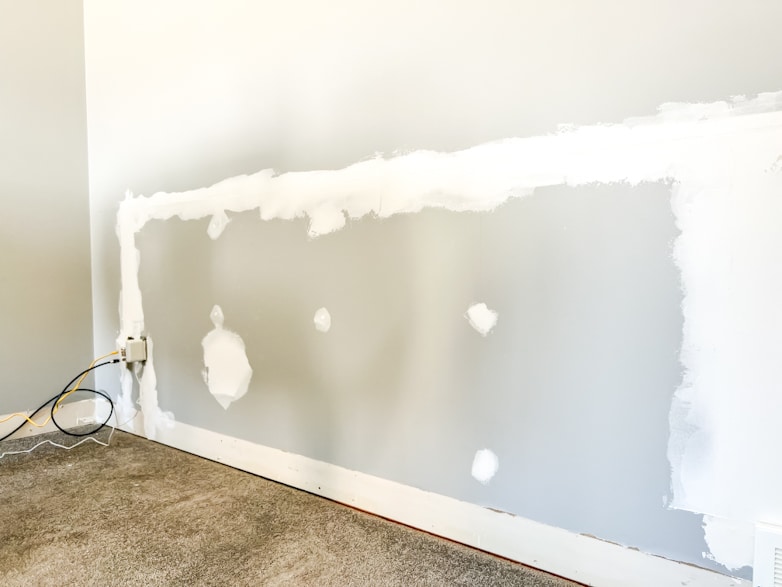
Task 4 – Repairing Walls
To move electrical outlets, I had to open up two of the walls. Luckily, I had a few drywall panels in the garage, left over from a previous project, to fix them.


Mudding and taping our entire basement gave me a lot of experience, but I’m no pro. The first coat always looks a bit ( actually a lot) rough around the edges.

After the third coat, it started to look decent. It just required a bit of patience to blend the new in with the old.

Sanding drywall compound smooth is one of the messiest jobs ever!
This time, I wore proper protective gear to save my eyes and lungs from the dreaded fine dust.
Task 5 – Preparing for a Room Makeover by Removing Ceiling Texture
I am determined to eliminate all the ceiling texture in this house!
Now that the home office ceiling is smooth, the main level is completely done! Hooray!


How do I remove ceiling texture? I use a garden pressure sprayer filled with clean water to spray the texture. The texture turns soft and pasty, which makes it easy to scrape off. Unfortunately, this only works on unpainted texture. Once your ceilings have been painted, your best option is to repaint them.
I use a 12-inch taping knife to scrape the texture off, catching most of it in an oversized paint tray made for an 18-inch roller.
My best tip: file the sharp corners of the taping knife as round as possible. Those sharp corners can cause serious damage to a slightly damp ceiling.
Task 6 – Picking Paint Colors
This is my favorite part of preparing for a room makeover. I finally decided on paint colors! I found the perfect colors at Benjamin Moore.


For the ceiling, I picked Pale Oak. This is the first time I will paint a ceiling anything other than bright white, and I am excited to see the outcome.
The ceiling and the wallpapered two-thirds of the walls are the only areas in the room that will not be painted blue. The bottom third of the walls, the window trim, crown molding, baseboards and built-ins will all be painted in Winter Lake.
I painted a few areas on every wall to see how the color changes with the light, and I am happy to say it looks beautiful from all angles. Winter Lake is exactly what I had in mind.

I cut one strip of wallpaper to see how it looks next to the paint. The photo above also shows the ceiling color next to the wallpaper.

I looked for a color matching the dark blue flowers in the wallpaper and then chose one shade lighter on the same color swatch strip. I’m all for dark and moody, but I want to keep this space light and airy.
There’s still a lot of work ahead, but I think this was good progress for one week. Preparing for a room makeover is a crucial part of the project and the foundation for everything else. Now, I am off to see the progress of the other ORC participants.
Until next time, happy renovating!
| Week 1 | Week 2 |
Wow! You have had such a productive week! I love the colors and the beautiful wall paper you chose. It is so much fun to follow along. I am cheering you on!
Wow! Great work, and all in one week! You both deserve medals! So fun to follow along – thanks for sharing and have fun with week three!
Exciting !! I love the wallpaper and your choice of color!