DIY Placemats that are Quick and Easy to Make
In this post, I’ll show you how to make DIY placemats with hardboard, paint, and transfer images. You won’t believe how pretty they are!
Don’t you just love using stuff you already have to create something new? A few weeks ago, I bought two pieces of hardboard for the back of the bookcases I built. The off-cuts were staring me in the face as I worked in the garage, and I decided to put them to good use. I cut them into smaller pieces with the table saw to create DIY placemats, decorating them with paint and transfers – my favorite!
I’ve been working on my home office makeover for several weeks and felt like I could do with a break. I needed a quick and easy project, something fun that would not take longer than a day or two to complete. These placemats were the perfect project!
Products Needed for the DIY Placemats
These are shoppable links from which I may earn a commission at no extra cost to you. (Read our disclosure policy here)
- Hardboard off-cuts
- Similar Floral Transfer
- Dixie Belle Silk Mineral Paint – Cotton
- Light Blue Chalk Paint (similar to Quiet Cove)
- Dixie Belle Clear Coat – Flat
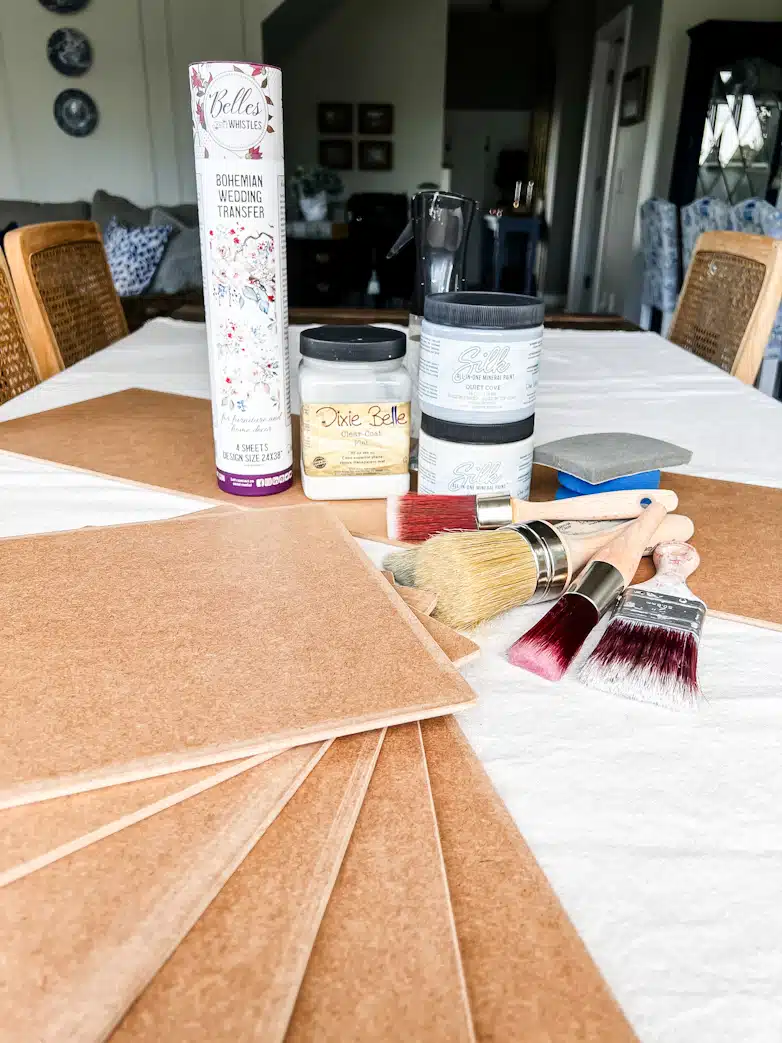
The hardboard off-cuts were big enough to cut six placemats of 11 x 15 inches each and one 11 x 36-inch piece that I thought could be useful as a centerpiece for hot dishes, etc.
The transfer design includes four sheets, of which two form one big image, the perfect size for a centerpiece.
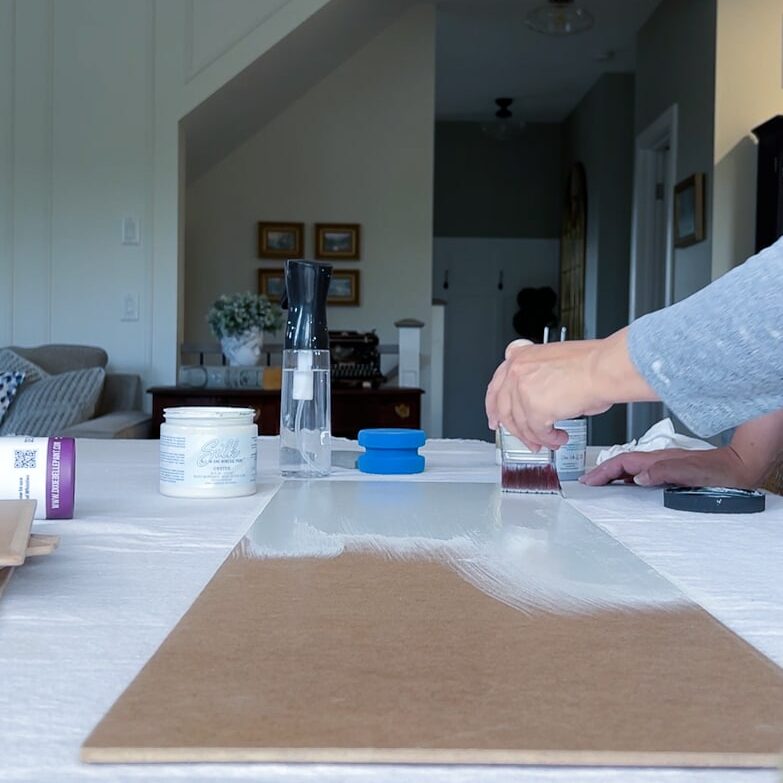
As a basecoat, I painted all the boards with an off-white paint color.

Once that was dry, I used a beautiful blue named Quiet Cove to roughly paint a border of about an inch, blended with more white in the middle.

I used a big round brush to blend the two colors to flow seamlessly into one another. It ended up looking like clouds in a blue sky.
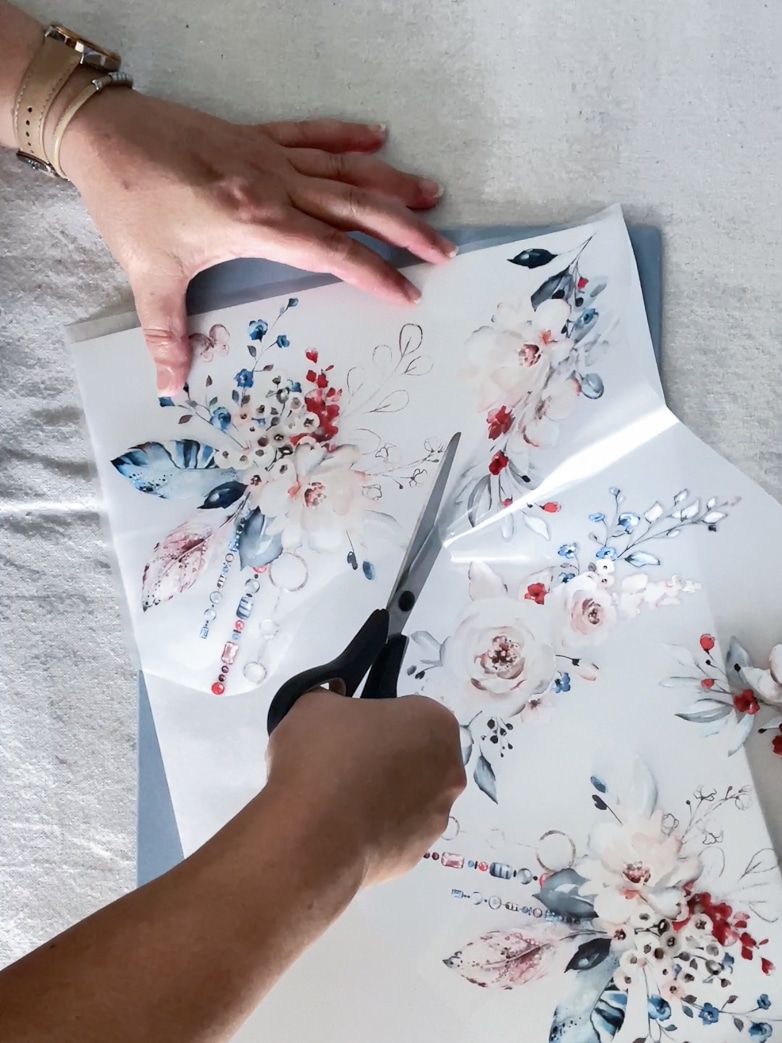
Two of the sheets consist of smaller images that can be separated. I picked the images I liked best and divided them between the six placemats.

Two of the placemats each have an image in the bottom corner, two with images in the top corner, and two with images centered at the bottom.

The remaining two sheets each have half of one big design, which looks absolutely gorgeous on the long center mat. This centerpiece is perfect for placing warm dishes on or anything you want to protect your table from.
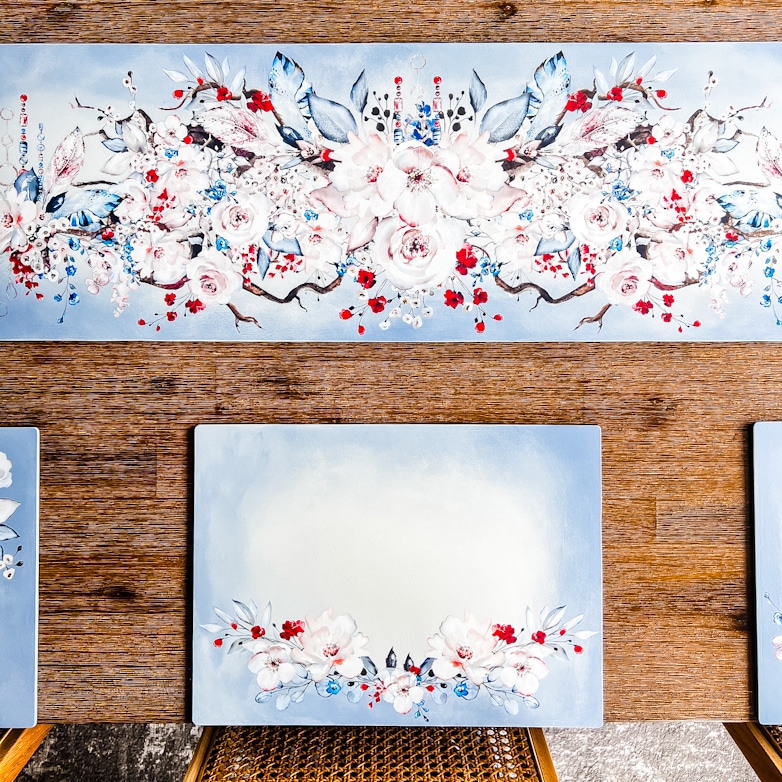
It looks even better than I imagined! I am so glad I used two blended colors for the background instead of one solid color.
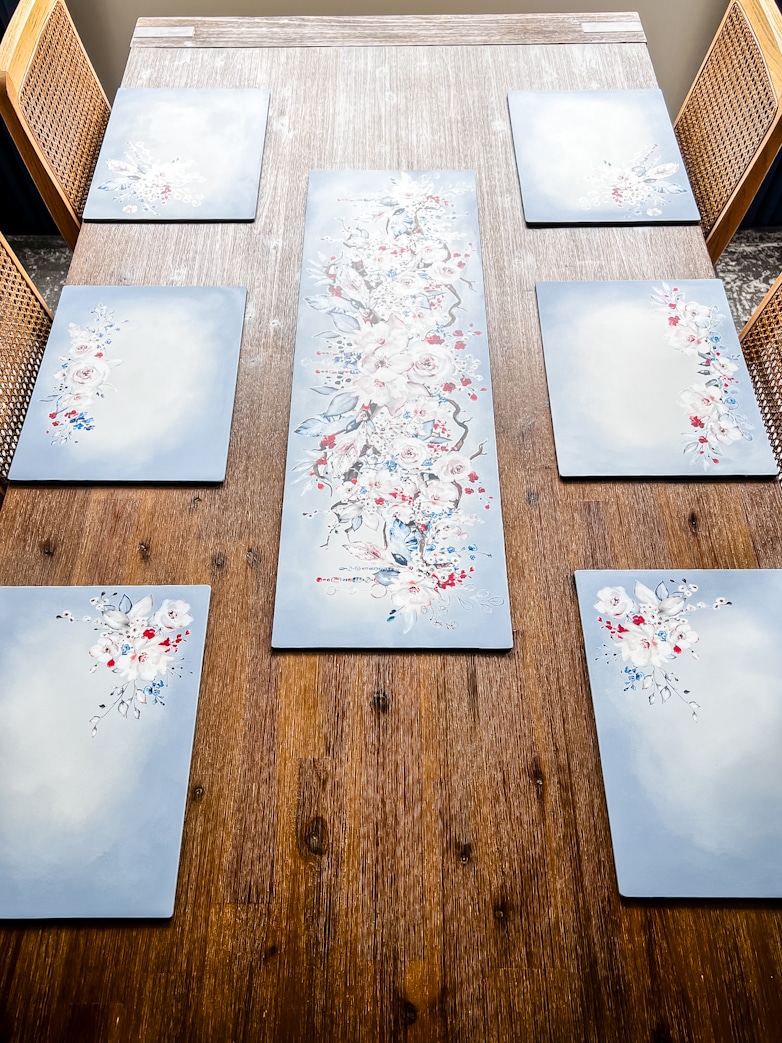
Here, you can see all the pieces together. I feared the blue might be too dark under some parts of the transfer images, but it turned out beautifully. These two colors together are the perfect backdrop for this design, don’t you think?
Tablescape Inspiration
This table setting shows how the DIY placemats and center mat can be used. The red accents in the design led me to a red and blue scheme.

If you are looking for something red and blue that isn’t all flags, this could work for a 4th of July table.

Using less blue and more white could even work for Canada Day! The possibilities are endless.
I would love to hear what you think of these DIY placemats!
Until next time, happy crafting and happy celebrating!
Not at all surprised that these turned out so beautifully! You are such a talented lady. But once again I am asking for information. As you are here in AB maybe you could tell me of a retailer who carries DB products. Ordering from the US is cost prohibitive. Thank you.
Hi Barb! I emailed you a few names. Hope that helps.
How can they be cleaned??
Since it has a coat of sealer, it can be wiped off with a damp cloth like most placemats.
Stunning
Thank you so much!
I love the idea of using hardboard for placemats! These turned out beautiful! Thanks for the step by step instructions and for sharing this post on the Home Imagined Link Party.
This is absolutely gorgeous and your photos are amazing! I just love this idea.
Thank you so much, Tamara! Thanks for stopping by.
Beautiful!! What a great idea!
Thanks Leslie!
Hi Marieza this is such a great idea. I have some old placements which I was going to replace but I think now I should just paint them like you did. All the placemats you find these days are so small, so I will definitely be using this method in the future. Thank you for sharing.
I’m so glad they inspire you, Carol!
These are so beautiful, I love them!
I am so glad to hear that, Penny! Thanks
So pretty – what a great idea!
Sheila
Thanks, Sheila, that’s so kind of you!
Absolutely gorgeous!
Thank you, Heather!
Oh my gosh Marieza, they’re absolutely gorgeous!! What a brilliant idea to paint two colors for the background, and your transfers are beautiful – and beautifully placed! The runner is beyond!! Wow – you never cease to amaze me! And good luck with those bookcases!
Aw, thank you, Barbara! I thought of you while setting this table as this is your field of expertise. No pressure at all, lol!
Baie, baie mooi. Dit lyk pragtig. Groete en liefde daar.
Dankie tannie!
These turned out beautifully. Like that you didn’t make them all the same.
Thanks, Suzie! I’m so glad you like them.
OH my gosh this is SO COOL!!! What an amazing way to use up some wood pieces!! This is fantastic for the Patriotic holidays without using flags and such. Those napkins you chose are just lovely.
I would love it if you shared this post at the Home Imagined link party on my blog!! I really enjoyed this!
Thank you so much, Rachel, that is so kind of you! I would love to share, thank you!