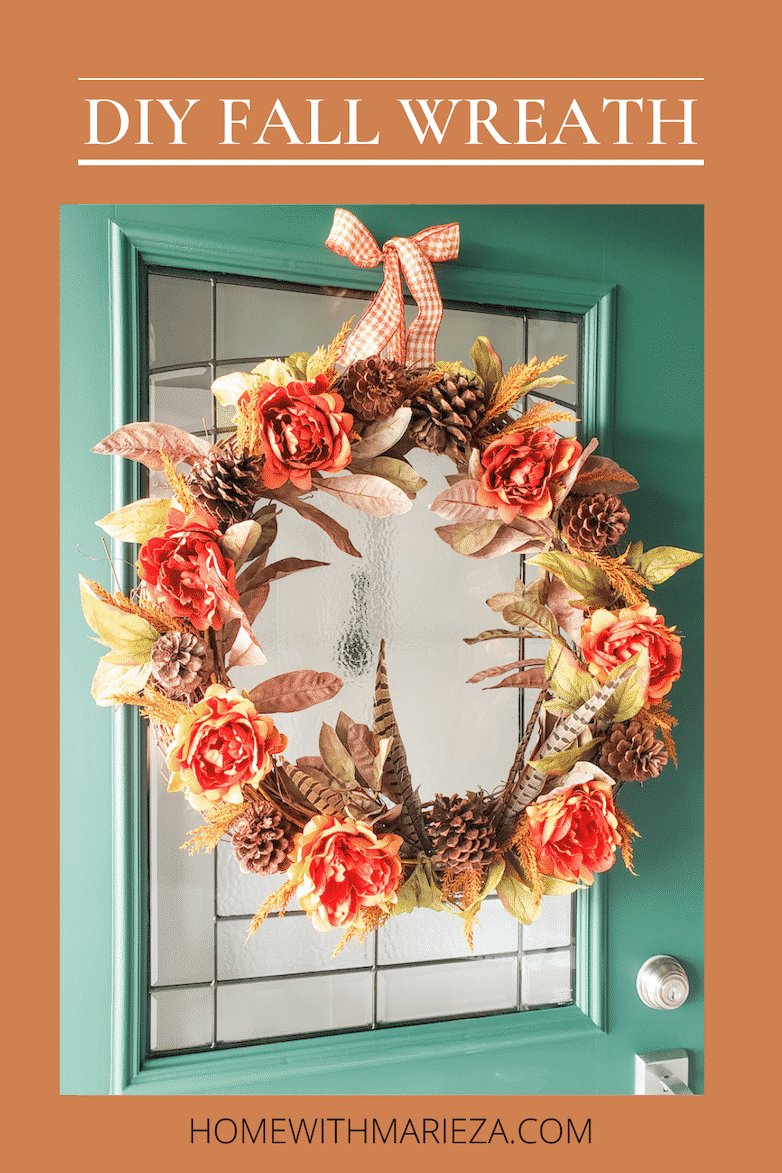
A DIY Fall Wreath For Our Newly Painted Front Door
Last week, I shared 6 Easy steps to a freshly painted front door and said all it needed was a pretty wreath for fall, and here it is! A DIY fall wreath for my new green door.
Let me show you how I made it.
Materials Needed For This DIY Fall Wreath
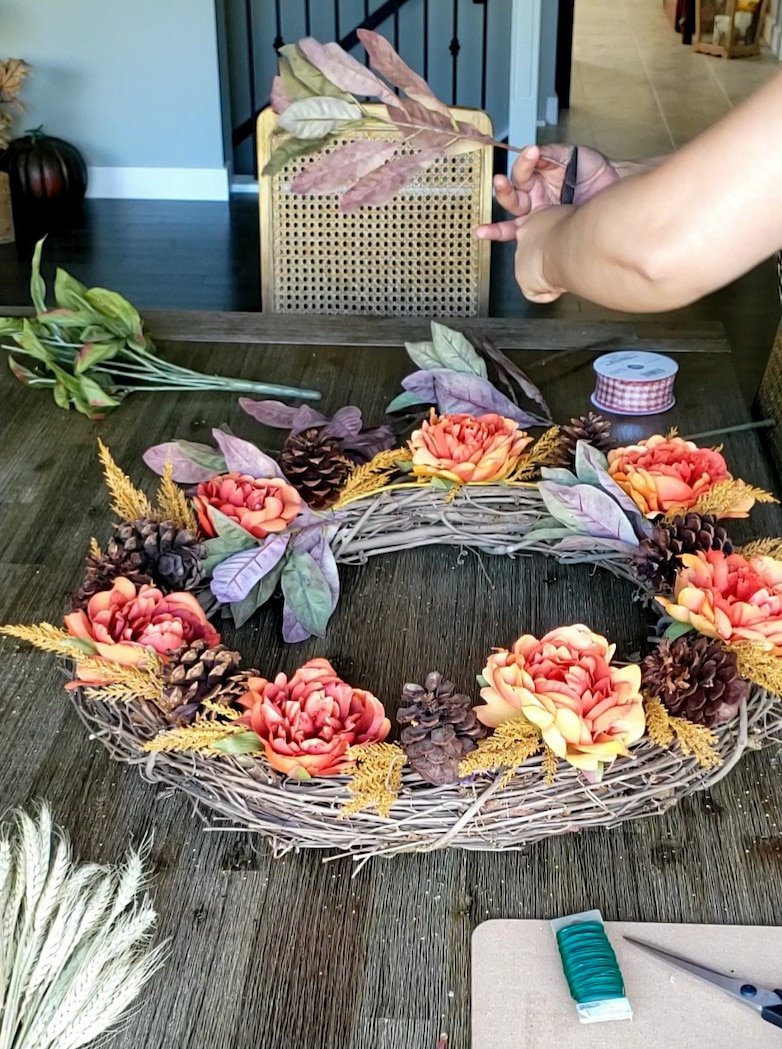
I always start with a grapevine wreath as a base. It’s easy to hang from a hook or nail, and some decorations can easily be tucked into the vines.
The first DIY wreath I ever made was also a fall wreath, and I enjoyed it so much that I knew it would not be the last. Earlier this year, I also made wreaths for spring and summer.
The “toppings” of your wreath can pretty much be anything you like. Step one is to decide what color scheme you want for your wreath.
This time, I considered what colors would best complement my newly painted green door.
Traditional fall colors (orange, yellow, and brown) are perfect – without the pumpkins, though.
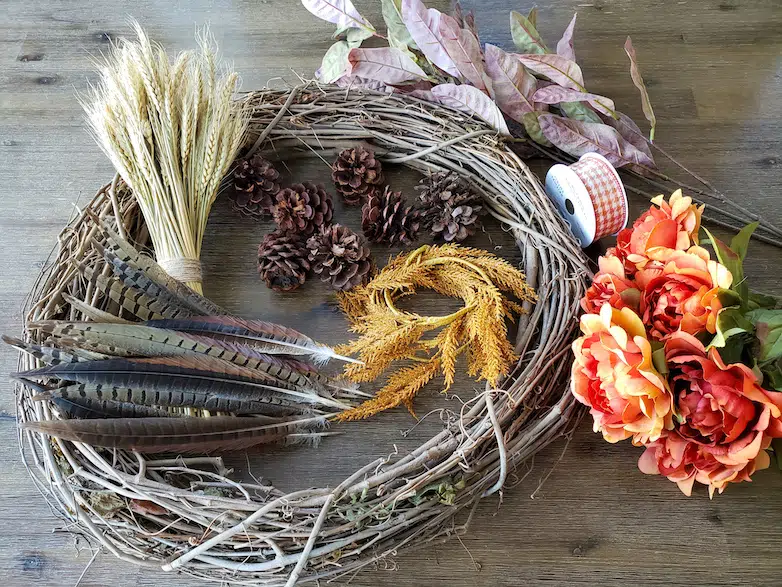
I randomly gathered items that would fit in with my color scheme.
- Faux orangey peonies
- Faux leafy stems
- Wire garland with yellow foliage
- Pine cones
- Pheasant feathers
- Dried wheat sheaves (which I never used)
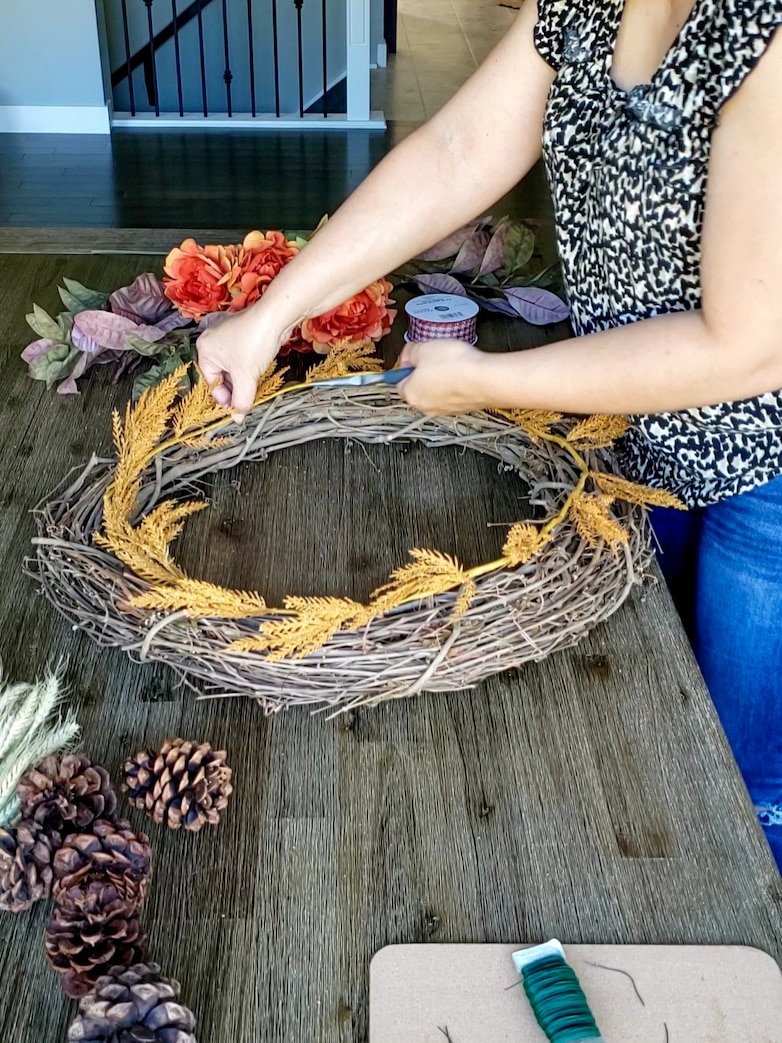
With a hot glue gun and soft florist’s wire, you can attach anything to your wreath.
I started by securing the garland with the florist’s wire. The hot glue might not be strong enough to keep it in place.
Decorating The DIY Fall Wreath
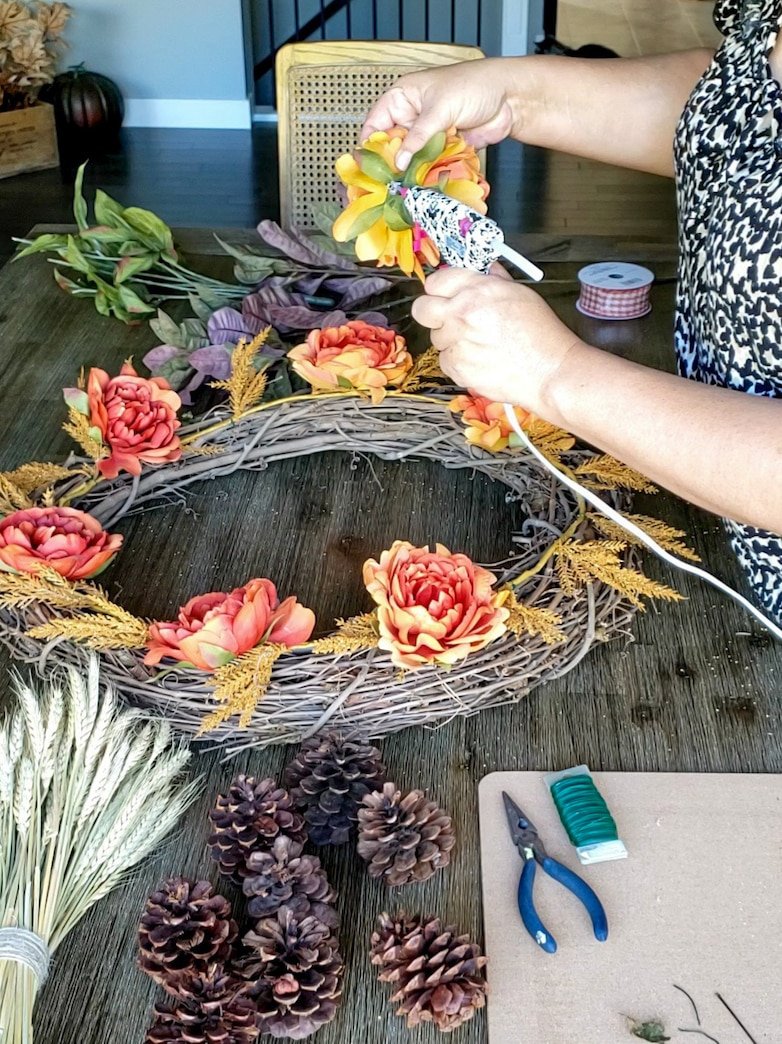
My advice? Play around! Arrange a few elements and decide what you like best.
I pulled the flowers from their stems and arranged them around the wreath. Once I was happy with the placement, I glued them on.
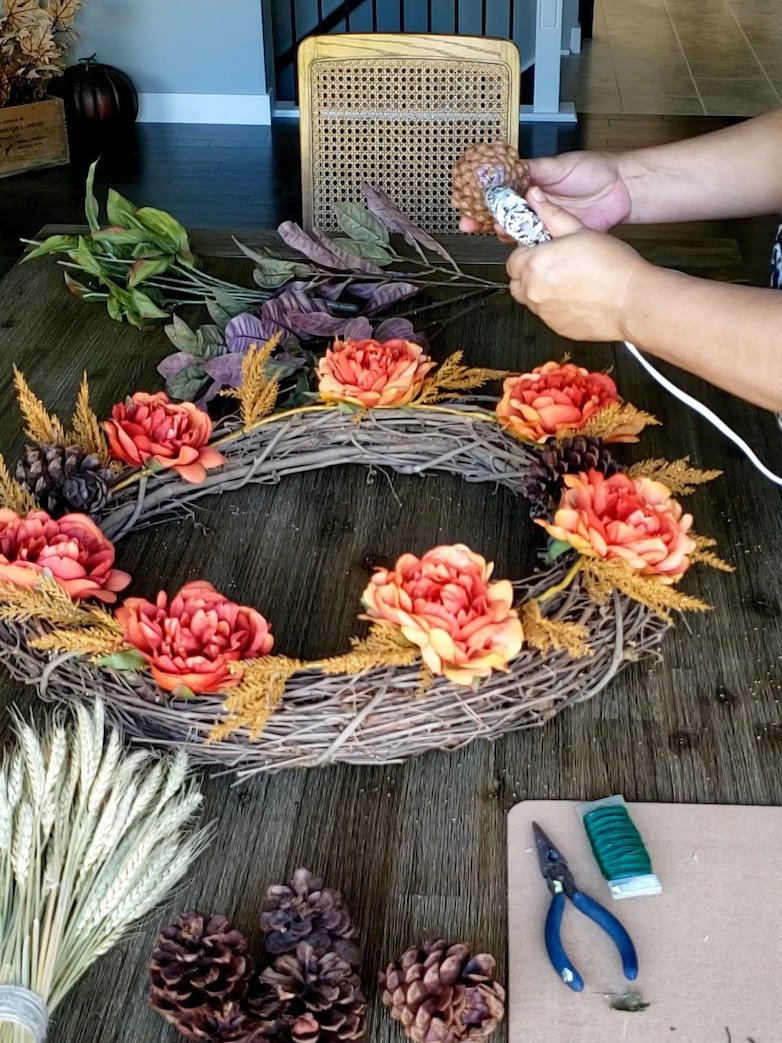
The pinecones were enough to glue one in every opening between the flowers.
The pliers used for the florists’ wire also work great for cutting the leafy stems into smaller pieces.
The leaves still have a bit of stem left, just enough to tuck them into the wreath tightly without the need for glue.
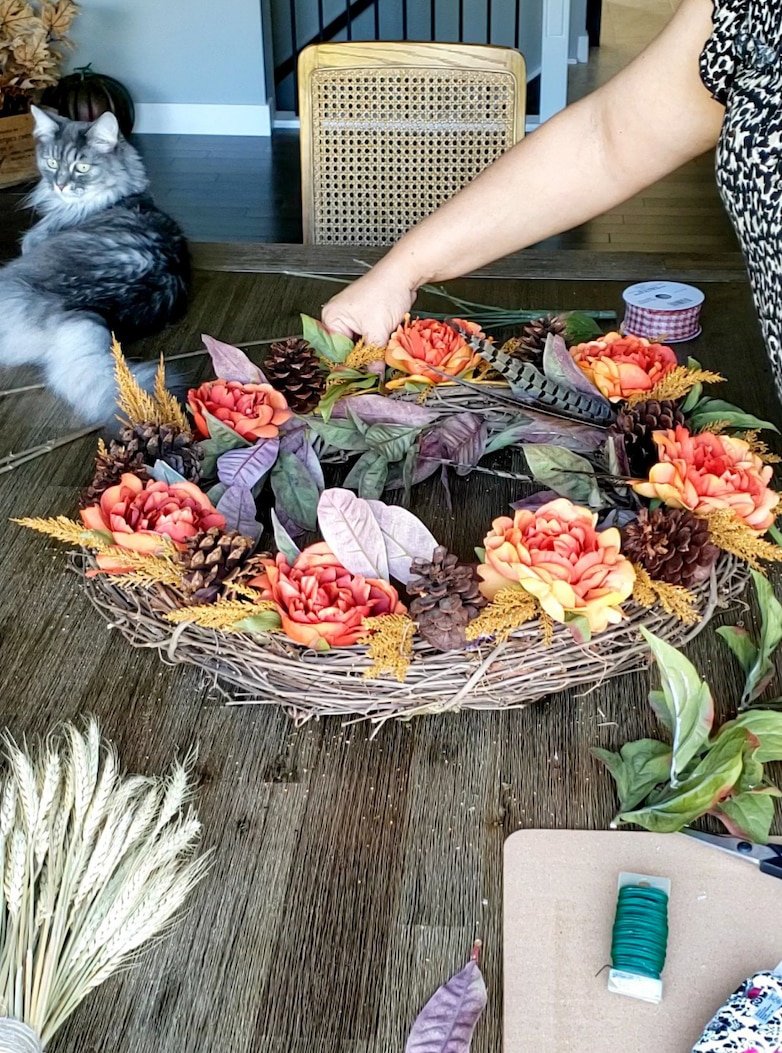
The leaves left over from the flower stems were also added, but they needed a bit of glue to stay in place.
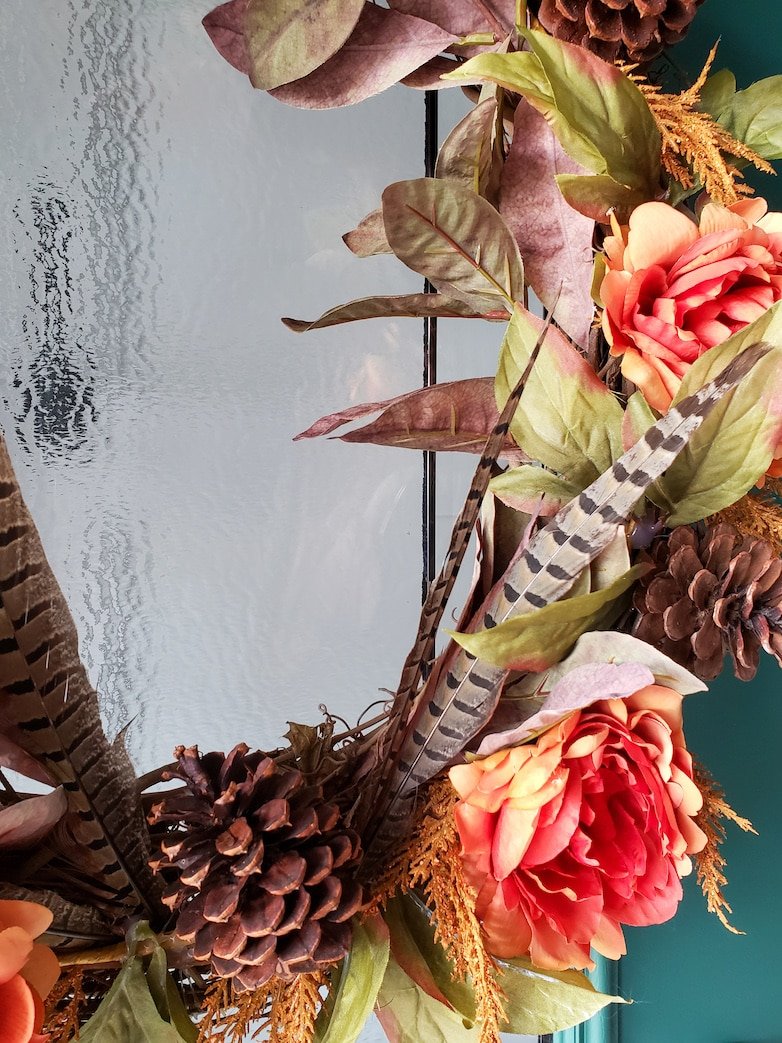
I used only four pheasant feathers at the inner bottom of the wreath as a little added detail. Finding the right place for them was slightly tricky, but they are my favorite, and I just had to add some!
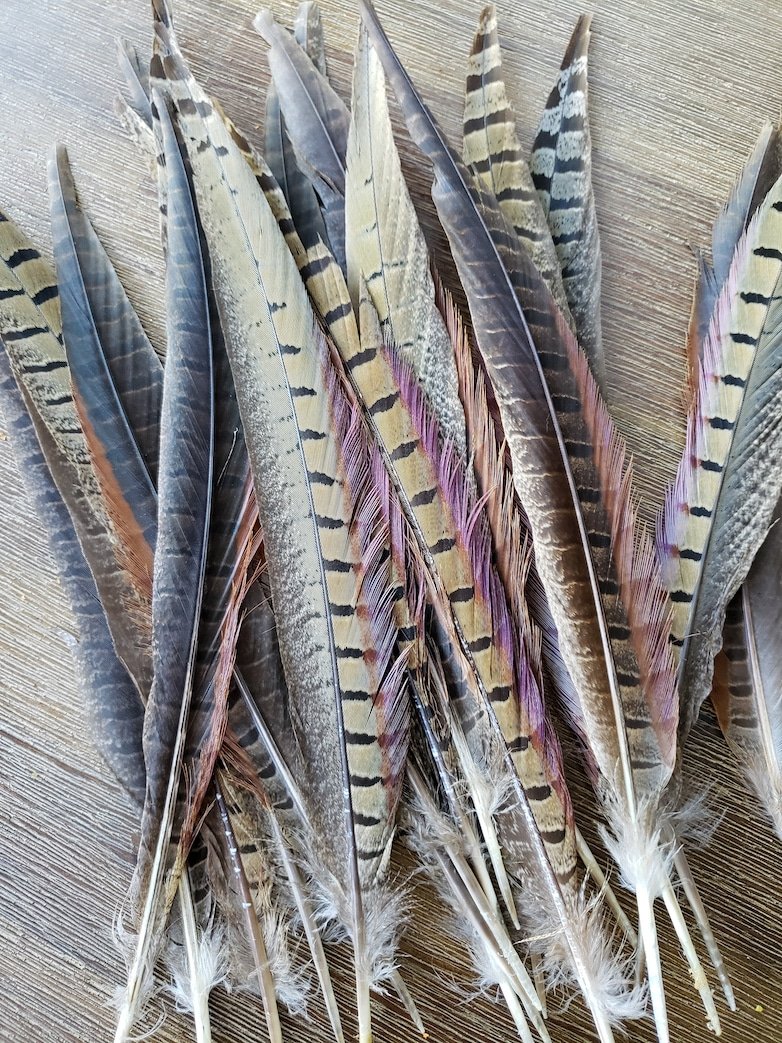
Aren’t they just gorgeous?? Those beautiful patterns, a dash of rust and a dash of purple.
Pure perfection!

A bit of ribbon with a cute little bow and the DIY fall wreath is ready to be hung!
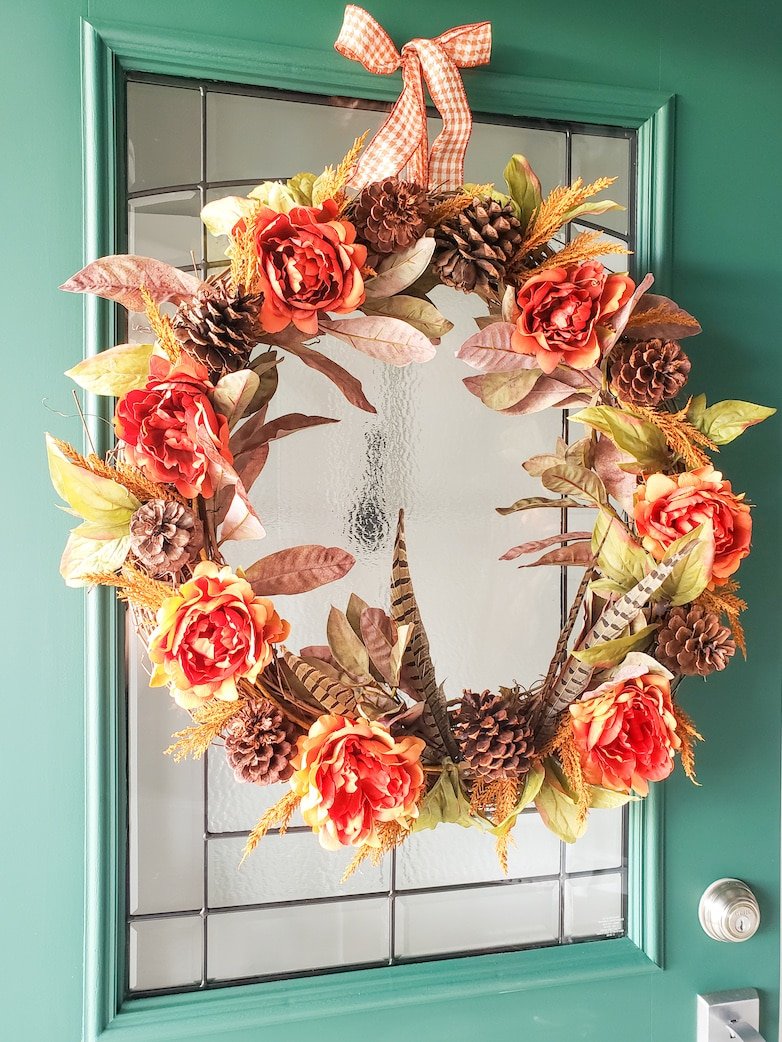
I love how these colors look against the green door.
The feathers and pinecones add great texture and soften the faux look of the leaves and flowers.
I hope this fun project left you inspired and excited for fall.
Until next time, Happy crafting!
Posts Related To The DIY Fall Wreath
- Easy DIY Fall Wreath in 10 Minutes Flat
- Decorating a Pumpkin With Flowers
- Blue and White Pumpkins Inspired By Wedgwood Jasperware
Pin This For Later!
Love your ideas. I like at how simple they are to fix a wreath. Looking forward to other projects.
Love your feedback! thank you, Betty!
The wreath you made is so beautiful especially on your door!
Thank you so much, Linda!
I love all the textures you added to your wreath! It is so very beautiful! It looks great against the green color of your front door. Thank you for sharing all the details on how to make it!
That’s very kind of you! Thank you, Kimberly!
Gorgeous! The feathers are an amazing touch.
Thank you, Renae! The feathers seem to be the popular favorite!
Gorgeous wreath! (I love the feathers!) And your new front door color is stunning! ~Missy
Thanks, Missy! I appreciate you stopping by.
This is so lovely!!!! You are amazing friend!
Thank you so much for inspiring me today!
Happy day!
KariAnne
Thank you so much, KariAnne!!! Thanks for stopping by!
So lovely, Marieza! The fall colors look so nice with your new front door.
I’m so glad you like it, thank you, Misty!
Your wreath was so beautiful and it just looks amazing on your door! Way to go girl!
Thank you so much, Wendy! Thanks for stopping by!
This is such a beautiful wreath. Your whole front entry looks amazing.
Thank you so much, Carol!
The feathers are such a fun touch! I like the kitty keeping you company 🙂 Happy hoping with you!
Thanks, Marie! There’s always a little helper hanging around!
Love, love, love the wreath! I am obsessed with the pheasant feathers! Going to have to get some! Thanks for the inspiration!
The feathers seem to be a big hit! Hang tight, I am going to create shoppable links.
I am a feather lover! The touch is so pretty. Love the entire look Marieza!
Thanks, Melba! The feathers seem to be the star of the show. Lol!
This is so gorgeous! Great tutorial!
I appreciate you stopping by, thank you Christin!
What a pretty wreath! I love the addition of the feathers. It’s truly lovely to be on tour with you!
Thank you, Laura! I’m so glad you like it. Thank you for stopping by.