Front Door Hardware to Match the Home Office
I painted the front door a lovely deep dark blue a few weeks ago. This week (week 7 of the One Room Challenge), I replaced the old hardware with a new lockset to match the hardware on the home office door next to it.
To recap, this is how the front door looked after being painted blue, but with the old hardware.
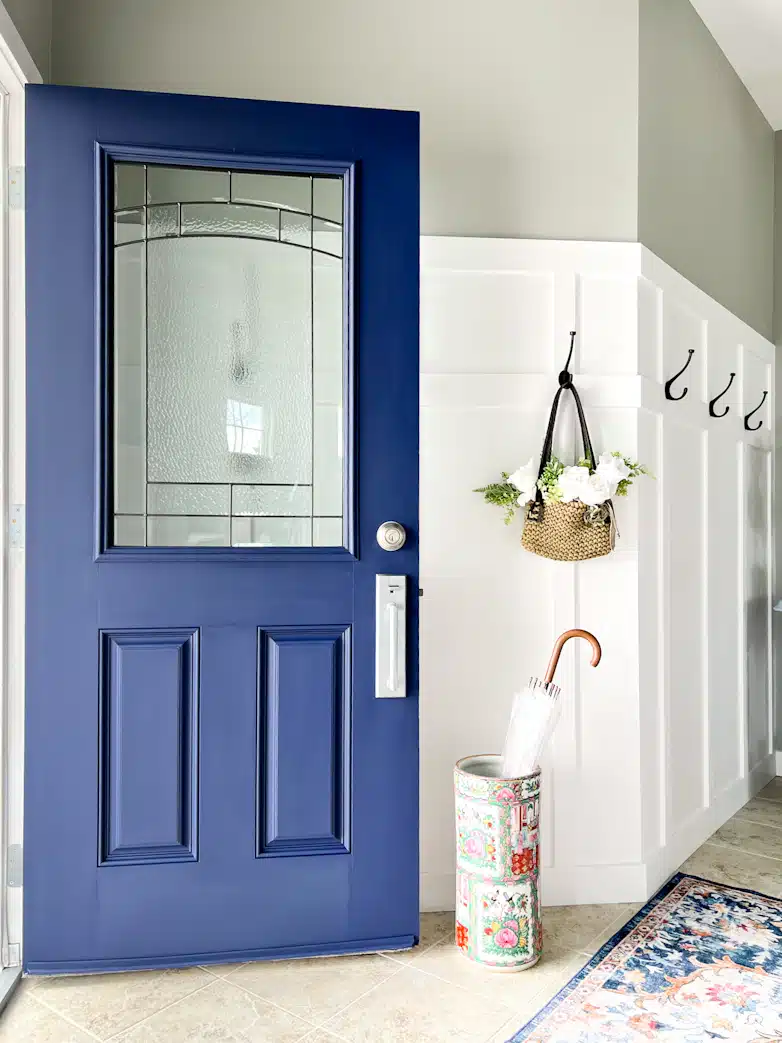
In the photo below with the new hardware, you will also see that instead of sealing the initial paint job, I decided to follow up with a glossy enamel paint in a similar color.

The paint doesn’t have a perfect mirror-like finish, but you can see the reflection of the new French antique brass lockset, which is good enough for me! Brass on Blue is one of my favorite looks ever.

As seen from the inside, the doorknob perfectly matches the one on the office door. I am grateful to Emtek for also sponsoring the front door hardware as part of the One Room Challenge.
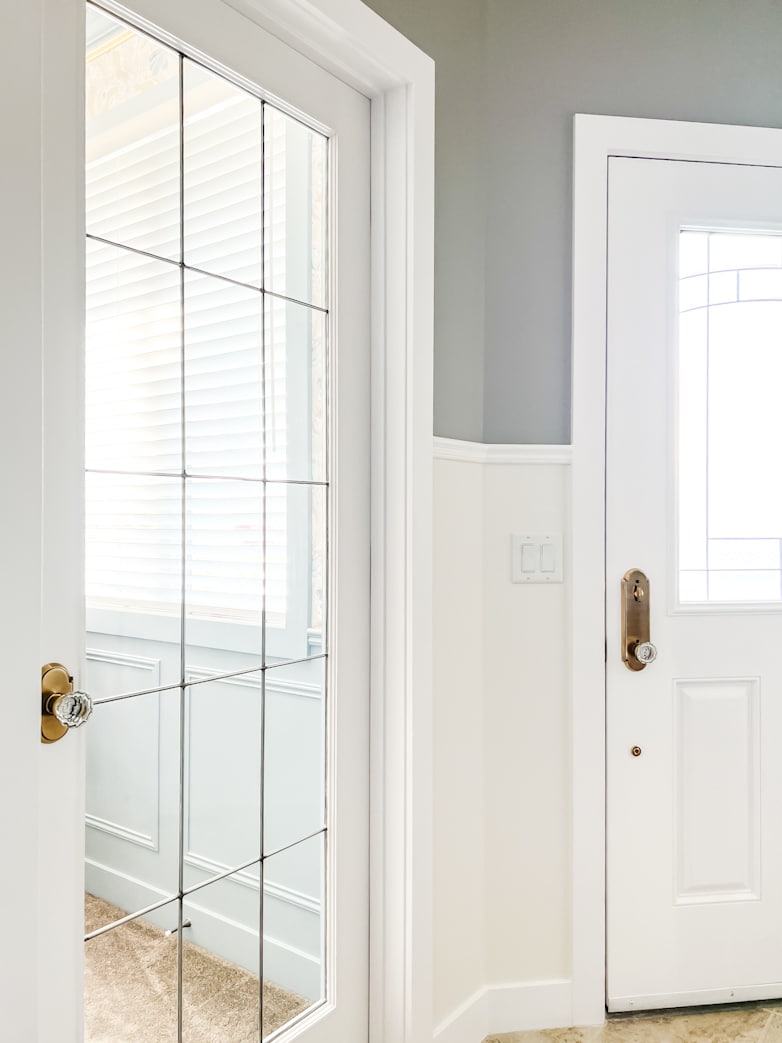
This is not the most flattering angle of this perfect pair; I will share a better photo after the reveal of the office makeover.

Changing out the hardware didn’t take me all week, so I guess it’s time to address what everybody wants to know…
How Are The Built-ins Coming Along?
I have been working long days and even longer nights, and still, progress feels extremely slow. It is a dirty, labor-intensive project, but I really enjoy the building process! Seeing how it gets easier and better as I go along is fascinating.
I don’t have any “after” photos yet, but I would like to share a few random thoughts and facts from this project…
The Good, The Bad & The Ugly
The Good –
As much as I’ve used a miter and table saw, this was my first time using a circular saw!

I started scared and intimidated, but after what felt like a gazillion cuts, it was just another tool!
Tip: Stay on the side of the saw! If something goes wrong, it will shoot a piece of wood straight forward or backward. (I read that while mentally preparing, luckily not from experience!)

This week, I learned that clamps are your best friends! Good quality clamps of all sizes are essential!

Another great helper? A speed square! I am clueless about all these measurements and shortcuts on the actual square, but I constantly use it to check my corners. This one is lightweight and the perfect size, in my opinion.
I also realized that as much as I hate wearing them, protective gear for your eyes, nose, ears and hands should be part of the deal!
The Bad –
At this stage, I can say with certainty that I will not be 100% done with the built-ins by next week, which is supposed to be the big reveal. I am not freaked out by that, though. I will have a partial reveal, and although it might take me an extra week, I will share the finished room and all its details with you.
Very timely, I listened to a podcast this week with the title: “Not Finished Is Not Failure!” In a recent email from One Room Challenge, they said something similar, and I am embracing those words! I made so much progress, and finishing slightly later doesn’t take away from that! We all need to be reminded of that every now and again. Rushing toward the deadline and compromising on quality work would be foolish.
The Ugly –
Sigh… I REALLY enjoy this woodworking project, but my carpal tunnel problems are out of control! My fingers are so swollen that typing this post requires much effort. I am not sleeping well due to nerve pain in my hands and forearms.
Needless to say, I can’t do this continuously, as much as I would love to. I am not quitting, either! My love for creating things will always win! Also, I might be in denial, but if this challenge had age categories, I would be a veteran. Yup, not part of the young folk.
I don’t want to complain; just share that DIYing isn’t all moonlight, sawdust and roses! Still, it’s what I like doing more than anything else – 100% recommend!
Remember to check out the other participants’ progress (and woes) on the One Room Challenge website.
Can’t wait to see the finished room. And, as far as the carpal tunnel issues, I highly recommend an acupuncturist. I had carpal tunnel issues in both hands(wrists) to the point that I could not even pick up a coffee cup. When they diagnosed me, it was also mentioned that I also had an ulnar nerve issue in my left arm. Surgery was recommended for everything. I decided to try acupuncture instead. At first, I went twice a week, then once a week, then twice a month, all over a period of 6 months. It has been well over a dozen years, and I have never had another issue with either problem. Good luck. And so far, everything looks amazing.
Thank you so much for the advice, Jill! I will definitely look into acupuncture as I also want to avoid surgery.
You are so inspiring! I feel for you wanting to continue even as your body is telling you no, but I know you’ll figure out a happy medium. Your door handles are gorgeous and I’m so excited to see your partial, then complete, reveal! Sending lots of healthy DIY energy your way! 😊
Thank you so much, Barbara!
I hope you get some relief from the pain soon. Your home office is coming together beautifully! So inspiring!
Thank you, Lynne. I appreciate it.
You are a super talented and hardworking person and deserve to have painfreehands to continue your amazing work! I hope you find a solution soon!
as a DIYer I too have struggled with carpal tunnel, advice from my chiro was to take 200 mg of a GOOD quality B6 once a day for 2 weeks, then back off to 100 a day. I also bought a good set of splints with the metal insertion, I wore these every night. I never had surgery it healed on its own. Hope this helps, Laurie.
Thank you so much for this advice, Laurie! I already wear splints at night but I’m definitely going to try the vitamin B6!