Updating Kitchen Lighting on a Small Budget
Does updating your kitchen lighting sound like a big expense? Let me show you how to make the most of your existing lighting with a small budget.
“Updating Kitchen Lighting” is part four of the Budget-friendly Kitchen Makeover series.
In case you’ve missed the previous three, you can find them here:
The Kitchen Before Recent Updates
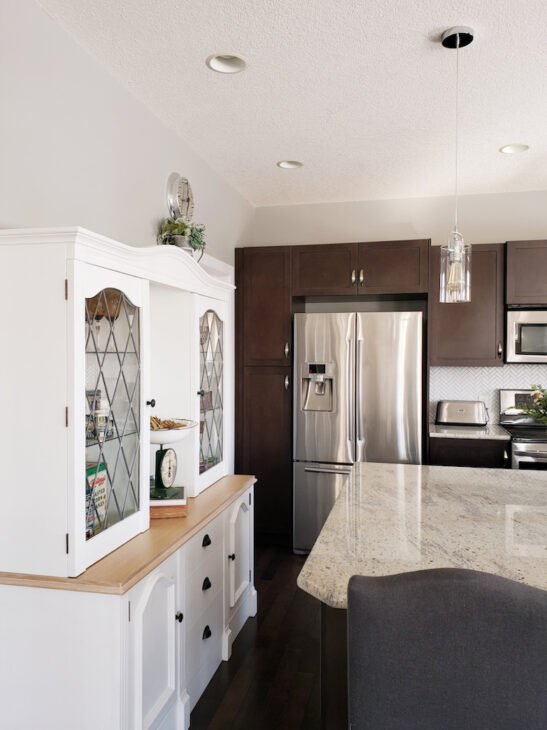
In this photo of the kitchen, before any updates, you can see the two types of lighting: pod lights and pendant lights over the island.
Updating Ugly Old Pod Lights
With their beige rims, these pod lights are even more ugly now that we have a super smooth, super white ceiling!
I always assumed the rims used to be white, and the beige was due to discoloration over the years. Nope! As I took them out, I realized it’s metal, and that yucky color was intentional! (it shows much lighter in the photo.)
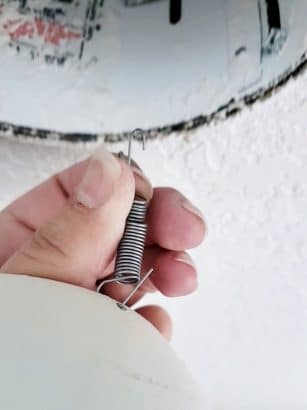
They are super easy to remove. With the light bulb removed, you unhook two tiny spring brackets, and the whole outer part comes right out. The big cylinder that remains inside the ceiling is what limits your options for an alternative.
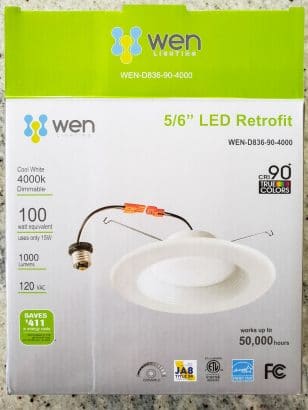
Luckily, I am not the first person with this problem. While searching for a solution, I came across these LED retrofit fixtures. They are made especially to fit these old pod light openings!
As shown on the packaging, the wiring is attached to a socket that screws into the old fixture instead of a light bulb.
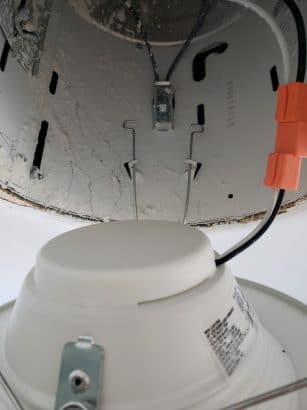
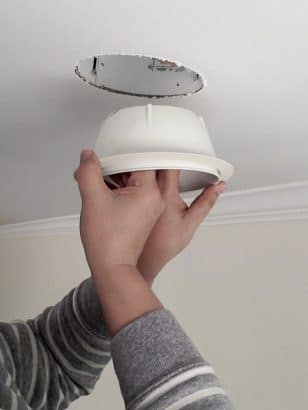
Inside the old casing, you will find two pairs of brackets. The new units have bendable wire brackets that fit securely into the brackets inside the pod. Once both are hooked in, you can push the new unit in to sit flush with the ceiling.
I have to be honest and tell you that they do not all sit 100% flush and snug. Well, my friend, by now, you might already know that I am too uptight to let that tiny imperfection slide! ( no pun intended).
It was an easy fix, and all I did was apply a dab or two “No More Nails” (adhesive) to keep them in place. Just enough to not be a hassle one day when the lights need to be replaced. I also caulked around the rim for a more polished look.
It’s a huge improvement and looks so much better! (see photos lower down with the updated pendants.) It was a fairly inexpensive update. I will link all products at the bottom of the post.
Updating Kitchen Pendant Lights

These pendant lights are already an upgrade from what we had when we moved in. I ordered them online and picked the cheapest cute option. Somehow, I didn’t realize they were this shiny chrome finish. I must have selected the wrong finish before checking out. I’m not sure why I didn’t return them, but here they are.
Since I’m trying to keep costs to a minimum, I decided to zhoosh the chrome up with a bit of spray paint.
The easiest way was to take them down or uninstall them, take the glass covers off and mask off the electrical bits.
I used upside-down disposable cups with tiny holes to keep the side screws up to easily spray all sides evenly.
To make sure the paint formed a strong bond with the chrome, I first sprayed all pieces with a primer. After one coat of primer, I sprayed two coats of shiny metallic gold. It is not as shiny and reflective as claimed, but not as flat as regular gold spray paint. This is exactly the look I was aiming for. It matches the new cabinet hardware really well.
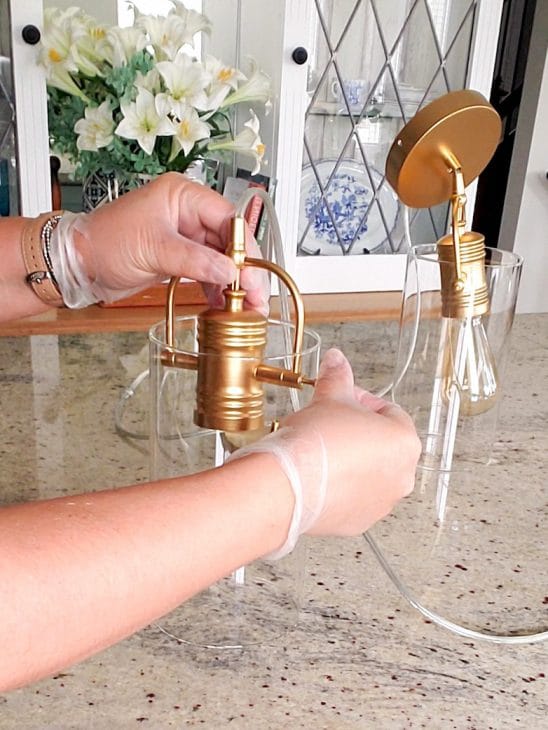
I left it to dry overnight before putting all the pieces back together. Wear disposable gloves to avoid fingerprints since metallic paint is notorious for showing fingerprints!

Time to re-install the pendants! Usually, my husband is in charge of all things electrical, but this was an easy task that I could do myself.
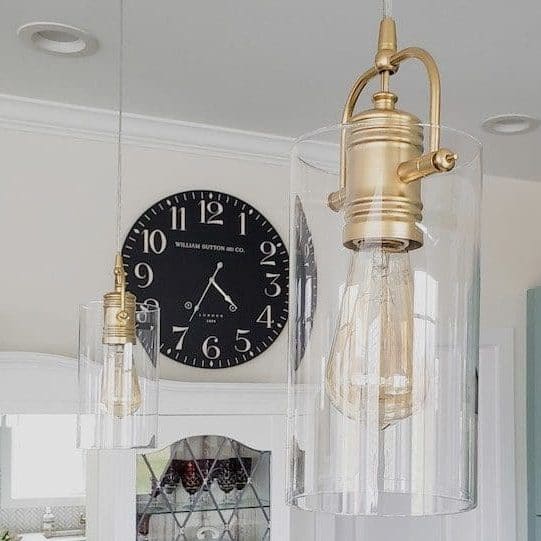
I really like the pendants in gold! It also goes much better with the color of the Edison bulbs.
We are one step closer to finishing the kitchen makeover!
The New Look After Updating the Kitchen Lighting
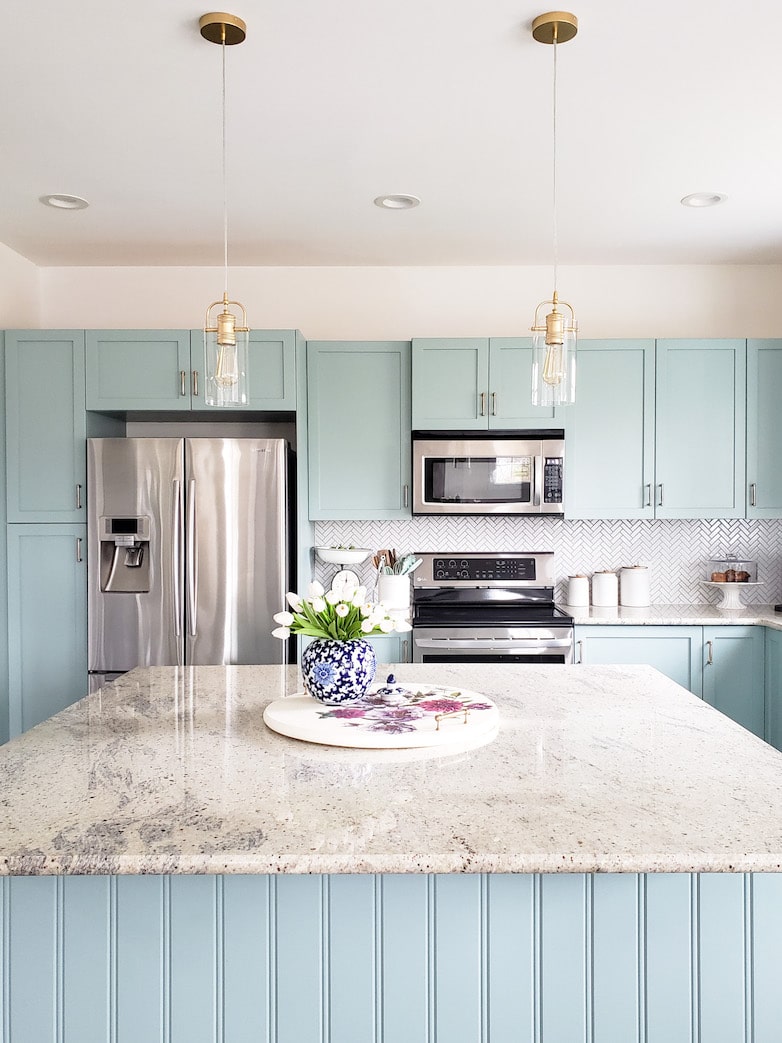
Here, you can see both the pendants and the LED recessed lights. What an improvement! And can we take a minute to appreciate this gorgeous smooth ceiling?! (If you noticed the darker area in the corner, don’t worry; that space above the cabinets is on the list to be closed up, so stay tuned!)
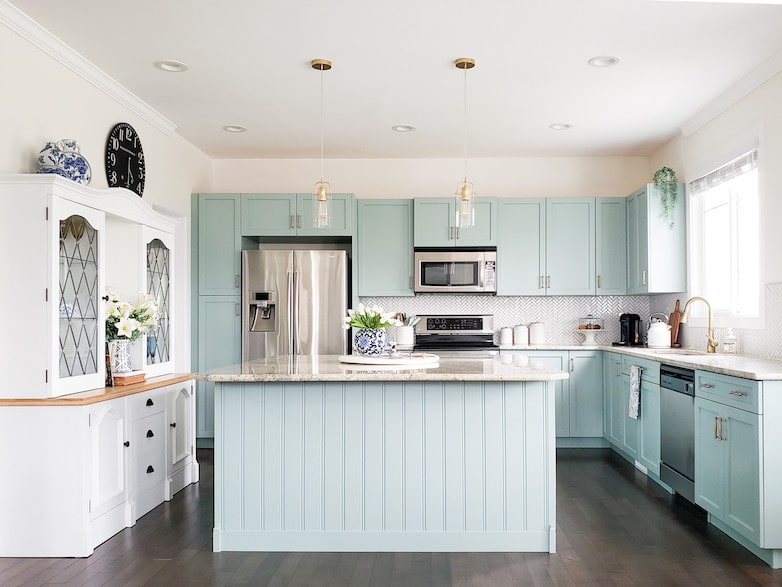
This photo is especially for those of you who said I don’t show enough of the rest of the kitchen. I tried to avoid showing the unfinished areas, but I already love this view and could not wait to share it with you!
I love hearing from you! Let me know what you think.
Products used in this project
Click on the image for details or to purchase. These are affiliate links from which I can earn a small commission at no extra cost to you.
Pin this for later!

You have to see this!
A few weeks ago, I found an interesting article by Family Handyman:
Cheap Kitchen Upgrades to Make Your Kitchen Look More Expensive.
It lists every single thing in my budget-friendly kitchen makeover! It almost looks as if I am copying this list!
Number one on the list? Updating the lighting! It’s a good read. Enjoy!
Marieza the lighting make-over is perfect. You have a very good eye for color. I am amazed at how creatively you solve the problems you encounter e.g. what to do when spraypainting the pendant lights. Lastly, your blog is so professional and a pleasure to read. Well done on all aspects of your diy journey.
This is such an amazing comliment! Thank you so much!
Your pendant lights look amazing. Also, have I told you before, I love the colour of your cabinets.
Aw, thank Carol! That is wonderful to hear!
Wow these turned out really pretty!
Loving the kitchen
Thank you, Cindy! I”m so glad you like it!