How to Build a Simple Desk with Drawers
For the first time in my life, I built a piece of furniture from scratch—a simple desk with drawers. And the best part of it? Definitely, the fact that it has drawers! Three of them! This girl is pretty darn proud of herself, to say the least. My experience in woodworking projects? Only small pieces like this wooden tray.
Why build a desk and not just buy one? I mean, it is the year 2021, and the price of wood is something ridiculous! Well, it all began with my youngest daughter’s room makeover. The room is small, and the young lady needed something very specific. I get it! When it comes to workspace, I also need to have just the right space.
So, let me tell you the story of how I built a simple desk with drawers.
What I Had To Work With and What She Needed:
- The room is small, so the desk couldn’t be too deep.
- She is a young artist with many other hobbies and needs room to spread out, so it had to be a longer-than-usual desk.
- Drawers to store her artwork and supplies would be a great bonus.
- The price of wood is through the roof, so I had to come up with an alternative.
- Ideally, she preferred a dark wood finish, so I had to find an alternative to that.
Was this mom up for the challenge? Heck yes! After overthinking it for several weeks and building it about 29 times in my head, as one does.
The “how-to” part of the title might be a bit misleading. As I’ve mentioned before, I’m a rookie at this. Just a mom who built stuff. Not always because I enjoy it so much, but rather to solve a problem. Like a small budget or needing something that doesn’t exist (yet). If it’s fancy technical drawings with precise measurements you need, this is not the post for you.
What I can do is explain the train of thought of someone who is winging it until it works. There are, however, ladies who are excellent at technical drawings and building furniture like pros. I’ll link them at the end of the post.
Where To Begin When Building a Desk For The First Time?
Look to the pros. Measure other desks and find out what the average height of a desk is. That is a good starting point. From there on, you can determine the length of the legs for the desk.
Another critical factor is legroom. I knew I wanted to incorporate drawers in this design, but you don’t want your work area too high or too little space to move your legs freely underneath the desk.
Those two factors will determine how high your drawers can be. In this case, I only had 4 inches to work with. I intended to use that 4 inches to the max. That meant no casing around the drawers. They had to be floating.
These are the things I tried to figure out in my mind before I actually started. The most important decision was what material to use.
Solid wood would have been too expensive. Even plywood didn’t quite fit into my budget. That basically left me with MDF. I considered using a veneer layer but, in the end, decided to dust off my paint technique skills and finish the MDF to look like wood.
Materials:
- One sheet 8 x 4 feet (¾ inch thick) MDF
- Five 2 x 4 studs (generally used for framing)
- Three pairs of drawer slides
- Three pieces of hardboard with one side in a white melamine finish
- Wood glue
- Kreg jig pocket Screws
- Wood filler
- Paint
- Sealer
Tools:
- Table saw
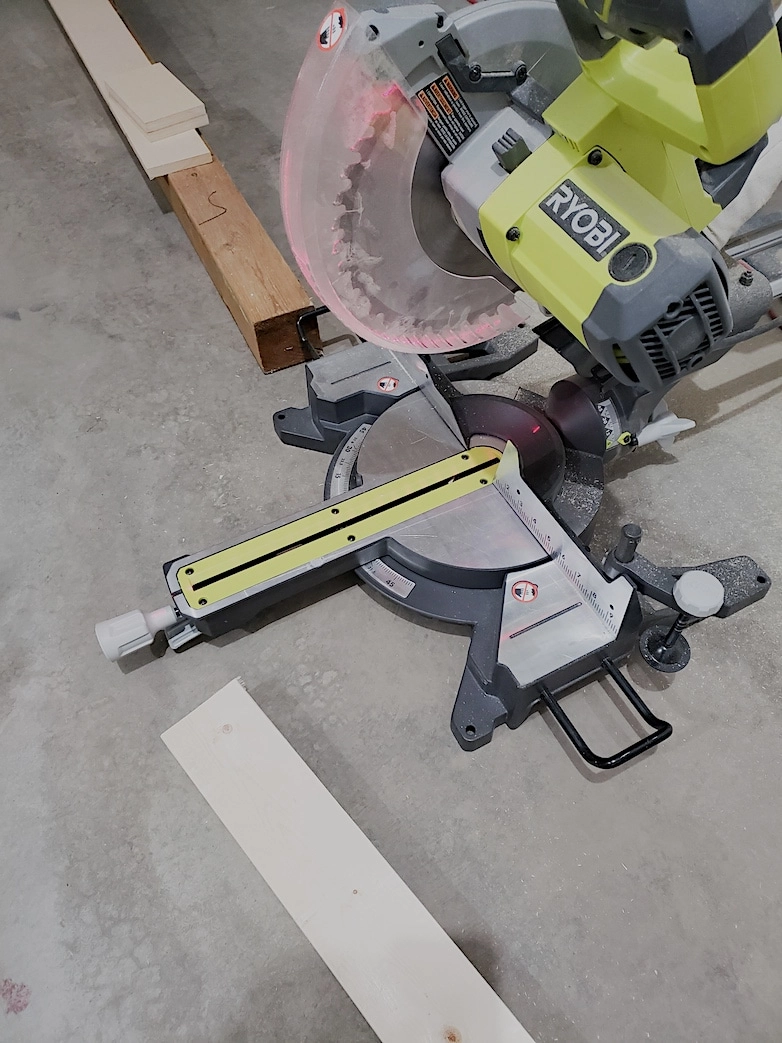
- Mitre saw
- Kreg pocket hole jig
- Clamps
- Cordless drill
- Cordless screwdriver
- Tape measure
- Speed square
- Nail gun
Step 1
Determine what size you need the desk to be. I decided to make the top/work area 2 x 7.5 feet big. I had that cut to size from a 4 x 8 feet sheet of MDF by Home Depot. The remaining 2 x 8 feet, I cut into 4-inch strips with my table saw.
Step 2
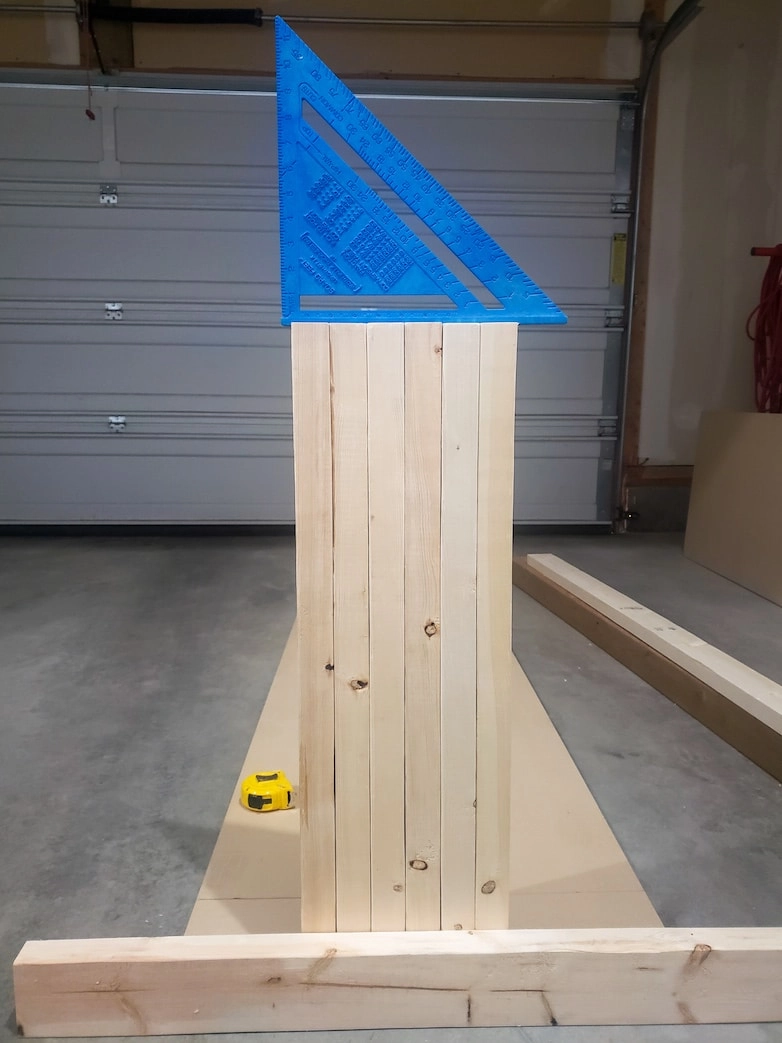
Cutting 6 legs of precisely the same length. In my mind, this is where things can go seriously wrong. Nothing screams shoddy workmanship more than a table with a wonk and a wobble. So those legs had to be perfect. I later added two more legs in the middle for more support. It’s a long desk!
Step 3
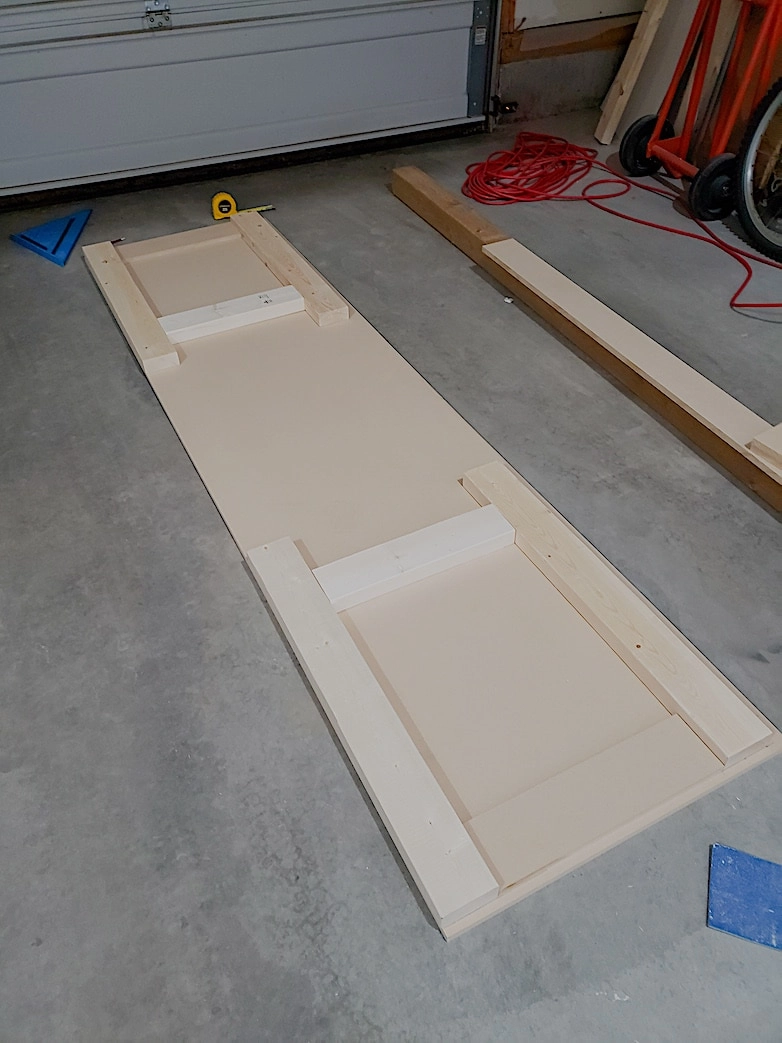
The easiest way for me was to lay the top on the floor and build the desk upside down. Then, with the bottom of the work surface facing upward, I could easily determine where I wanted to attach the legs and how long the supports between the legs should be. I used 2 x 4’s for the legs and the bottom support between the legs. For the upper mount, I used MDF. I made doubly sure this desk was not going to wobble!
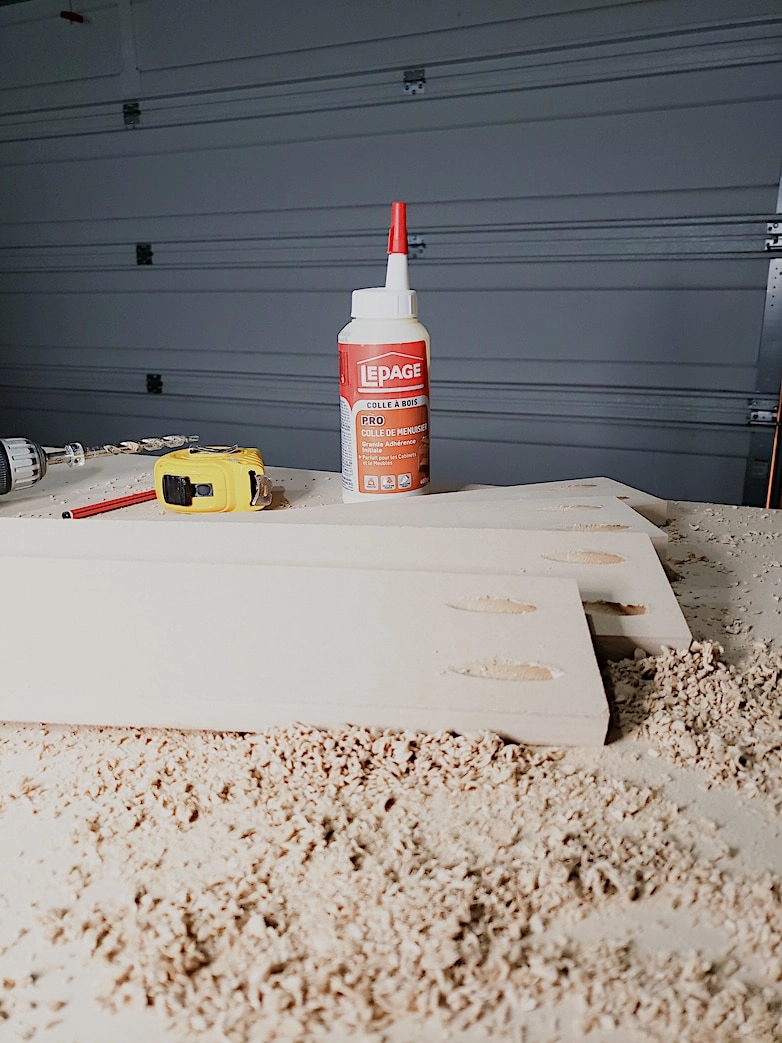
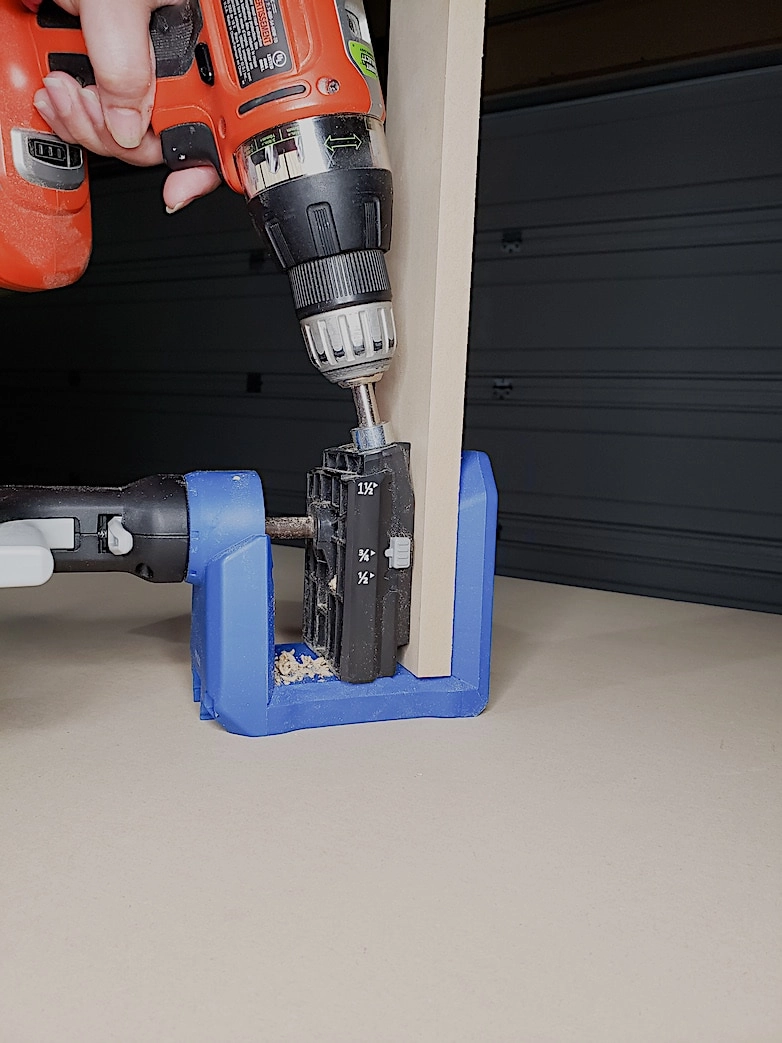
I drilled pocket holes for the screws attaching all the pieces. It was the first time I used a pocket hole jig, and I am hooked! It’s one of the best tools ever!
I also used wood glue between the wood pieces before I screwed in the screws.
Step 4
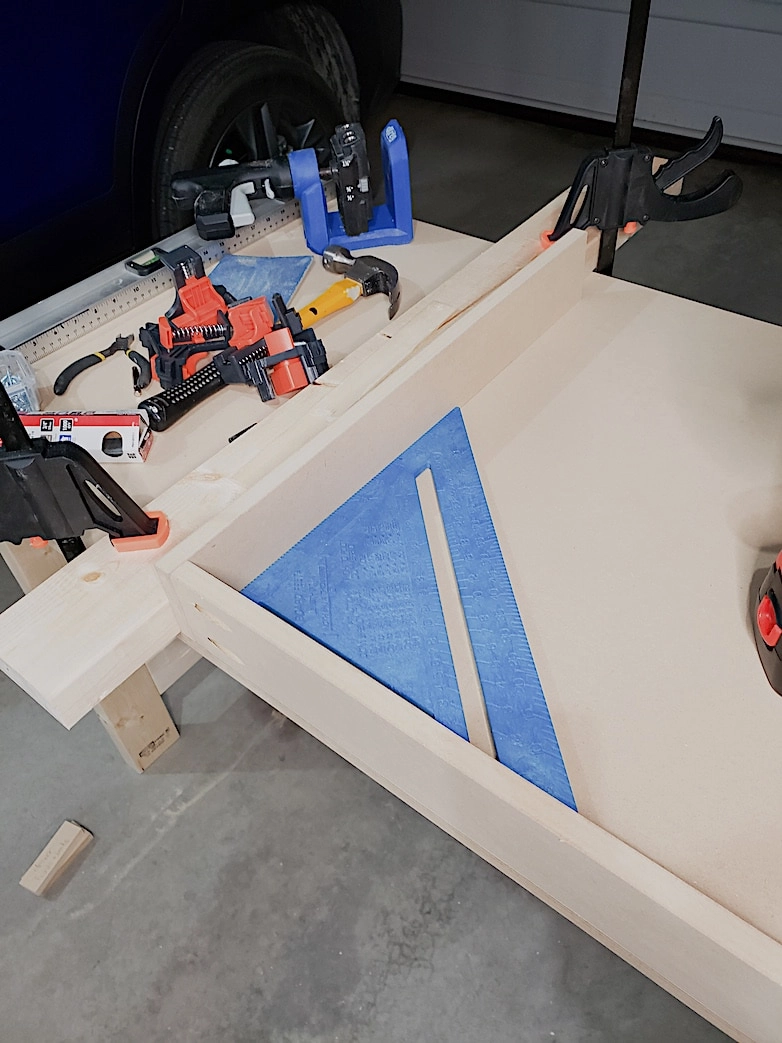
Building the drawers. I must admit, I was quite nervous about doing this for the first time. What if the corners weren’t perfectly square? What if The slides didn’t slide because I installed them wrong?
The best tip I can give you is to invest in clamps—lots and lots of clamps of all sorts and sizes. And, of course, a speed square.
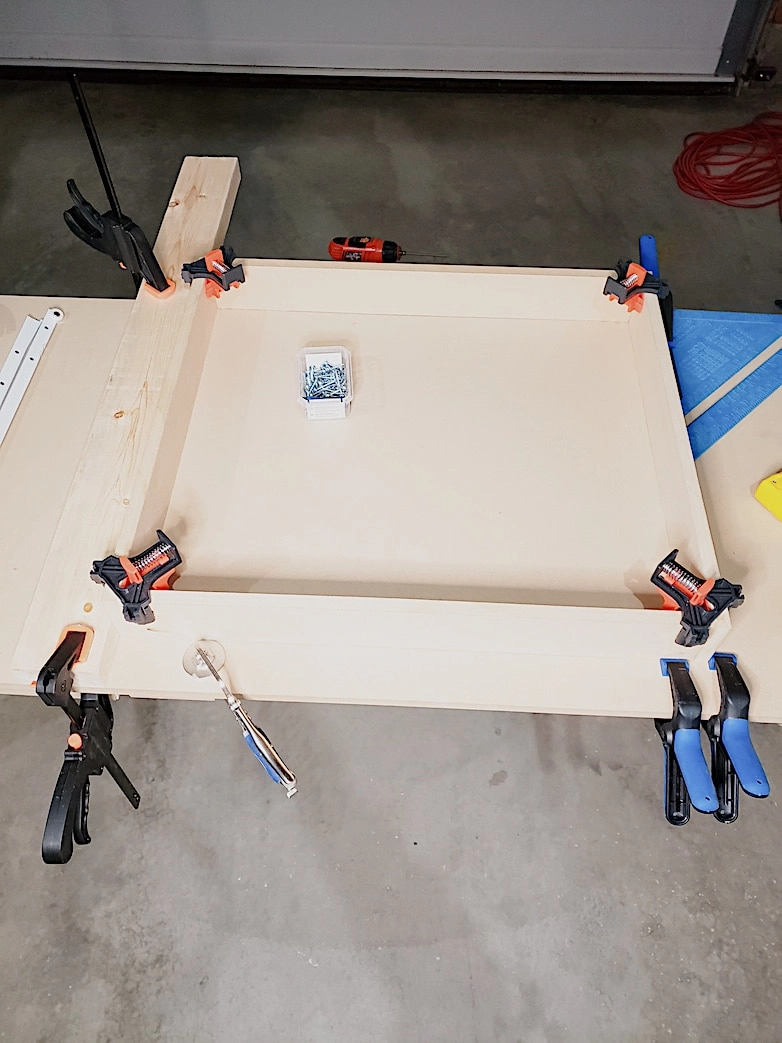
I used 3-inch wide strips of MDF for all the sides. For the bottoms, I used a thin white melamine-coated hardboard. The faces of the drawers are 4 inches wide. I positioned them to have a small overhang at the bottom, which serves as a hidden pull. I did not install any hardware.
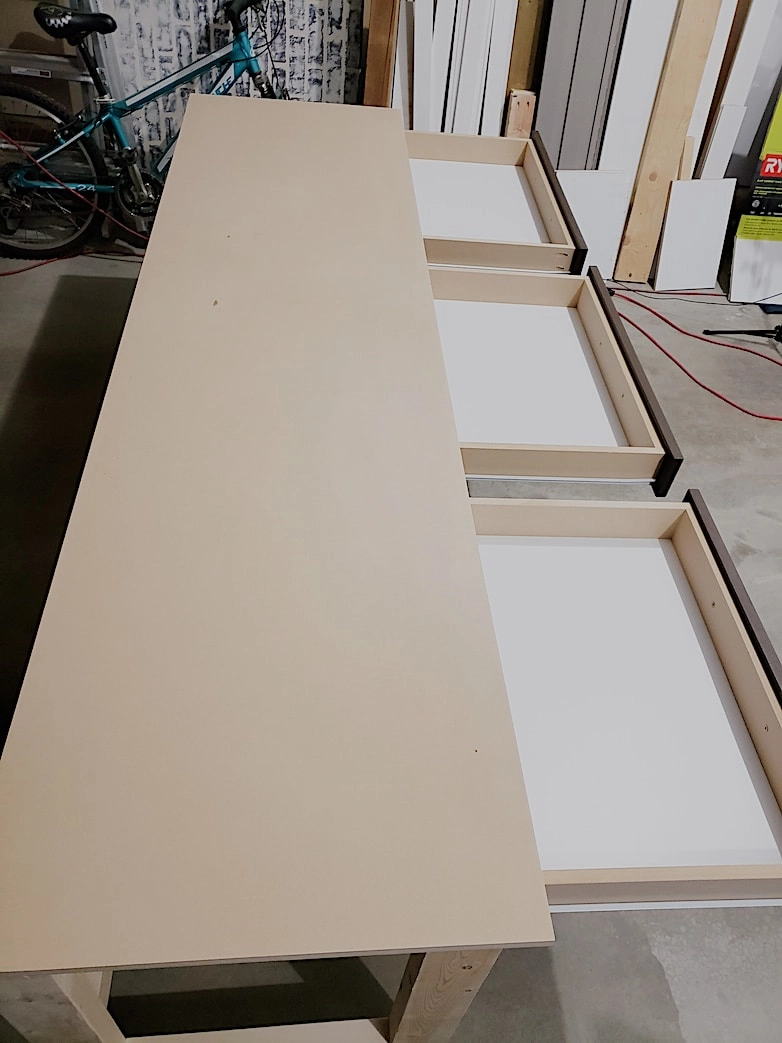
My first drawers ever were a success! And they slide like a dream!
Step 5
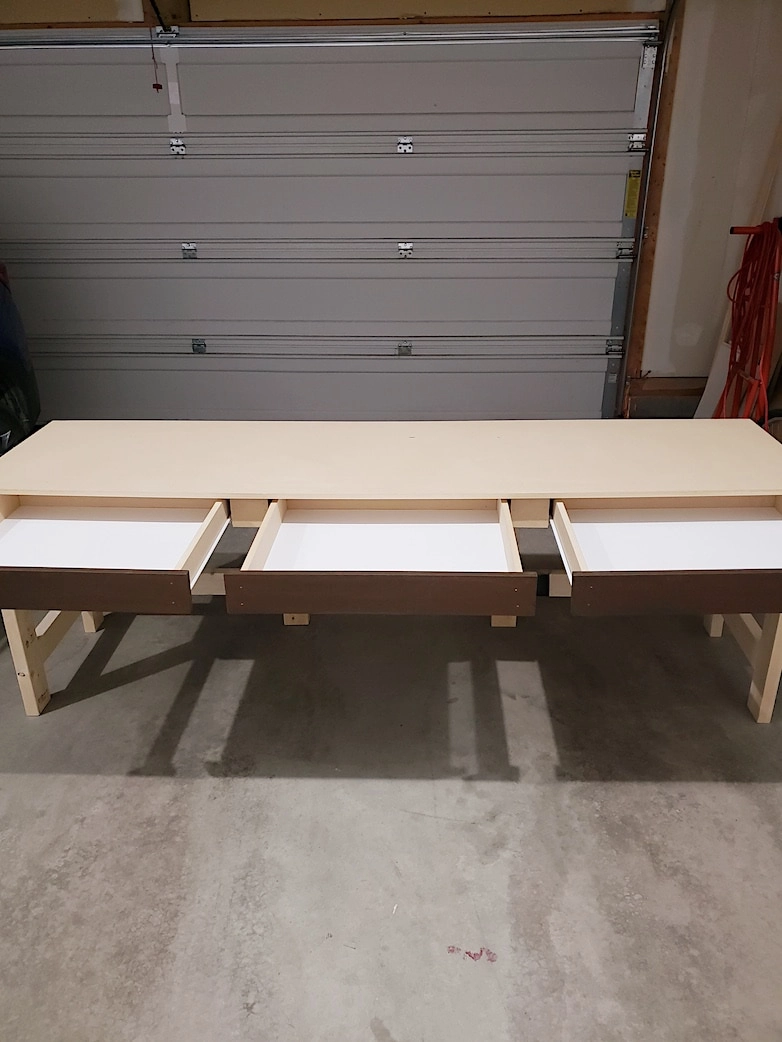
Because the drawers aren’t surrounded by casing, I had to build two simple boxes to go between the drawers. I screwed the boxes directly into the underside of the desk’s top. In the photo below, you can see the boxes between the drawers.
Step 6
After all the holes were filled with wood filler and sanded smoothly, it was time for the final finish.
Would it be possible to paint MDF to look like closely resemble wood? I sure tried my best!
The aim was a very dark wood finish (that’s what my girl wanted, not necessarily what I myself would have chosen).
I started by painting everything a solid dark brown. I used Behr in the color Havanna Coffee.
For the second step, I used black paint (Behr in the color Limousine Leather). I diluted it to 50% strength. With a fairly dry paintbrush, I lightly brushed over the surface, hardly touching it. I kept going until it resembled a woodgrain.
Step 7
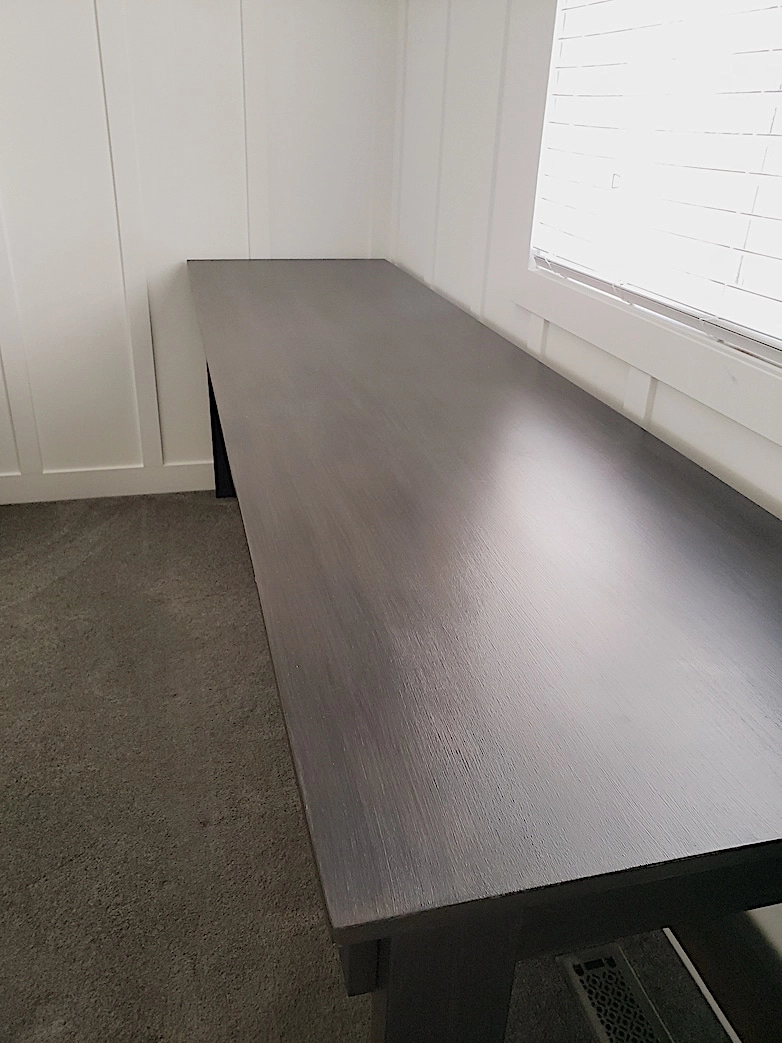
Lastly, I sealed everything with a clear sealer. I used a paintbrush instead of a roller for this effect. The brushstrokes helped to create a texture resembling wood grain. I just had to make sure my strokes were long and straight! The photo below shows the faux wood finish I tried to create.
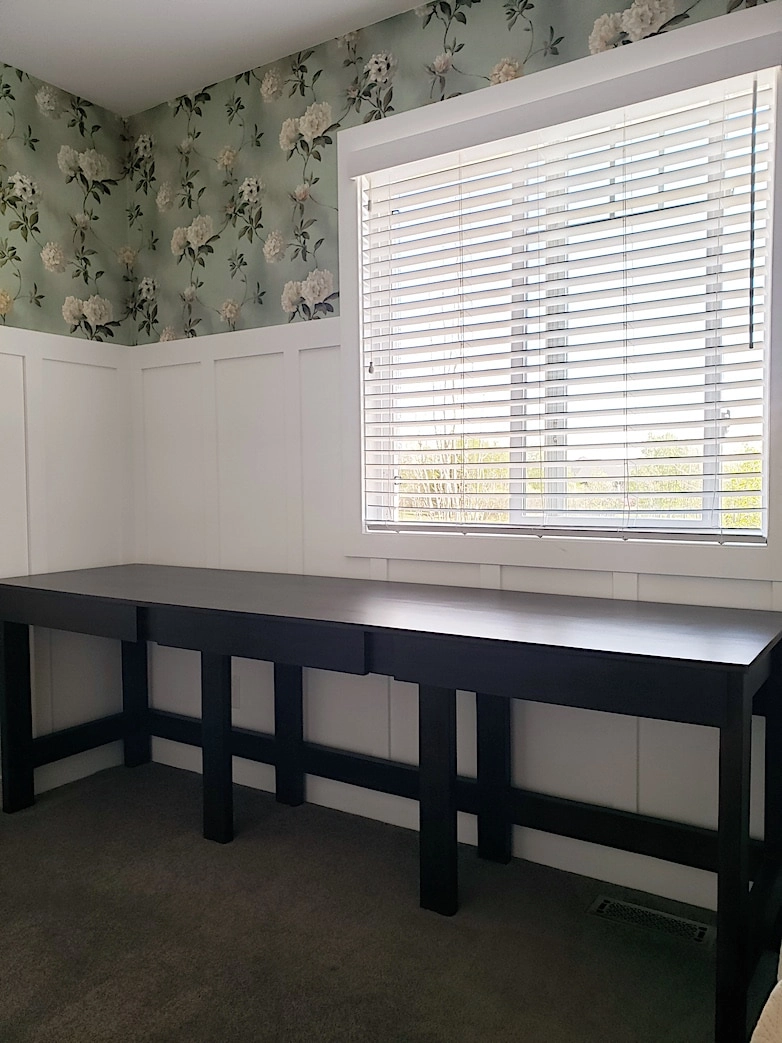
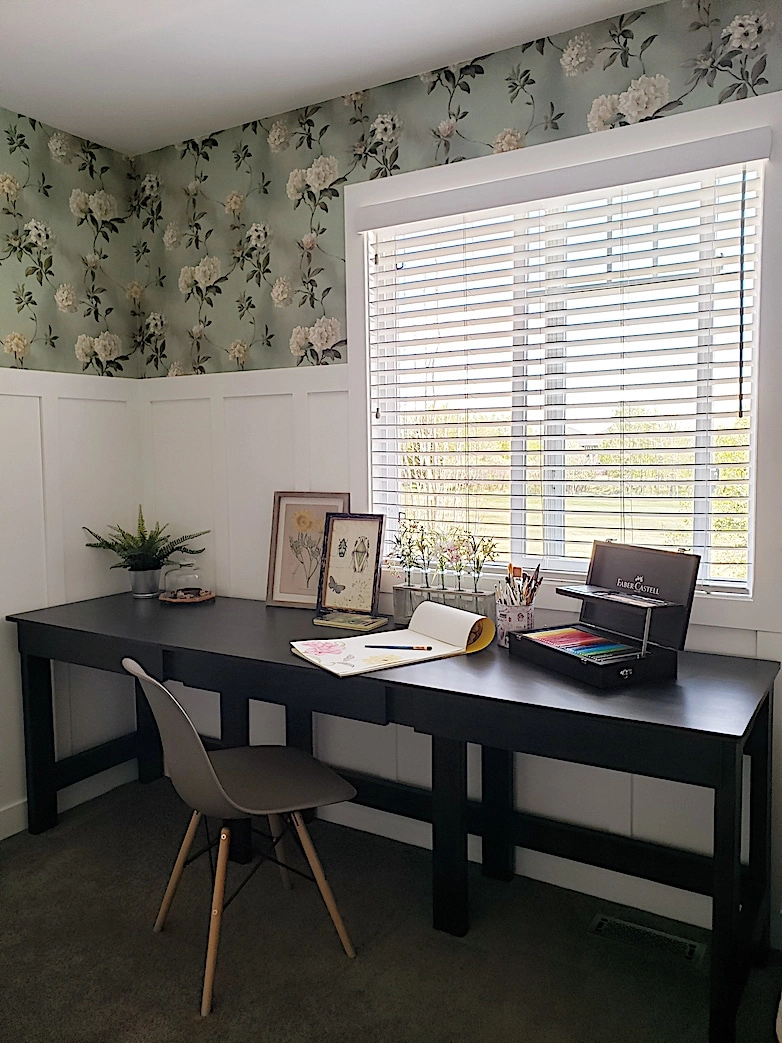
The desk fits perfectly in the room and is even more functional than I had imagined.
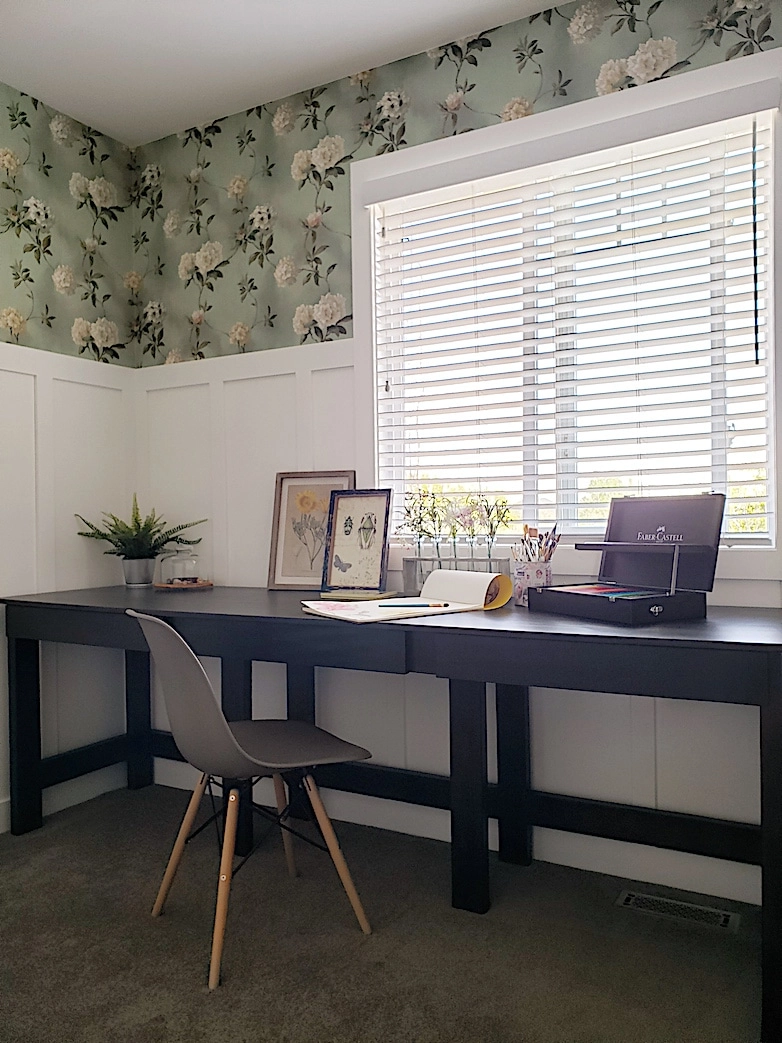
So far, these are the only photos of the room makeover. I still need to do a few final touches, and then I’ll write a post to show every little detail.
And that is how I built a simple desk with drawers for the very first time. It was fun but also challenging. As promised at the beginning of this post, here are two links you can visit to see desks built by ladies with more experience and great technical drawings with measurements.
- https://www.woodshopdiaries.com/how-to-build-a-writing-desk/
- https://www.addicted2decorating.com/how-to-build-a-small-diy-writing-desk-with-drawer-part-1.html
If you have any questions, please feel free to ask. I will happily share what I can. Don’t forget to pin an image to your favorite Pinterest board, and feel free to share.
