DIY Floating Shelves – No Special Hardware Required
I built DIY floating shelves for our basement dry bar using nothing but wood. Yes, even the brackets are made from wood. let me show you how!
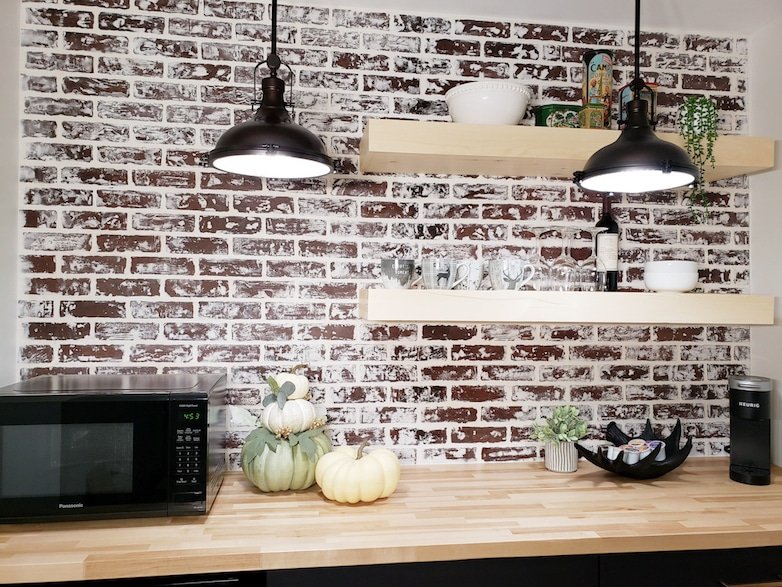
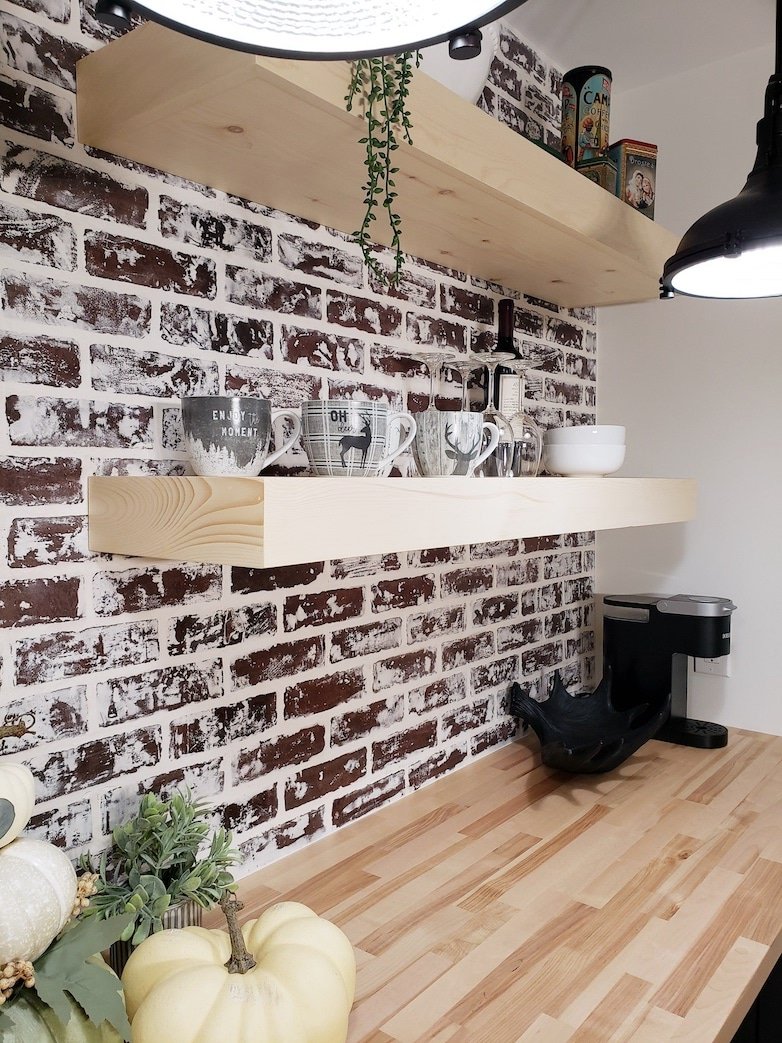
When I designed our basement dry bar, I knew I wanted to add two floating shelves to the faux brick wall. I could have saved a bit of time by buying ready-made shelves from Ikea, but I wanted a custom look. The vision was shelving made of real wood, much thicker than a standard shelf, like a big chunk of solid timber. I also didn’t want to order metal brackets and thought it couldn’t be difficult to rather make them out of wood. It turned out to be fairly easy! Let me show you how I did it…
Building Material Needed:
- Two pieces 1 (inch) x 12 (inches) x 8 (feet) select pine
- Three pieces 1″ x 4″ x 6′ select pine
- Two pieces 2″ x 4″ x 8′ pine (used for studs)
- One piece 2″ x 2″ x 8′ pine
- Sixteen 4-inch construction screws
- Four 2-inch wood screws
- Wood glue
- Varathane Triple Thick One Coat clear finish sealer (waterbased)
- Stainable and paintable wood filler (in a color as close to your wood color as possible)
Tools Used:
- Mitre saw
- Nail gun
- Electric Sander
- Cordless drill
- Cordless screwdriver
- Stud-finder
- Level
- 2-inch paintbrush
- 4-inch foam roller and paint tray
- Sanding block or sandpaper
Step 1
I started by cutting a 1″ x 4″ x 6′ piece of timber for three edges of the shelf (the back remained open). I cut 45-degree mitered corners to create a seamless look. After every cut, I ran a sanding block over the rough edges to get rid of any splinters.
Step 2
The 1″ x 12″ x 8′ timber will make the top and bottom of the shelf. If you want your finished shelf to be 4 feet wide, subtract your two side edge pieces’ width. Your 1″ x 4″ should be 3/4 of an inch thick (not 1 inch), so 48 inches (4 feet) minus 1.5 inches (3/4″ x 2) should make your top and bottom 46.5 inches long (each).
Step 3
It’s time to attach your side edges to the top and bottom of your shelf. (An extra pair of hands could come in handy in this step). While keeping one of your bigger pieces (top or bottom) upright, put a bit of wood glue on all the edges and line up your side edges. The inside corners of the edge pieces should line up perfectly with the corners of the big piece.
Once you are happy that all edges and corners line up, you can secure them together with your nail gun. Be sure to have nails on every corner and along the longer edges at least every 8 inches. Nail the mitered corners together as well. All the seems should be glued before you nail them together. Repeat on the other side of your shelf. You should now have a hollow box.
Step 4
Fill all the seams, gaps and nail holes with wood filler. If your mitered corners did not close up entirely, you could now fill and shape them to look perfect. Allow a few hours for the filler to dry completely.
Step 5
Sand the wood filler to a smooth finish. You want as little as possible to be visible. Give your whole box a quick sanding for an even texture and color. You can use a sanding block or sandpaper, but a palm sander or an electric sander will get the job done in no time.
Step 6
You can now stain or paint your shelf. I wanted to keep the natural wood color and started sealing. Varathane Tripple Thick One Coat clear finish was the perfect product for the job. I applied two coats with light sanding between coats. You could use any sealer of your choice, though. While waiting for the sealer to dry, you can move on to the next step.
Step 7
Building the support bracket. Measure the length of the opening inside your box/shelf. Cut a piece of your 2″ x 2″ that will fit comfortably in the length of the opening. This will be the part of the shelf bracket that attaches to the wall. Measure the depth of the inside opening. Subtract 2 inches from that and cut four pieces of 2 x 4’s of that length. These will stick out from the wall bracket at right angles, pointing out horizontally from the wall, to add support inside the box-shaped shelf. Don’t attach the support struts to the wall bracket just yet.
Step 8
At this stage, you would want to use your stud-finder to find studs in the wall where you want to hang your shelf. You need to attach your shelf’s support structure to no less than two studs. Position the 2 x 2 on the wall where you want your shelf to go. Mark the studs’ exact location on the 2 x 2 and drill pilot holes for the screws.
Step 9
Screw the four pieces of 2 x 4’s from Step 7 into your 2 x 2 wall bracket. Spread them out evenly without covering the holes you just drilled. Again, use a bit of wood glue before screwing them together. (Securing them with nails will keep them from moving around while you screw them together). Drill pilot holes for the screws and use two screws per piece of 2 x 4. Don’t use screws shorter than 4 inches. You want the support bracket to be as sturdy as possible.
Step 10
Attach your support structure to the wall where you marked the position of the studs. Once again, use screws at least 4 inches long. Once that is in place, your box/shelf should slide over the support effortlessly.
Step 11
Use 2-inch long wood screws to secure your box to the support bracket. Two should be more than enough. You only need to prevent it from sliding off or moving around. Place the screws where it would not be seen easily. For the top shelf, I screwed the box to the bracket from the top. For the bottom shelf, from underneath.
You now have a custom-made floating shelf! I chose to complete one shelf and then repeat the whole process for the second. The total cost of this project was less than $100 (Canadian dollars).
Your DIY floating shelves should be sturdy enough for decor items or a few dishes, as long as they are not extremely heavy or packed to the brim. Happy decorating!

Absolutely ingenious!! Thanks a million for the tutorial – this is brilliant!
These shelves are gorgeous! I can’t believe you made them! I want to redo my kitchen shelves someday!
Well done! these look beautiful on the brick wall.