Reupholstering a Chair with a Back
Does reupholstering a chair with a back sound daunting and intimidating? I promise you, it isn’t that difficult at all! Let me show you how I transformed our kitchen counter-height chairs with new upholstery fabric and a lick of paint.
This is a great beginner project if you want to gain confidence to tackle more complex upholstering (which I will also show you in the next couple of months.)
Reupholstering a Chair with a Back vs Replacing
Reupholstering a counter-height chair with a basic seat and backrest is definitely a lot less expensive than buying a new one.
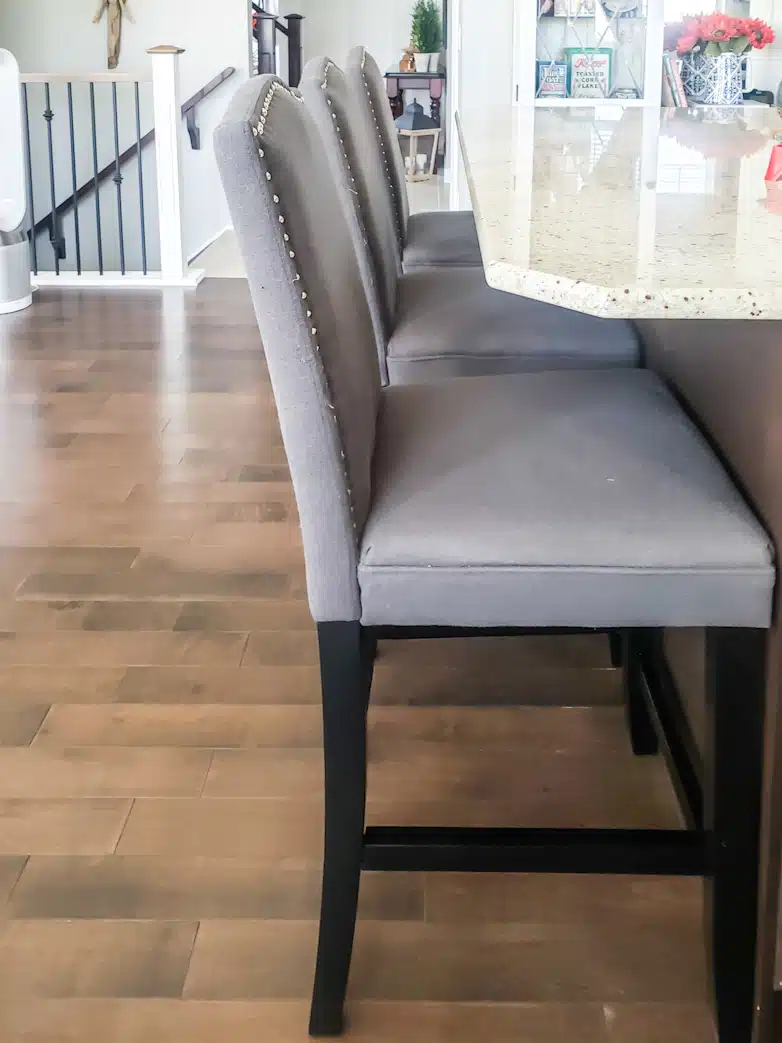
In my case, I found these three chairs for an unbeatable price a couple of years ago. Structurally, they are still in great shape, and most importantly, they are super comfy! Not something my family is willing to compromise on! However, I think we all knew the espresso legs and grey upholstery would be changed sooner rather than later.
The Difference Between a Counter-height Chair and a Barstool
I found so many references to chairs like mine, calling them barstools. Technically, a barstool only has a seat and no backrest. Then there is the height difference – best explained in the quoted text below from Rejuvenation’s website.
Counter stool height: Countertops range from 36 to 39 inches, so you’ll need a counter stool that ranges from 24 to 26 inches high. Bar stool height: Bar tops are usually around 40 to 42 inches high, so opt for a bar stool about 28 to 30 inches tall. – rejuvenation.com
Reupholstering Supply List
- Fabric suitable for upholstery
- Scissors
- Sewing machine (optional)
- Upholstery tacks (optional)
- Staple gun or hand stapler
- Staples
- Screwdrivers
- Hammer
- Pliers
Step 1 – Remove the Old Upholstery Fabric
In some cases, you might be able to re-cover your chair without removing the old fabric. However, most of the time, it will leave your chair looking too bulky.
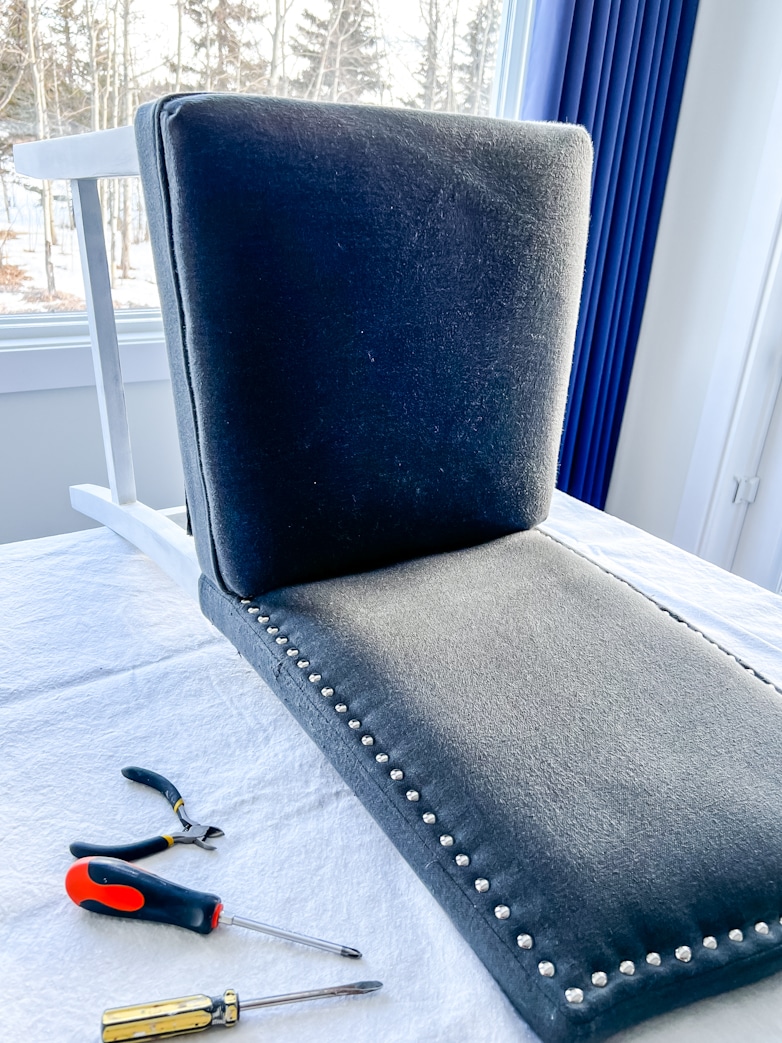
My chairs had piping around the seats that would have created unsightly ridges under the new fabric. Upholstery tacks outlined the backs, which made an indented outline I didn’t want.
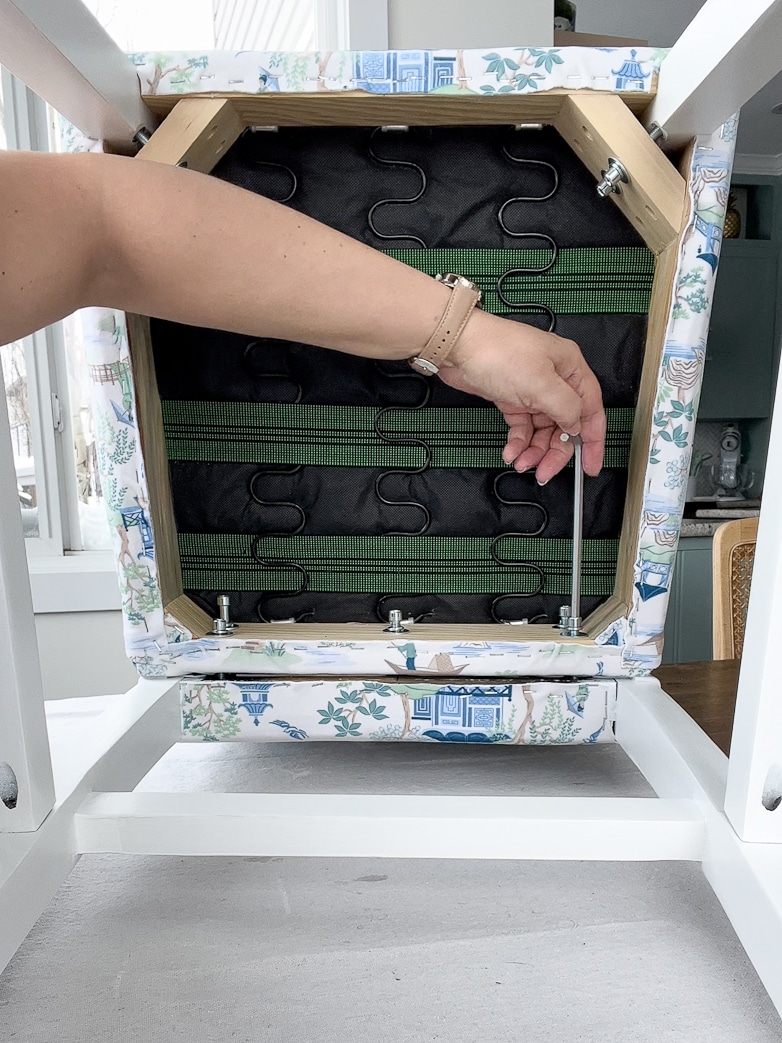
My initial plan was to cover the seat and back without taking the whole chair apart. I soon realized it wasn’t possible because the bolts holding the seat and back together must go through the fabric. Trying to work around them would result in a poorly executed job.
Once I removed the bolts, it actually simplified the whole reupholstering process.

Be prepared; removing tack nails and staples is a tedious job! It’s going to keep you busy for a while.
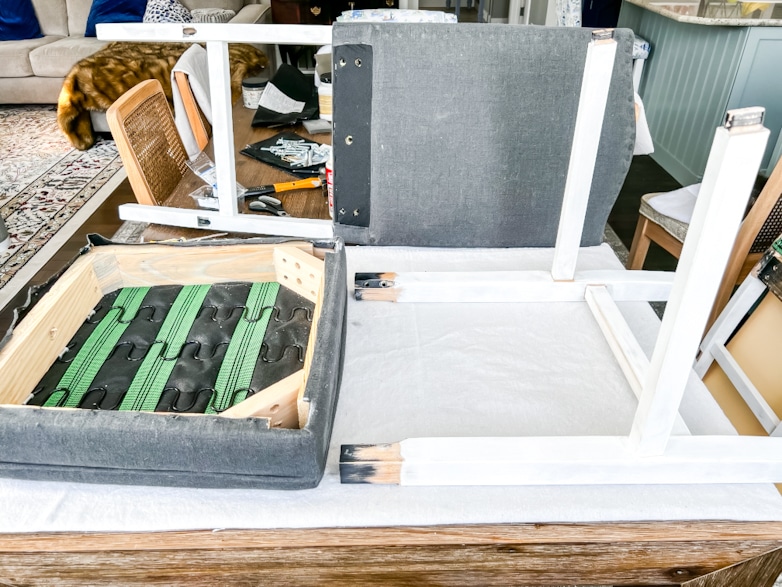
Step 2 – Assess the Chair’s Structure and Foam
Older chairs usually need new foam for the seat or, at the very least, a little extra foam.


The foam on all of my three chairs was in pretty decent shape. Nonetheless, I removed all of it (temporarily) because I wanted to change the height of the backrests. Yes, you read that right!
Changing the Height of the Backrest (my optional step)
I know this might sound like a major undertaking, but let me tell you how straightforward and easy it actually was!
The backrests of these chairs were ever so slightly taller than preferred. Some designers believe you should be able to push a counter-hight chair under the island’s overhang. I didn’t go that far. They are only 3.5 inches shorter now, and it may not sound like much, but it is a huge improvement!
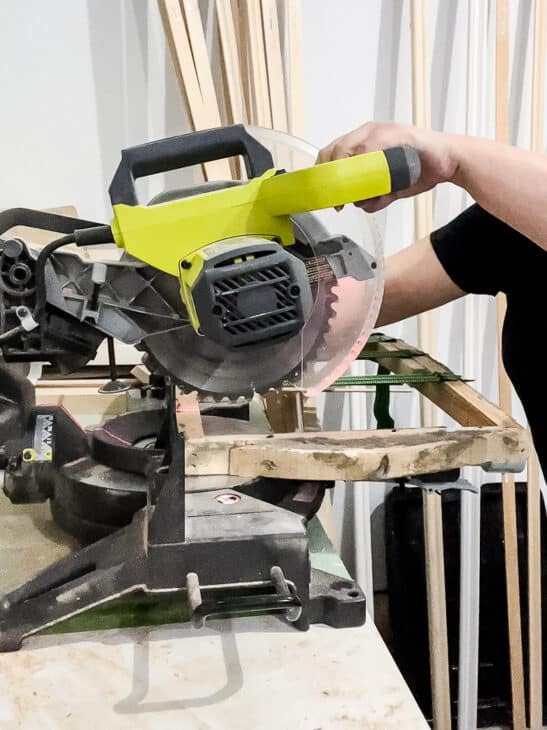

I carefully measured and used the miter saw to cut off the curved top piece of each backrest, plus 3.5 inches off the sides. The excess pieces, still attached to the curved top pieces, broke off easily with a few taps with a hammer.

I reattached each top piece with wood glue and a few brad nails. This was already enough to make the backrests structurally sound again, but stapling the webbing back on reinforced it even more.
Preparing Well From the Inside Out
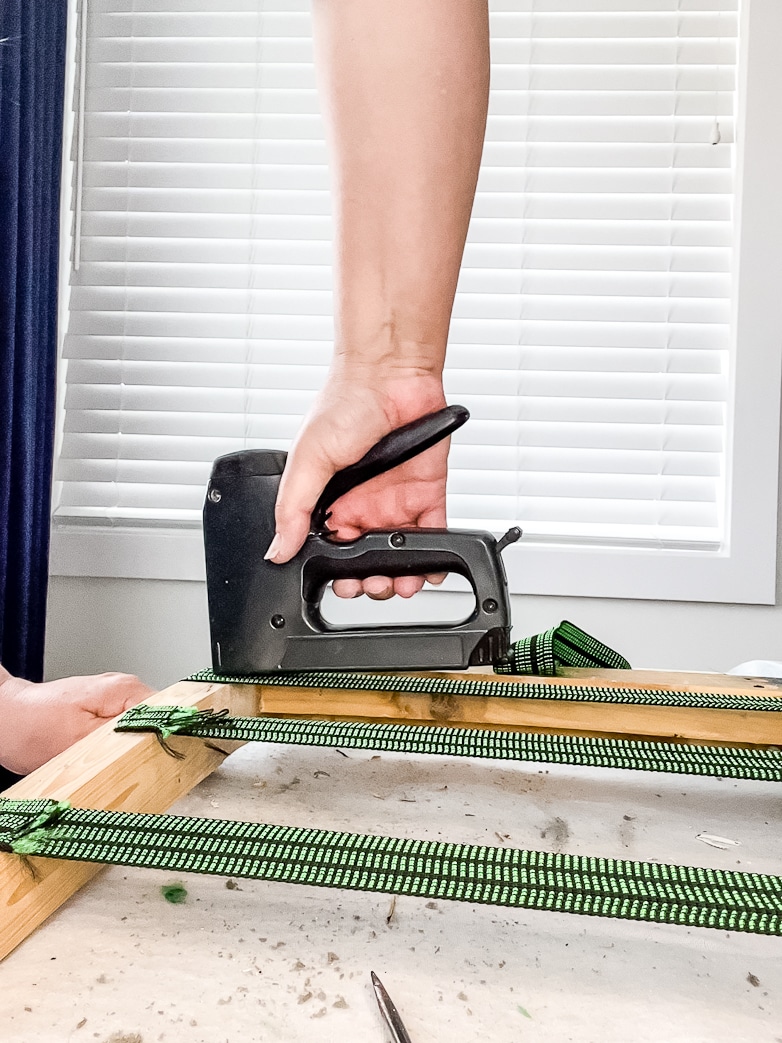
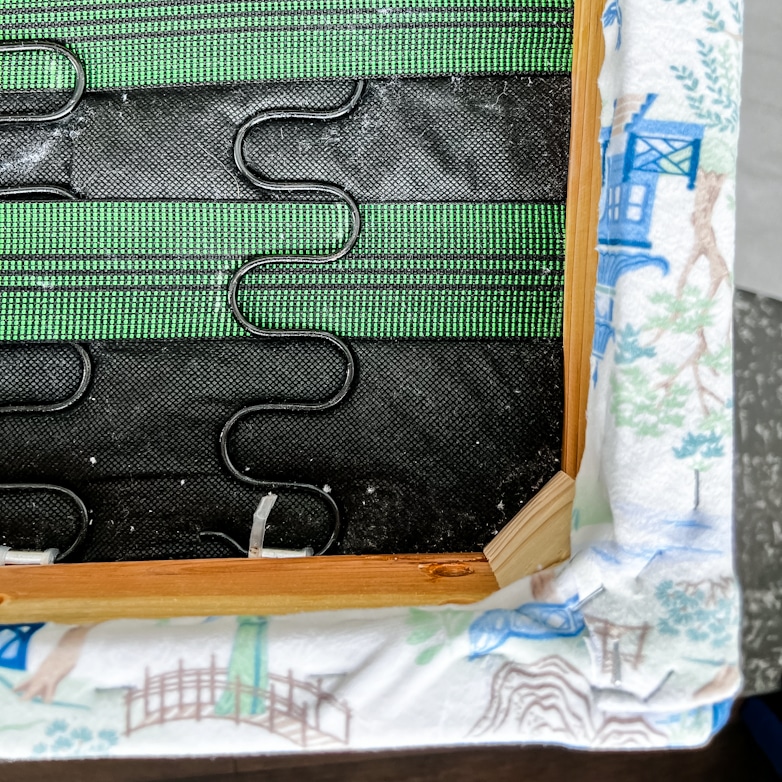
The webbing on these chairs looked a bit saggy as if they were never correctly stretched, so I adjusted all of it to be nice and tight.


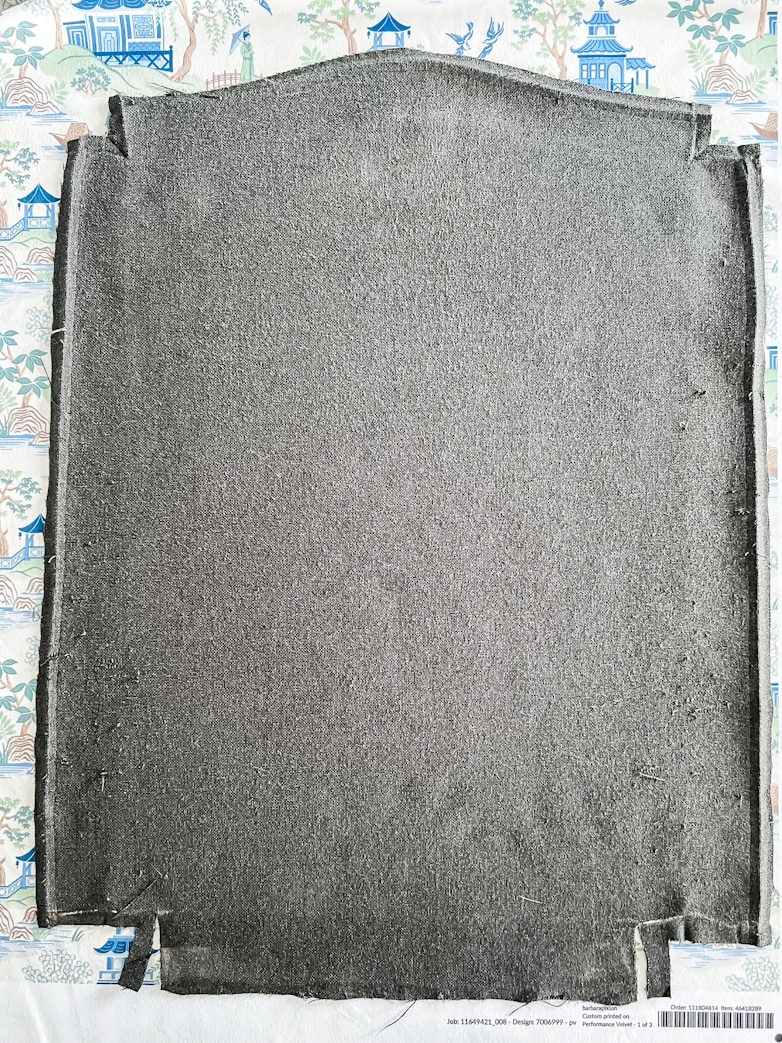
The thin green fabric, originally stapled to the back, was easier to tear off than remove hundreds of staples, so I replaced it with dropcloth canvas. After I stapled all the foam back on, I covered the front of the backrest, as well as the seat, with the same canvas fabric. It’s always good to have a sturdy, protective layer underneath a chair’s upholstery fabric.
Painting the Legs
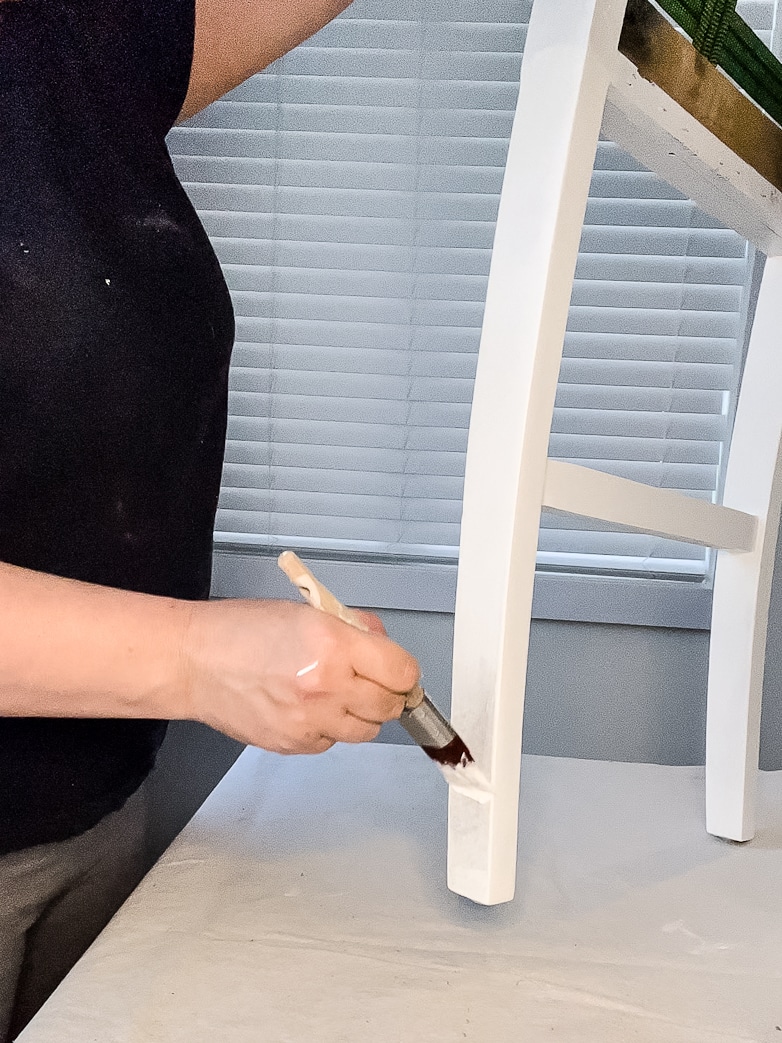
Way back, when I sanded the kitchen cabinets, I also sanded the legs of these chairs to get rid of the espresso stain. I initially stained them a light wood color, but they looked terrible, so I painted them with a temporary protective coat of white until I could repaint them in this project.
They were pretty rough and needed light sanding. As always, I used Dixie Belle chalk paint in Cotton. I finished with two coats of clear sealer for extra protection since the chair legs at a kitchen island get a lot of wear and tear.
Reupholstering the Chair’s Backrest
There are two possible methods to cover the backrest with fabric.
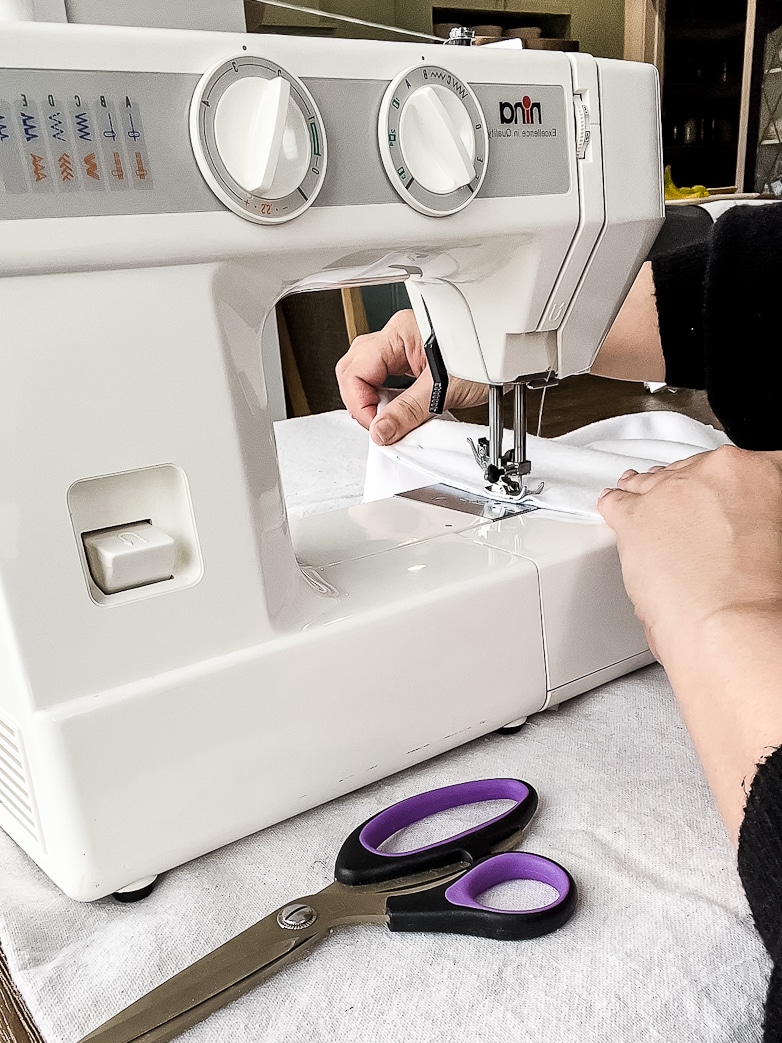
Option 1 – Sewing the front and back panels together
When you remove the old fabric, carefully cut the stitching loose and separate all the individual pieces. Use these panels as patterns or cutting templates when cutting your new material.
Either the front or the back panel will also cover the sides and top of the chair and, therefore, be bigger than the other panel.
As the larger panel folds over the sides or edge of the chair, 45-degree cutouts will form around the top corners of the chair. The easiest way to measure how big to sew these corners is to drape the panel over the chair, pulling the fabric snugly around the corners and pinning it together where it needs to be stitched.

When sewing together two panels that are not the same size, it is easy to misalign them. To avoid this, fold each panel in half and mark the center. Align the two centers and pin the panels together, working outwards from the center.
This method might sound daunting if you are not confident using a sewing machine. Do not fear! I’ll try to explain the non-sewing option as best as I can.
Option 2 – The alternative to sewing
If you prefer not to sew, your larger panel will have to be on the front, and you will fold the corners over and staple them to the back instead of cutting them out and sewing box corners.
Fold the front panel over the sides and staple it all around, close to the edge of the chair’s back.
The back panel will be the smaller one, but you will need more seam allowance than for sewing.
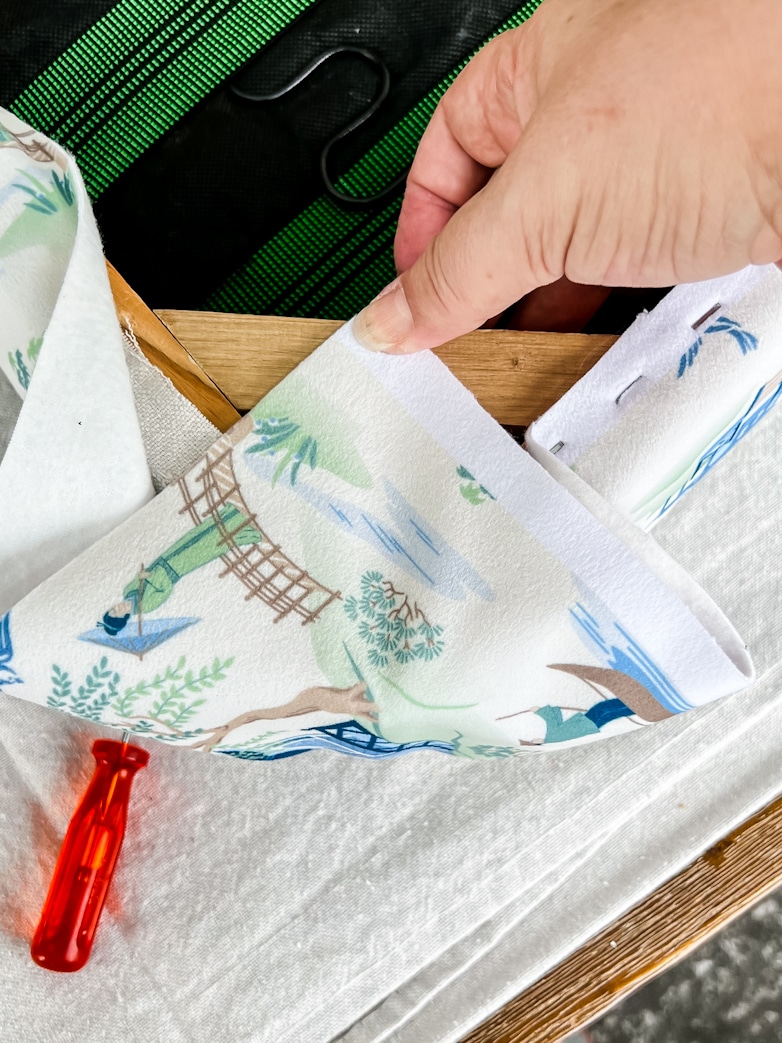
Lay the back panel out on the chairback and keep it in place by pinning the fabric to the canvas underneath. Do this near the middle of the panel.
Now, you can fold the edges (seam allowance) over and under the panel. Fold it carefully to end right on the edge where the back and sides meet. Keep the folded seams in place by hammering in decorative upholstery nails or tacks around the edge of the fabric panel. Space the tacks carefully to keep the panel secure and the spacing equal in size.
Alternatively, you can skip the upholstery nails and sew the panels together by hand, using blind stitching.
Reupholstering the Chair’s Seat
Breathe, my friend! This is the easier part.
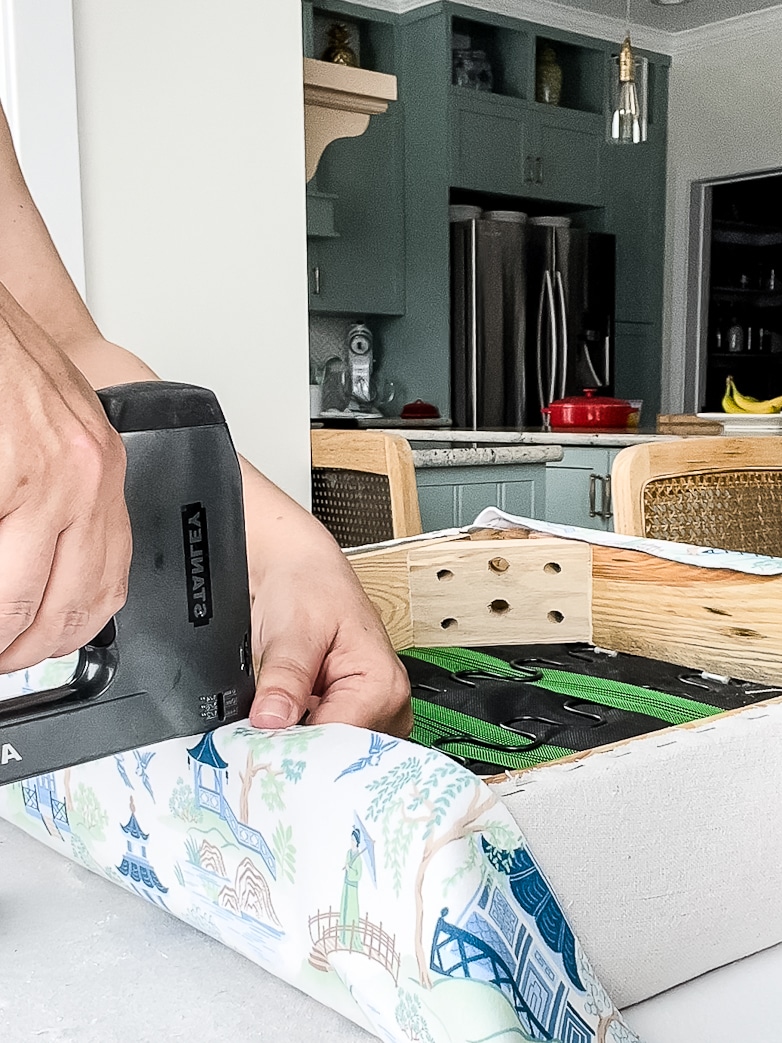
To cover the seat, you will only use a hand stapler or a pneumatic staple gun. I use a hand stapler, but the staples don’t always shoot in all the way and need a little help with a hammer. I don’t mind that.
The fabric should be pulled firmly over the seat but not too tight. It should stay smooth without stretching and wrinkling over time.
To shape the foam with nicely rounded corners, pull the canvas tight over the foam’s edges. If you skip the canvas (or lining of your choice) and try to shape the foam with your upholstery fabric, you will create unsightly bulges.
Begin stapling in the middle of each side, working towards the corners. This is especially important when your fabric has a pattern or design that you want to keep straight.
To correctly cover the corners, align the corner of the fabric with the corner of the chair’s framework.

Fold the remaining fabric in equal amounts on each side until they look identical. This looks more professional and, if done correctly, will create less bulk.

With just a few staples keeping the corner folds in place, cut away as much of the excess fabric as possible. Now, you can secure the fabric with more staples.
Use as many staples as it takes to flatten any bulges of fabric. The thicker your fabric, the more difficult this will be. My thick, velvety fabric was a challenge!
Once the seats and backs were covered in the new fabric and all the legs were painted, I could “rebuild” the chairs.
Revealing the Freshly Upholstered Chairs
I’ve teased you with little sneak peeks of this fabric design, but I won’t torment you any longer!
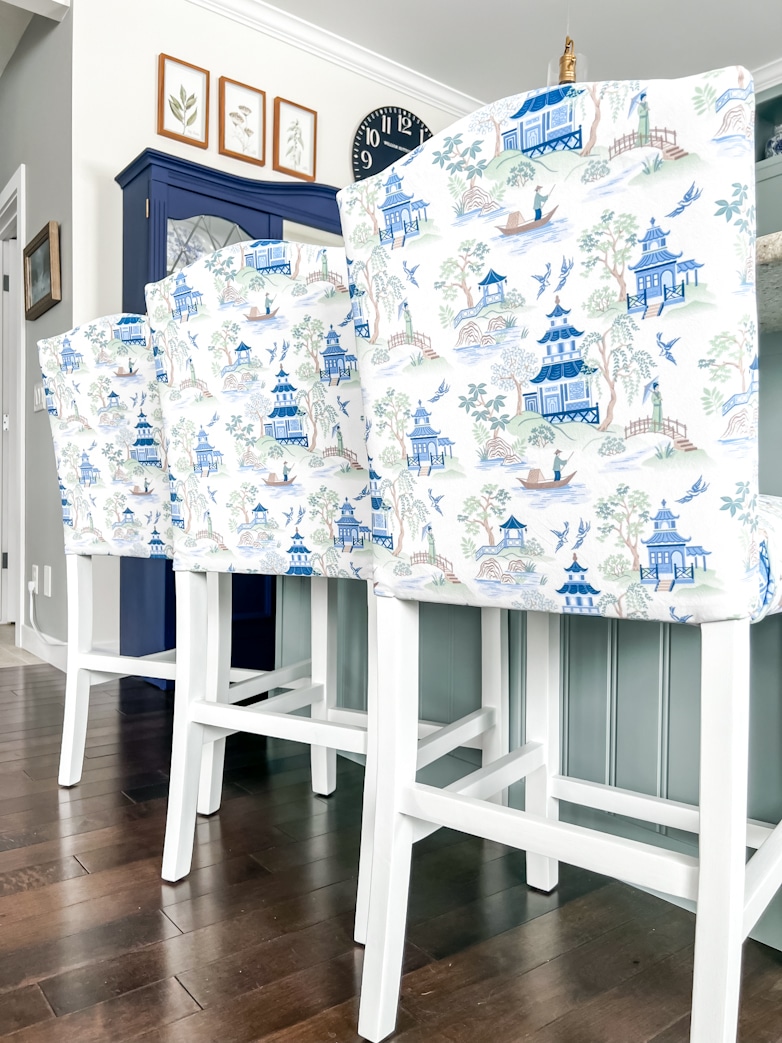
I picked this playful chinoiserie design to add a little fun and tie together the green color of my cabinets with the navy accents in this space.

The lower backs of the chairs look so much better.
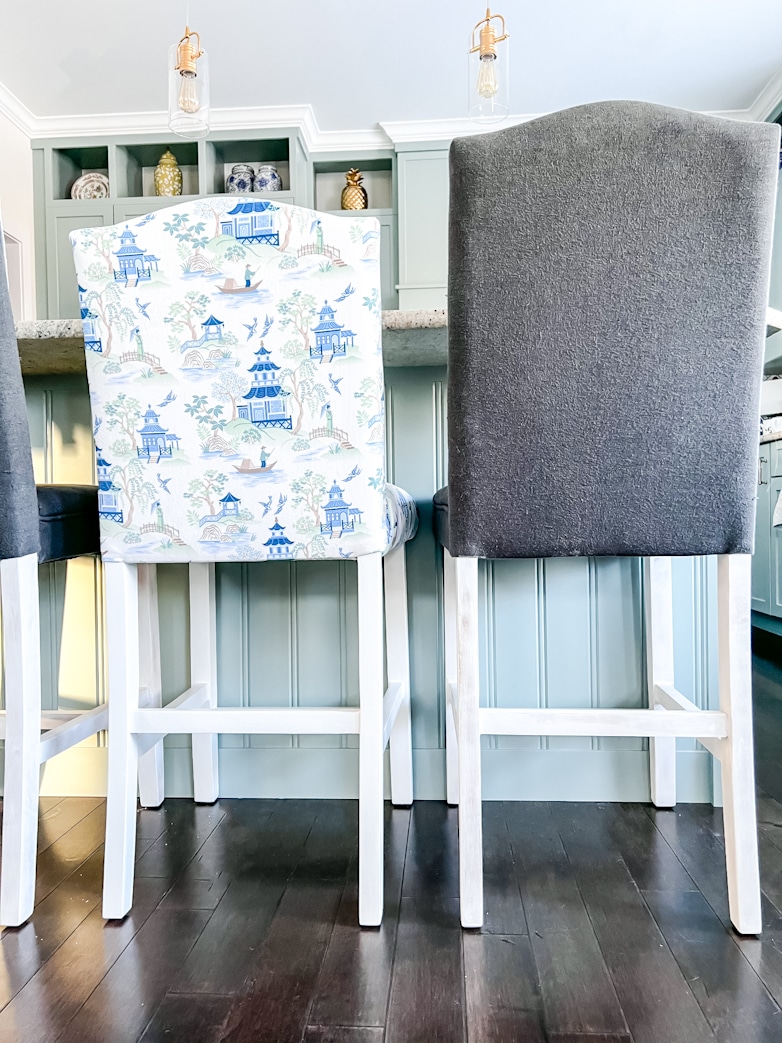
Here, you can see the before and after next to each other.

Don’t they just make a pretty picture? I love the huge difference reupholstering the chairs makes to the overall look and feel of the kitchen.
Have you noticed how those pagodas line up (almost) perfectly? Matching the pattern from one chair to the next didn’t even cross my mind when I ordered the fabric.
Once I started cutting, it dawned on me that seeing the back of the chairs from a distance would look awful if the patterns just jumped around all over the place! It is one of those things that would bother me so much that it would be the only thing I can see.
It was tricky, but with a bit of creative planning, I made all the pagodas line up!
This kitchen makeover is SO close to being done. I have one small detail to add, and then I can round up all the smaller projects in an overview showing all the changes from start to finish.
I would love to hear your thoughts on the chair makeover!
Until next time, happy DIYing!
The reupholstered chairs with the shortened backrests completely change the look — such a clever way to refresh furniture without replacing it. The patterned fabric makes the finish even more impressive.
Thank you so much! I’m glad you like it.
Beautiful! You took your chairs and kitchen to another level!
I love this!
What a great tutorial for reupholstering bar-height chairs! And they are so lovely, Marieza! I’m excited to be featuring your post at Tuesday Turn About this week! Pinned!
Your chairs look fabulous! Thanks for sharing each step in such great detail. Enjoy your new chairs!
Thank you so much for your kind words, Maureen!
Very nice job. Like how they look now vs the old look.
Thank you, Suzie! I’m so glad you like them!