Building Cubbies Above Kitchen Cabinets
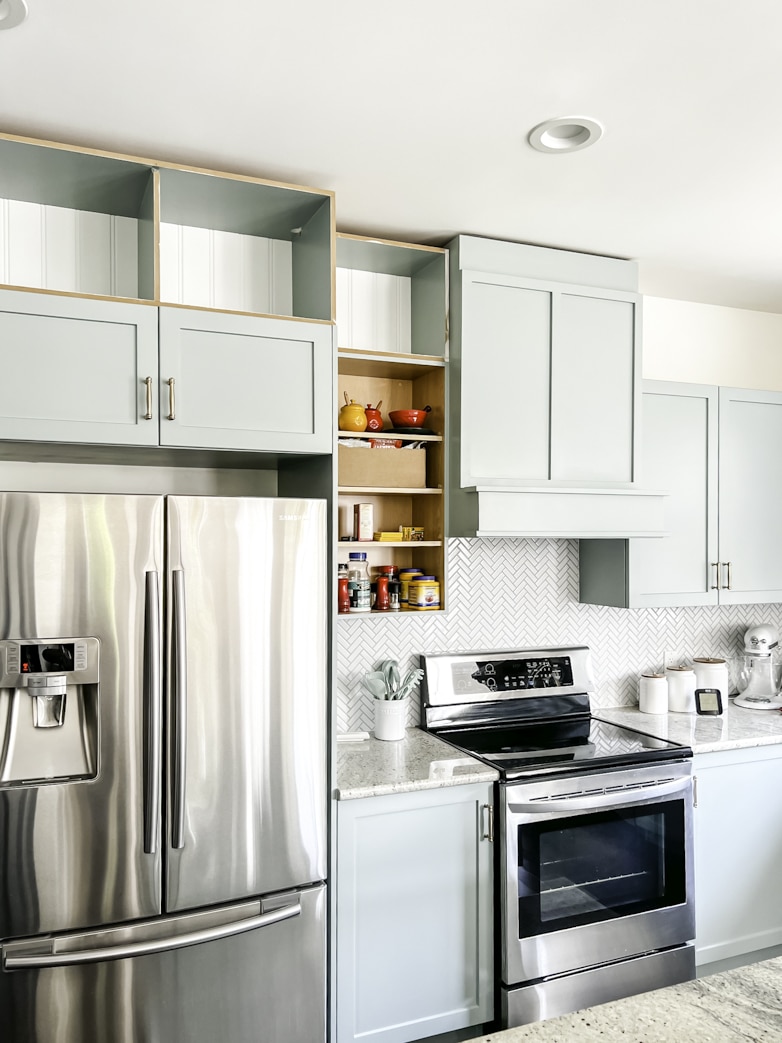
Of all the projects I’ve done so far to give my kitchen a budget-friendly makeover, building cubbies above kitchen cabinets has probably been the most anticipated! Many of my regular readers have been waiting patiently to see what I’ll do about that awkward opening between the ceiling and the cabinets.
The wait is over, my friend! Here’s how I did it.
Building the Basic Boxes to extend cabinets to the ceiling
I built the cubbies in three pieces before putting them in place, using MDF.
Box 1
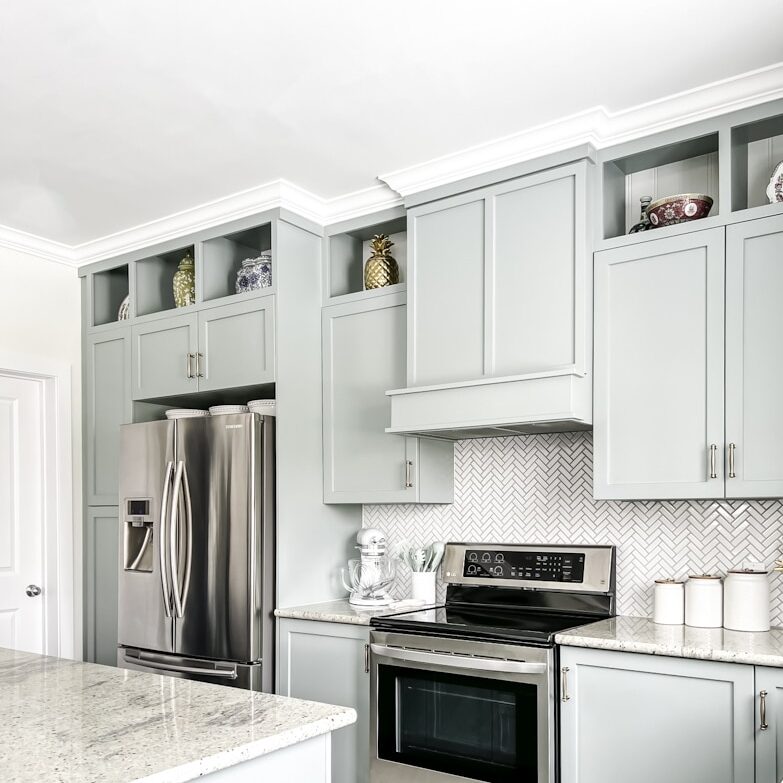
The first cubby I built was for the opening above the cabinet to the left of the range hood. It was the smallest and easiest one!
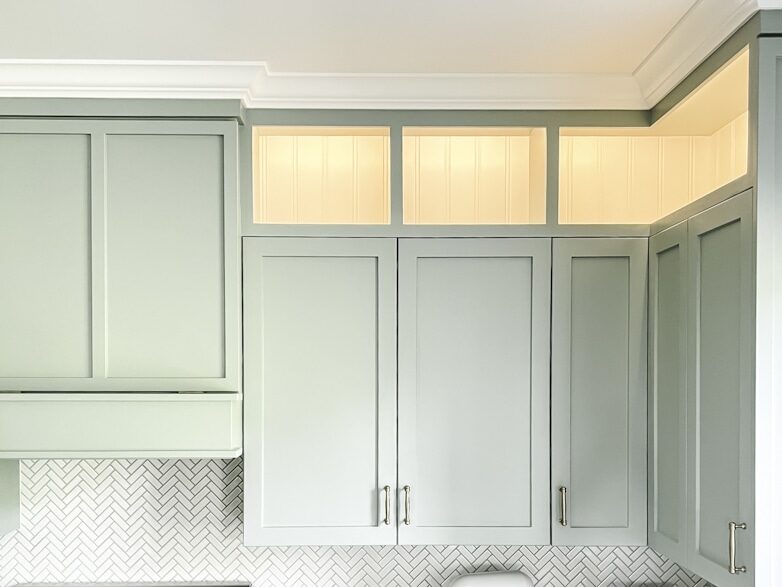
The opening from cabinet to ceiling was 17.5 inches tall. I built all the cubbies to be 15.5 inches high for an easy fit. Experience has taught me that due to mudding and taping, corners are never 90 degrees!
Box 2
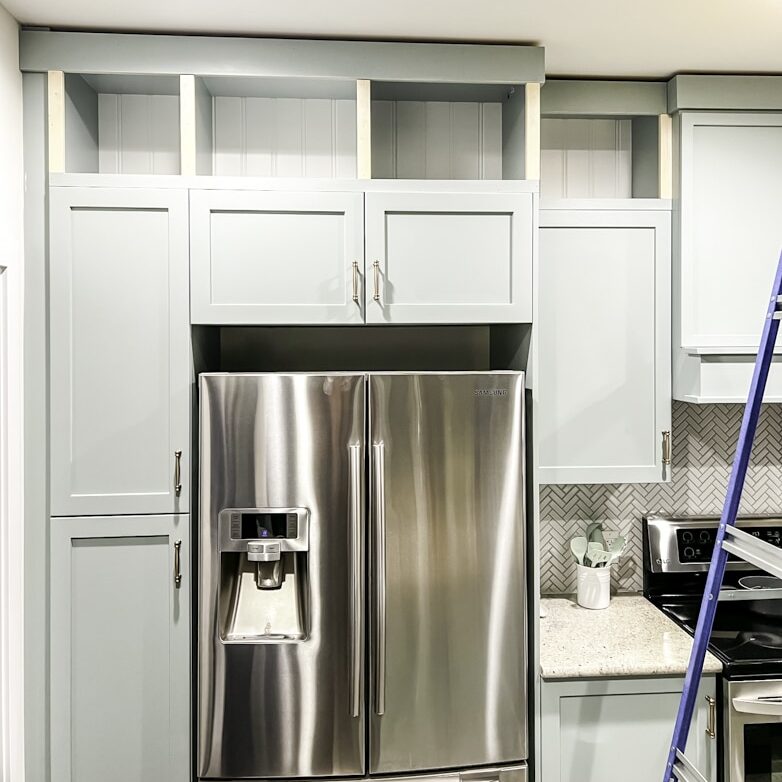
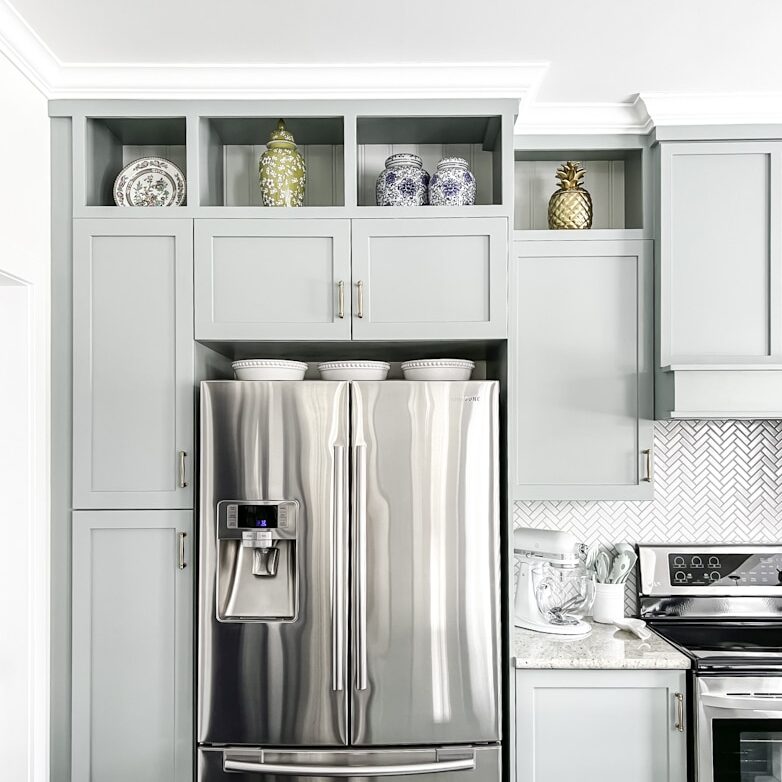
The second cubby was for the deeper (24-inch) space above the refrigerator and the cabinet to the left of that.
I didn’t want 24-inch deep cubbies where everything looks odd and lonely (like the built-in bookshelves in the living area). Trust me; they are not great to decorate. Sixteen inches felt like a good compromise, and it’s also the width of the MDF panels I used.

If you are wondering why one of the doors is missing, I clipped it off to work on the joint between the new box and the panel next to the fridge -patching and sanding repeatedly until the seam was invisible!
Box 3
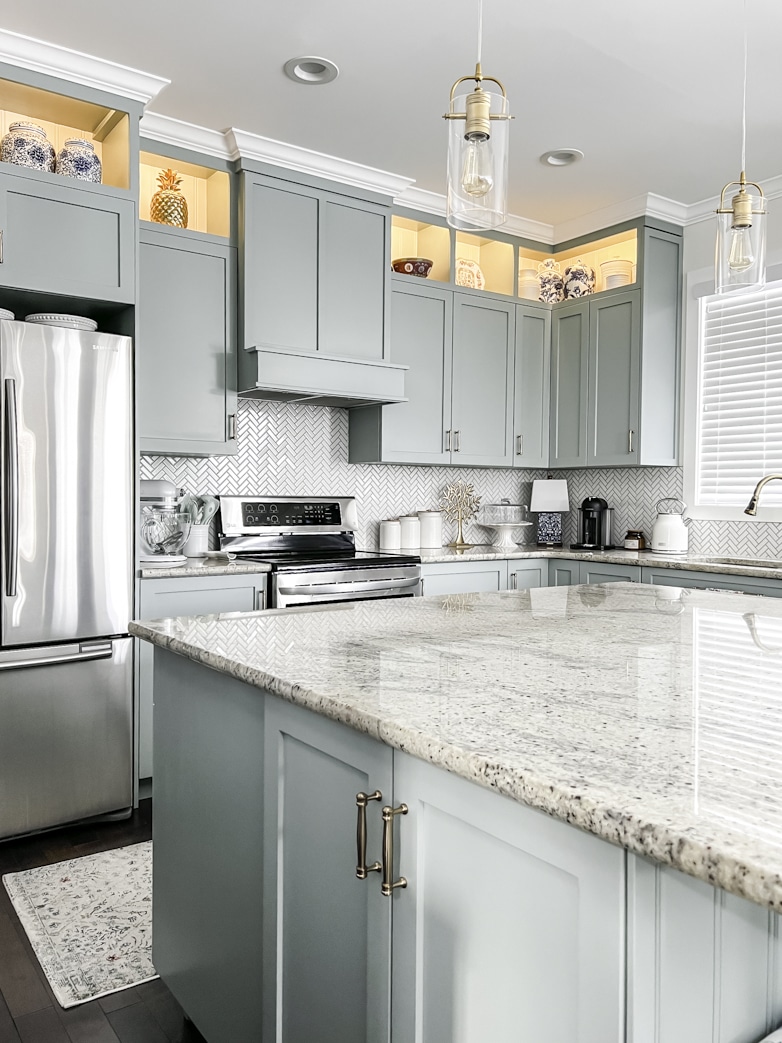
To close the last gap above the cabinets, I built one continuous box in an L-shape. I used beadboard for the back of all the boxes. Painting the beadboard white made the boxes a little lighter and brighter. I also think the items displayed in these openings will show better with a white backdrop.
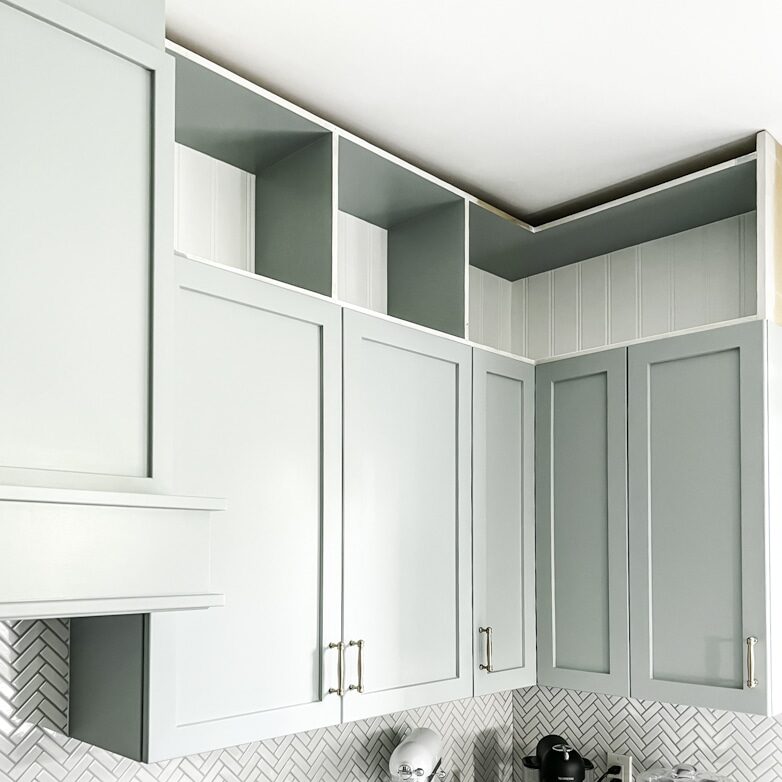
The dividers inside the boxes were positioned to mimic the size of the cabinets below them. I only skipped one on the far right (the short side of the “L”). I think it looks better flowing together with the corner.
Installing Trim Detail on the Cubbies Above the Kitchen Cabinets
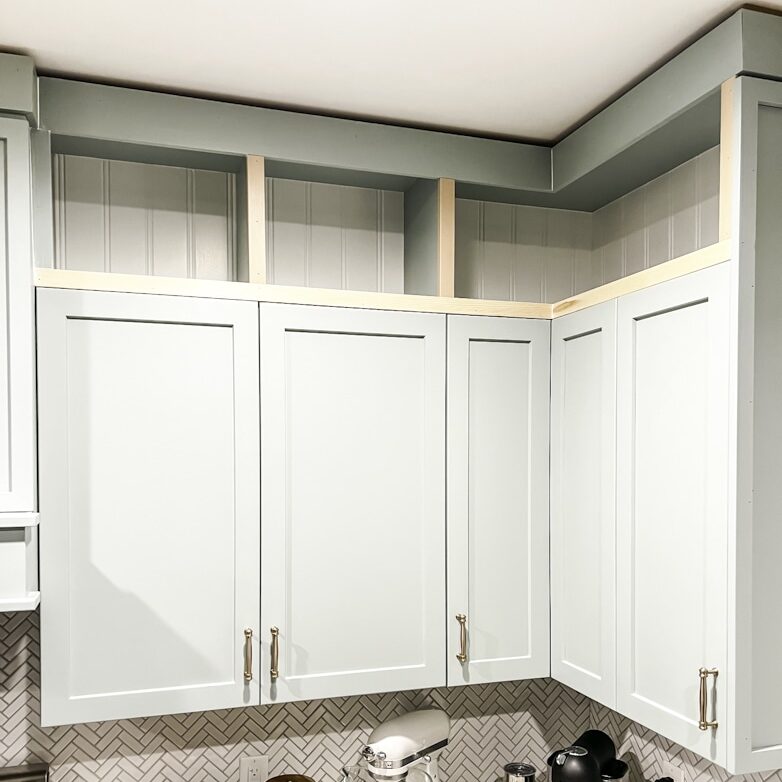
To create a face frame, I began with a 5-inch wide heading. The heading covers the top 2.5 inches of the box openings. I’ll explain why shortly!
I covered each vertical divider with a 2-inch wide wood trim piece to make them appear double as thick. All joints were filled and covered to blend together seamlessly.
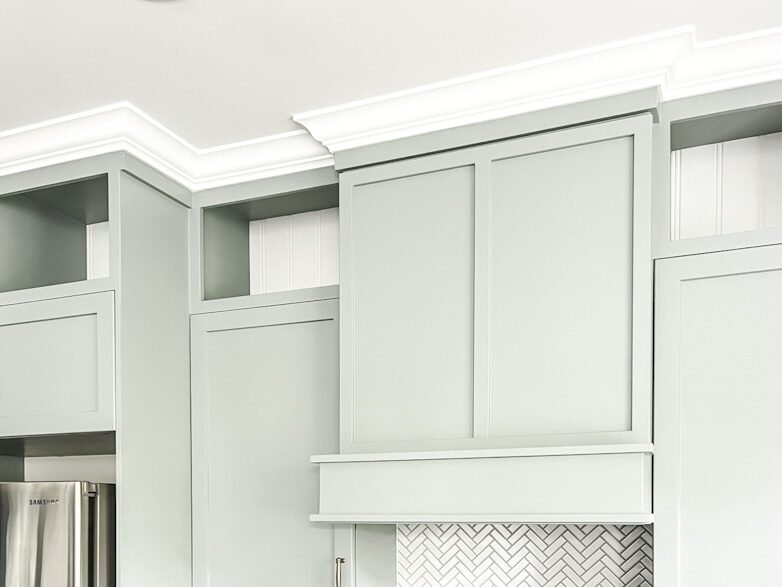
The crown molding was the last trim to be installed. I know many of you will ask why I painted it white and not the same color as the cabinets (which is very fashionable at the moment).
The truth is that I would’ve loved to paint it green, but in the corners where the cabinets end, the crown molding continues all the way to the other side of the living room. Changing to another color in a corner would look extremely odd.
I think they look fine in white. What I love most is the interest the crown molding creates by outlining all the pieces with different depths. It would have been much less appealing if it ran across in just one continuous piece, don’t you think?
Installing Lighting in the Cubbies above the Kitchen Cabinets
Finally, the fun part I have been looking forward to – lighting up the new cubbies!
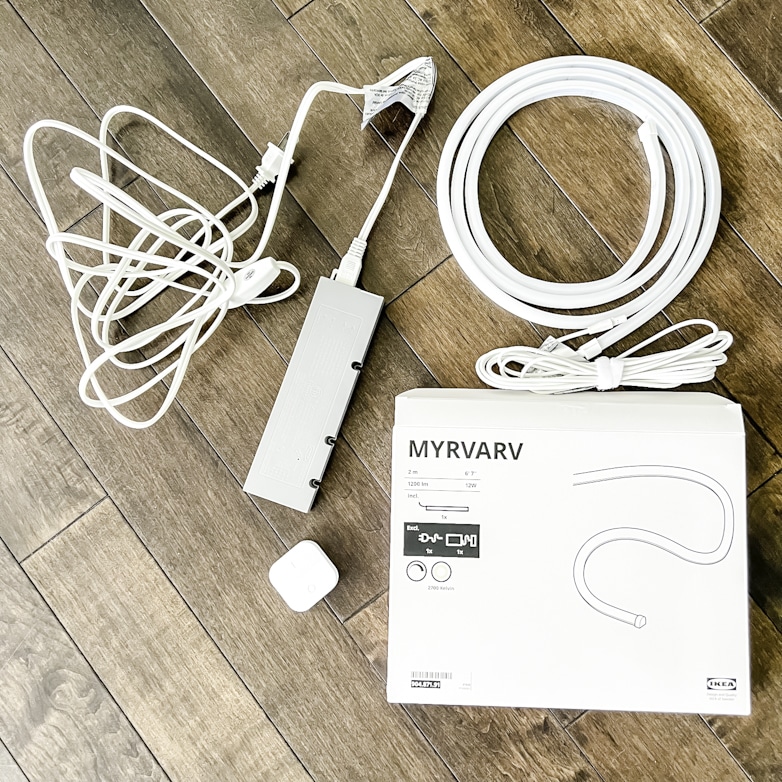
I found everything I needed at Ikea. You can see one of the two LED strips I used in the photo above. Each strip is encased by a tube that diffuses the light evenly instead of reflecting individual light dots. I love that! Also in this photo is the power unit, which plugs into the wall socket and can connect up to three light strips. Lastly, the small white square is a remote on/off button that can be mounted to the wall.
Let’s back up a few steps!


Before I installed the trim, I made these openings to feed the lighting tubes through.
Remember the 2.5-inch overhang of the header? I mounted the lighting tubes onto the back of it!

This is how it looks from inside a box. Not super neat, but not visible at all from any other angle.
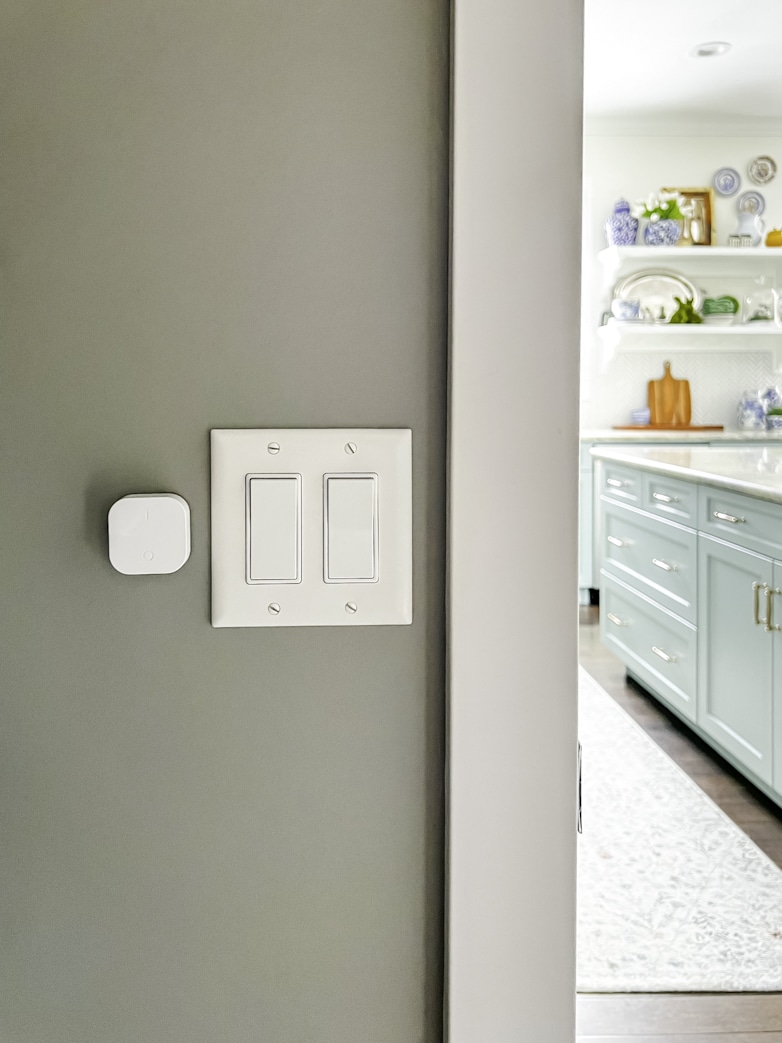
I mounted the remote on/off button next to the light switches in the pantry. It functions as just another light switch; very convenient and functional!
In a previous post about creating a custom range hood, I explained that the front needed to open easily to access the inside. Below you can see the reason why!
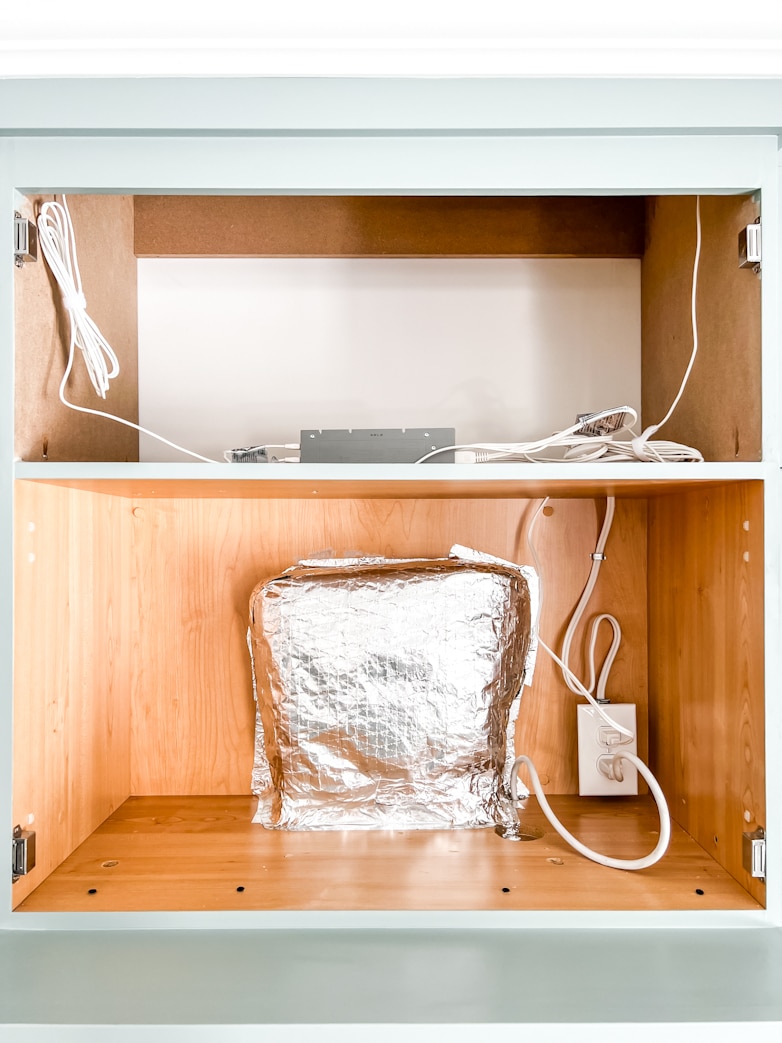
This is where the power source and unit connecting the two light strips go.
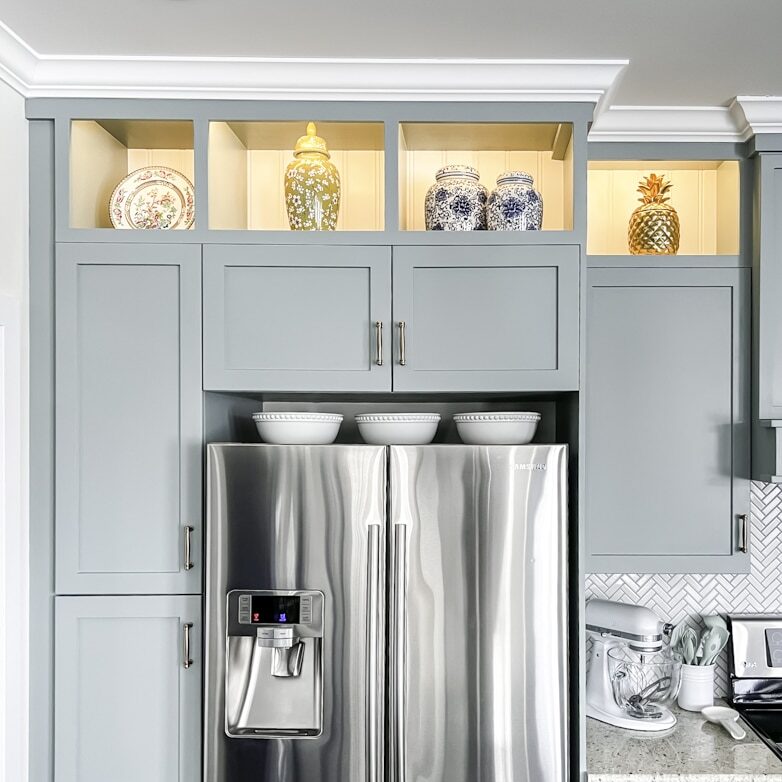
Voila! We have light.
The lighting looks very yellow in the photos, but in reality, it looks much more natural. It creates a cozy ambiance at night and even during the day.
Decorating the New Cubbies
I am sure you can imagine how much fun I’m having styling this space!
In the photos above and below, you can compare the same view with the lights off and on.
Do you love it as much as I do? I am obsessed with this new look!
Let’s see how the other side looks…
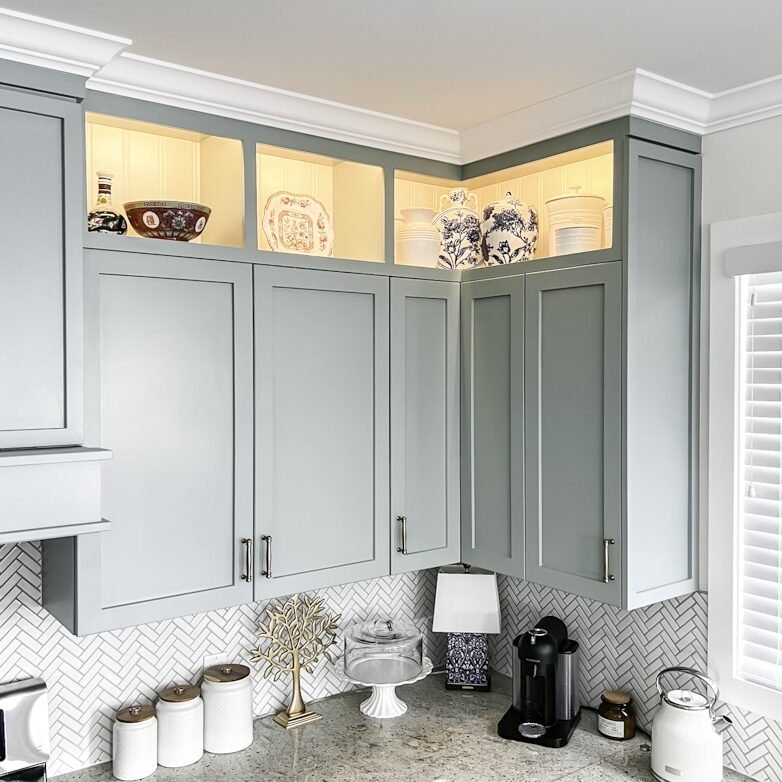
A wider angle, as seen from standing below.
I should mention that I still don’t have a brilliant solution for that silly gap above the fridge. For now, I’m using three bowls to fill the space and to make it look less awkward.
If you want to see even more, look out for my next kitchen update when I give the three chairs at the island a completely new look with paint and fabric!
Until next time, happy DIYing!
Posts Related To Building Cubbies Above Kitchen Cabinets
- A Super Inexpensive Makeover with Painted Kitchen Cabinets
- A DIY Kitchen Faucet Replacement Shown in 9 Steps
- Open Shelving in the Kitchen to Replace Cabinets
- Updating Kitchen Lighting on a Small Budget
- How to Enclose the Open Space Above Cabinets – Simply 2 Moms
- How to Enclose the Space Above Kitchen Cabinets – Angela Marie Made
- Extending Kitchen Cabinets up to the Ceiling – Thrifty Decor Chick
Gorgeous! Which paint color did you use on the cubbies?
Thank you! Same color as the cabinets, Halcyon Green by Sherwin Williams.
I would place a piece of trim between the cabinets and the fridge. This way, it could be removed in the future if needed to accommodate a taller fridge.
I totally agree! It’s just one of those small fixes that never got done.
This looks so well done and like it has been a part of the kitchen forever. Honestly I would have thought I would have liked the beadboard painted green like the cabinets, but the white looks so fresh and perfect with the crown moldings…so pretty! Such an awesome job!
Thank you so much, Stacey! I appreciate your kind comment!
Great job, it looks beautiful!
For above the fridge you can add a piece of trim board mounted with a piano hinge or heavy duty velcro.
You did a fantastic job! It looks amazing! Are the light strips on the top of the cabinets, I couldn’t really make it out from the pictures. The crown moulding really tops it all off.
Thank you, Heather! The light strips are inside the cubbies on the back of the 2-inch overhang at the top.
Your cabinets look amazing. Your kitchen is progressing so well. Really enjoying the transformation. I love that you now have a place to display your vases, etc.
Thank you so much, Carol! I do enjoy decorating these!
I LOVE IT!!! Just makes the kitchen look complete with a little pizazz!! Nice job!
Thank you so much for your kind words, Karolyn! I’m so happy you like it!