Making A Centerpiece to Decorate The Kitchen Island In 11 Easy Steps
Do you need ideas for a centerpiece to decorate the kitchen island? My oversized kitchen island was lacking something, but I found a solution! Let me show you!
Our 6 x 6-foot kitchen island makes any decor or flower arrangement look lost.
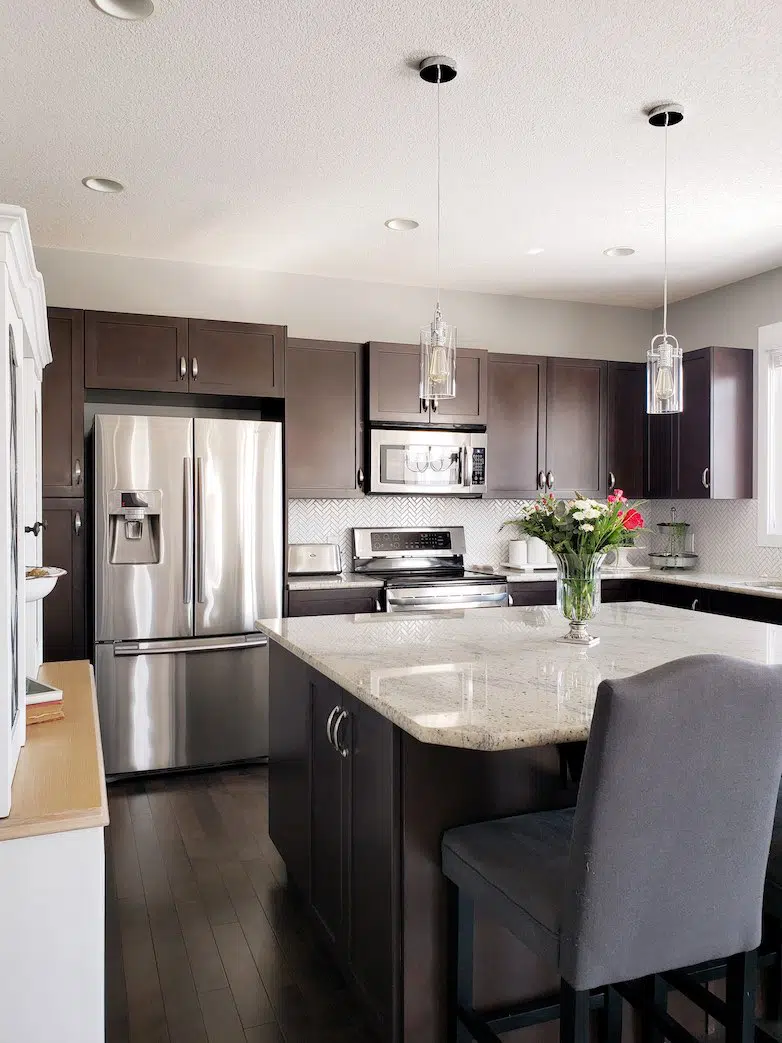
This photo from before I painted the kitchen cabinets is a good example. The vase and flowers in the center of the island look tiny, which is not the case.
Yesterday, I thought of a plan! The island needs something to “ground” the decor or flower arrangement I want to display. It needs a centerpiece!
I already had the perfect Dixie Belle products to finish my centerpiece with, and then I remembered the round wooden board I saw at Home Depot a while back. I couldn’t wait to get started!
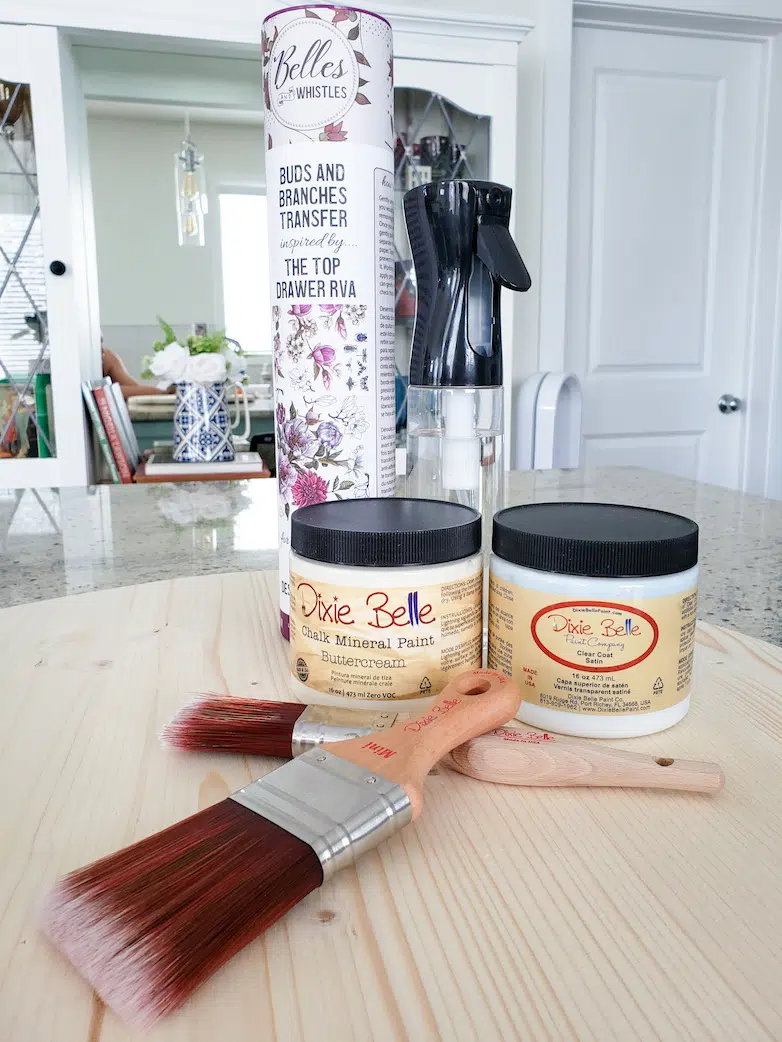
Products Needed To Make a Centerpiece for the Kitchen Island
- Dixie Belle Chalk Mineral Paint in the color Buttercream
- Belles and Whistles Buds & Branches Transfers (discontinued)
- Dixie Belle Clear Coat Sealer
- Continuous Fine Mist Bottle
- Dixie Belle Synthetic Bristle Brushes
- Elmer’s Wood Filler
- Sanding Block
- 24-inch x 2-ft Smooth Wood Panel
Step 1
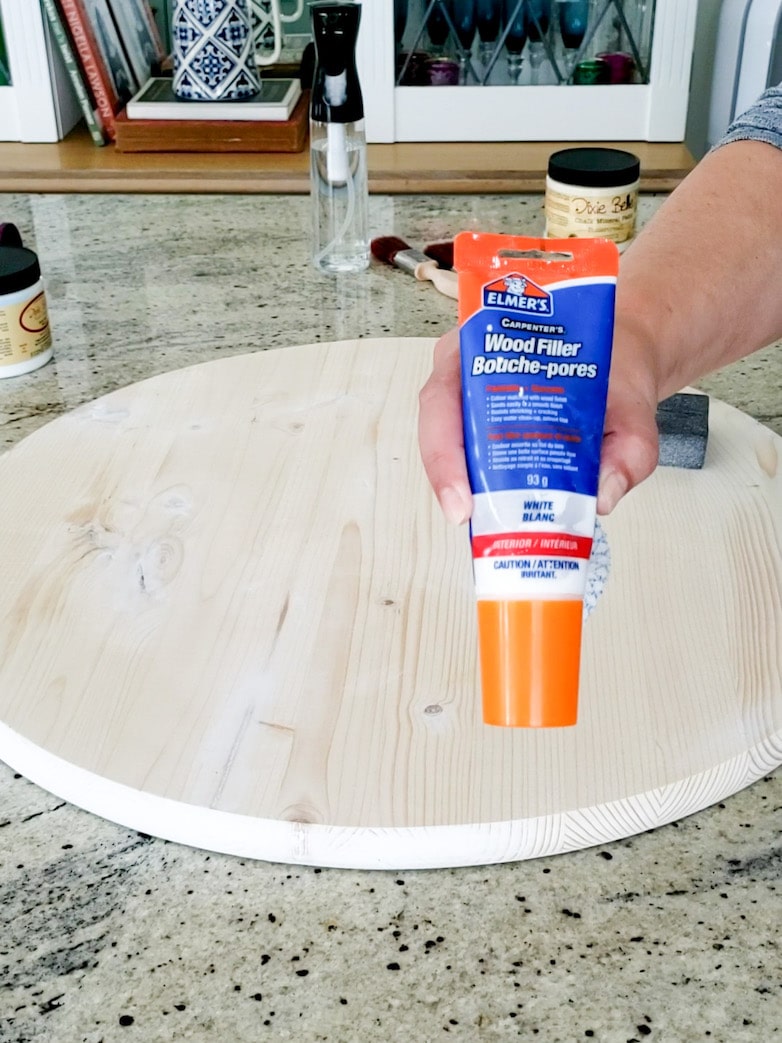
I filled the wooden panel’s small holes and imperfections with Elmer’s Wood Filler.
Step 2
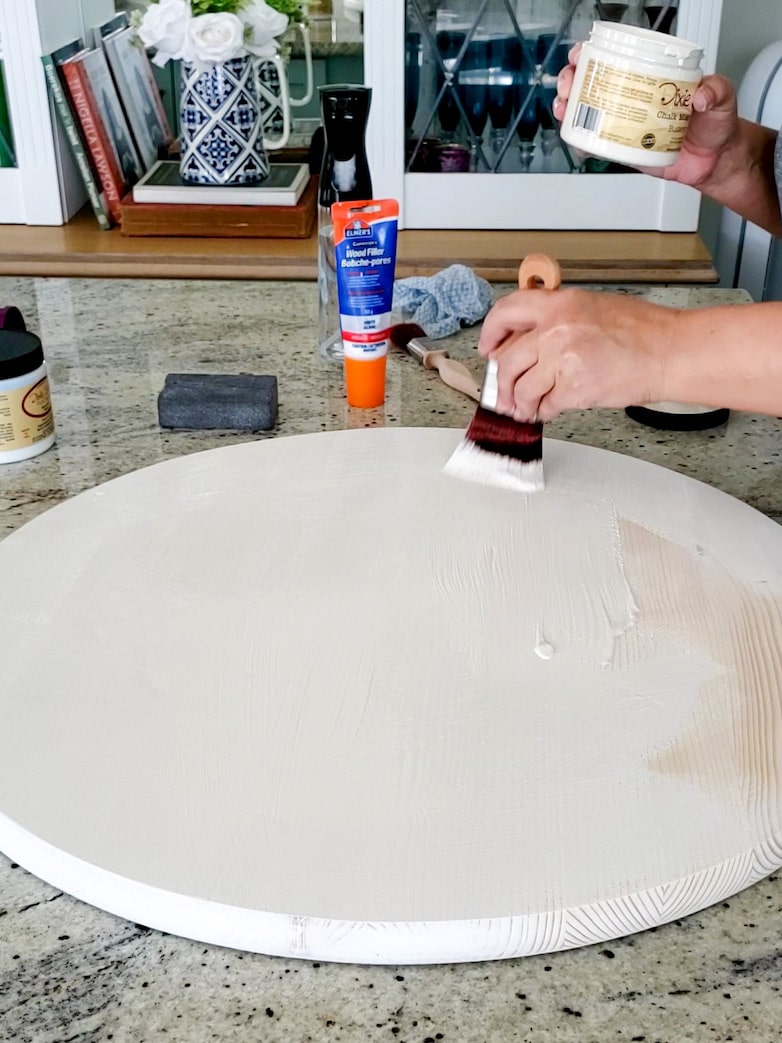
Without priming first, I jump right in with the first coat of chalk paint. It has excellent coverage and works better than most primers.
Step 3
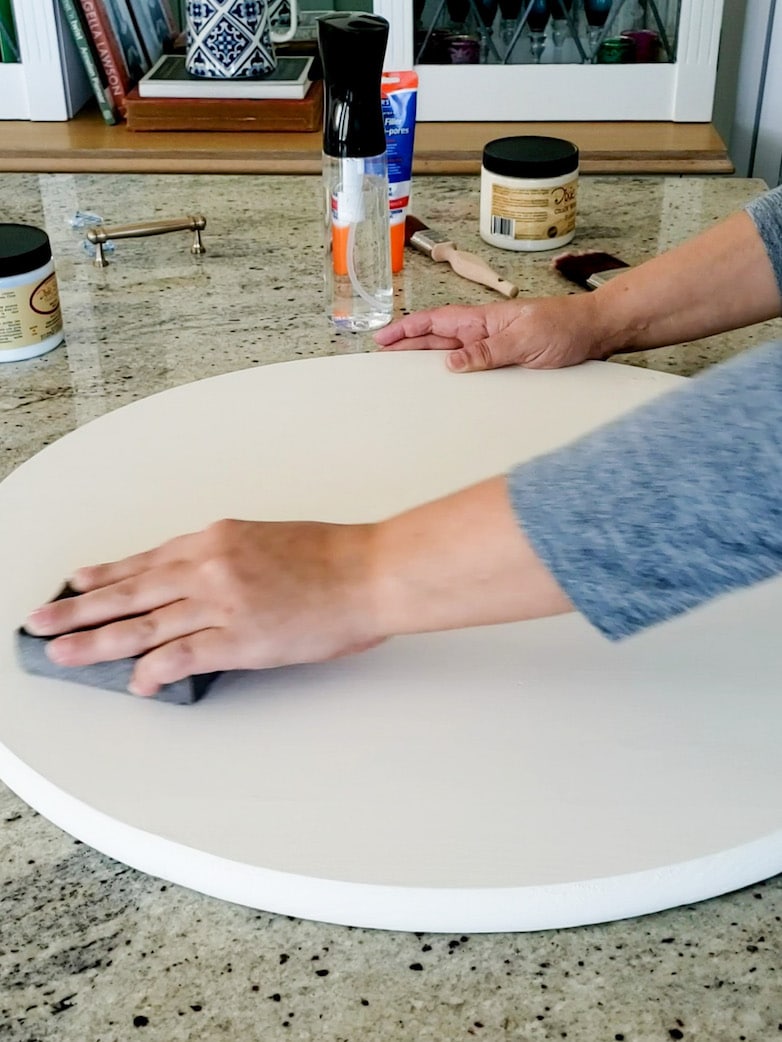
Painting raw wood opens up the wood grain and creates a rough, prickly surface when dry.
A light sanding takes care of that and leaves the surface silky-smooth.
That sanding after the first coat of paint is one of my favorite things to do! It’s so satisfying when, in an instant, the wood goes from super rough to super smooth.
Step 4
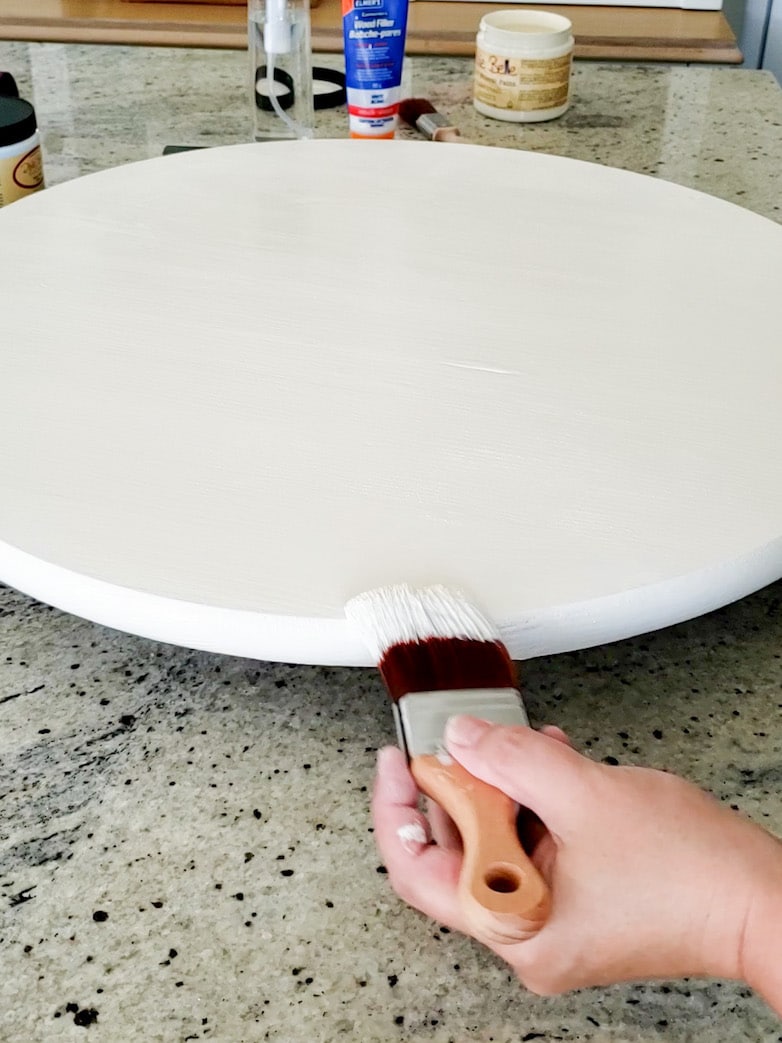
Time for the second coat of paint. Chalk paint tends to feel slightly thick and dry, but a quick spray with the continuous misting bottle will make it glide on smoothly.
Step 5
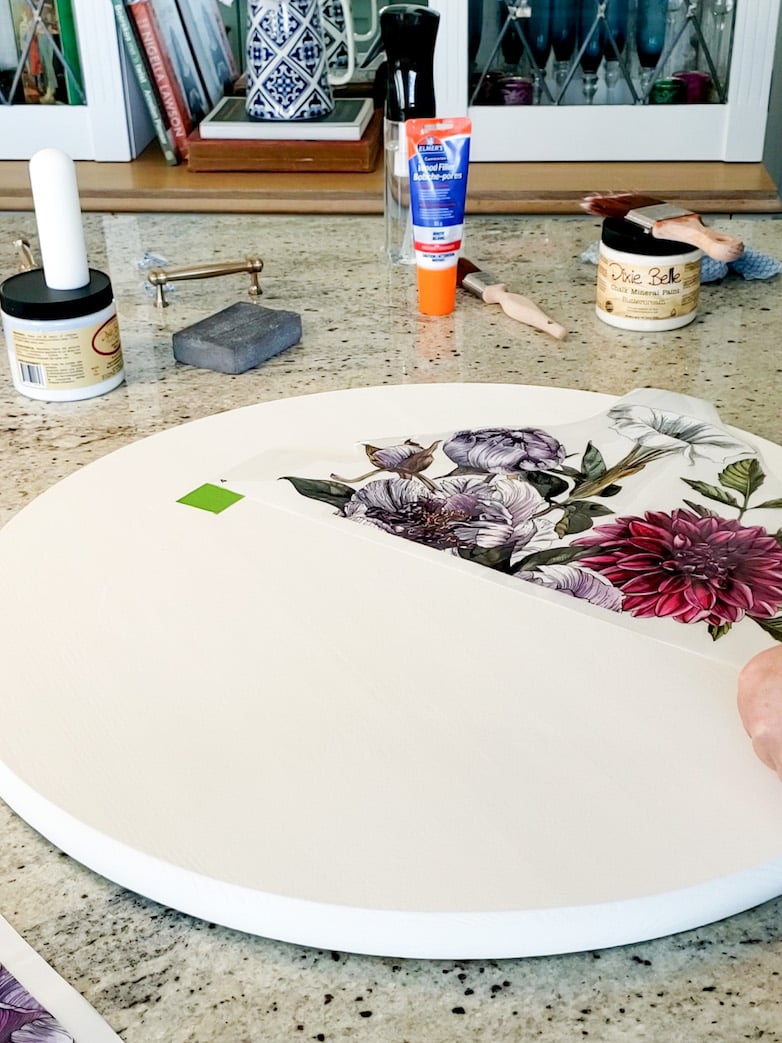
This is the fun part!
Dry-fit the first transfer piece to position it exactly where you need it to be. I used two pieces of painter’s tape to mark where to place the corners when permanently setting it.
Step 6

Carefully peel away the paper backing of the transfer image.
Step 7

Place the corners of the plastic cover next to the tape markers you made. Once in place, secure the transfer’s plastic cover sheet with a few pieces of painter’s tape.
Step 8

You will need a flat, hard but not sharp tool to apply pressure on the transfer, which will stick it to the board and “transfer” it from the plastic cover sheet.
Step 9

Slowly lift the plastic cover as you scrape, ensuring the transfer doesn’t pull away from the board.
Step 10

Time to line up the second part of the image with the first piece.
Pull the paper backing away only on the side that needed to line up. Once the edges line up, slowly remove the rest of the paper.
Repeat steps 8 and 9.


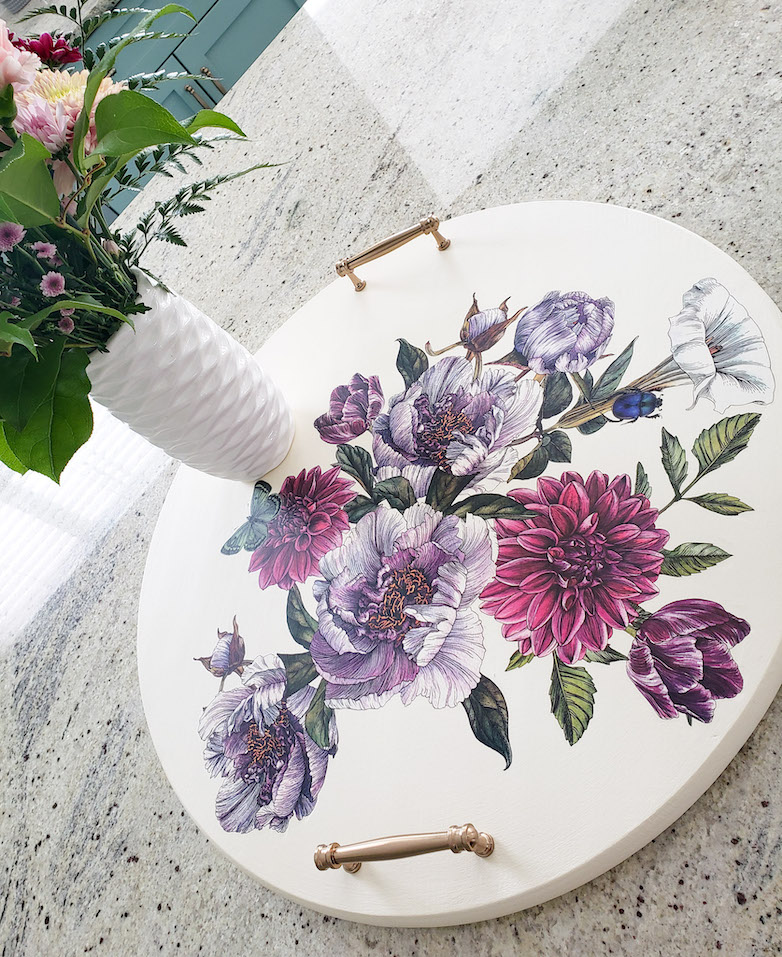
I added this little bug and butterfly that was also part of this transfer set. Aren’t they just the cutest?
Apply a coat or two clear sealer to protect the transfers and paint finish from spills or kitchen messes.
Step 11

I added two cabinet door handles on opposite sides of the panel as a finishing touch.
When measuring and marking where to drill the holes, do it on the bottom so as not to ruin the upper side.
A Centerpiece to Decorate the Kitchen Island for Spring
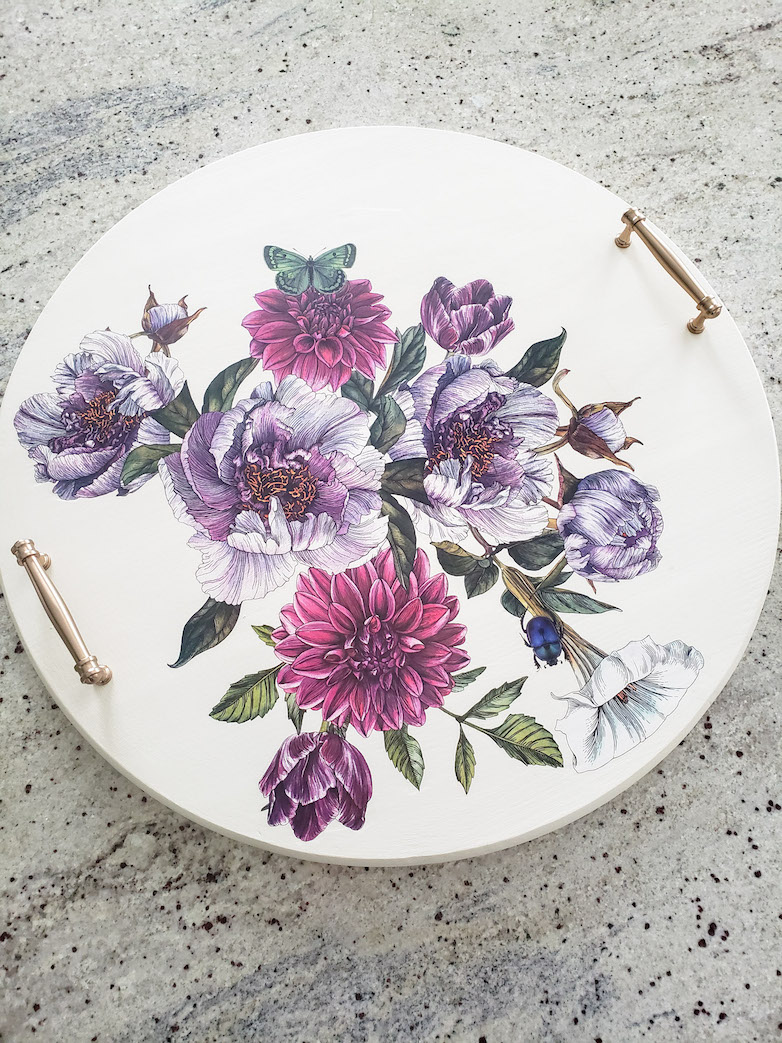
Judged by the transfer design I chose to use, I think it might be safe to say I have spring fever!
I am so ready for colorful flowers and butterflies and cute little critters.
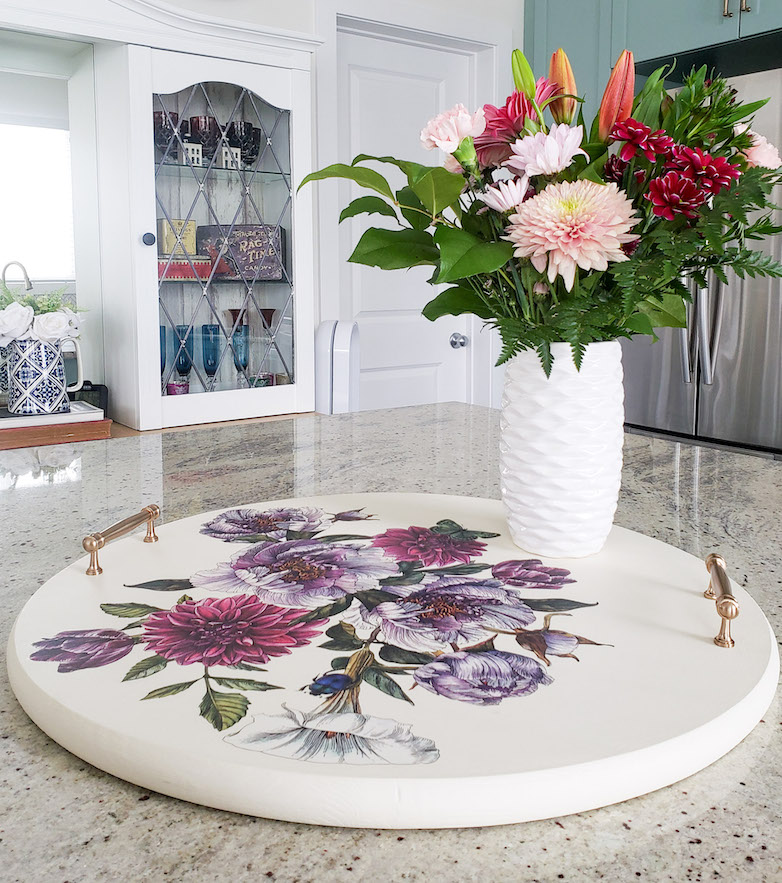
This centerpiece to decorate the kitchen island took me less than a day to complete, and that is always a win in my book!

I would love to hear what you think! Feel free to comment below, and please subscribe if you enjoyed this post!
You May Also Like These Paint Projects:
- A Vase Makeover Using Clay Paint
- This nightstand makeover
- Two fun projects using stencils
- How to paint a mirror frame
- Aging terracotta pots with paint
- Two end tables painted with the same paint but look completely different
- Cindy’s creative layered chippy paint finish
- Tammy’s painted furniture with transfers
Gorgeous Marieza! I love this! I want to make one for my grow room!
That would be awesome, Melba!
Marieza, I would like to make one of these for myself, and even as gifts. Can the solid piece of wood be found at Lowes or Home Depot?
This project turned out beautiful!!! And it really doesn’t look like a complicated DIY.
If you have time to add this to the Friday with Friends party I would be so happy:)
https://myhubbardhome.com/friday-with-friends-jump-into-spring-link-party/
take care,
Rachelle
Hi Rachelle! Yes, I got mine from Lowe’s. It really is an easy fun project. Have fun!
Stunning! You’ve absolutely inspired me to try something similar. Thanks!
You are very welcome, Rachel. Thanks for stopping by!
What a great idea! You’re so creative Marieza. The pattern you chose is so pretty.
thank you so much, Marie!
I love this project. The transfers are the perfect touch to bring in spring. Such a beautiful project!
Thank you, Tammy! I am so ready for spring!
Perfect addition!
Thank you so much, Diane!
So very pretty! What a great way to begin spring!
Thank you, Leslie! I think we can all use a little spring right now.
Gorgeous, I definitely want to try making that tray! Thank you for sharing the great idea.
I am so glad you like it! Thank you for your sweet comment, Sheri!
This looks amazing! I love it, I think I am going to try to make one! I love the flower decals/transfers, they looks like an old Masters still life painting! Have a wonderful week.
Thank you so much, Elizabeth! I do agree, they are gorgeous.
Your TRAY is beautiful I love it!!!
Thank you so much, Debbie! I am so glad to hear you like it. It’s great hearing from you!
I love the beautiful centrepiece that you have created Marieza! May it bring you years of pleasure. 🥰
Thanks, mom! It was a fun project. I was looking for an excuse to use these beautiful floral transfers.
It’s beautiful Marieza, and what a brilliant idea! I love the way it looks – and makes your flowers look – on your island, and it looks super fun to make too. I’m going to have to try some of those transfers. Thanks for another great idea and easy tutorial! Happy Last Day of February!
Thank you so much, Barbara! Somehow I knew this floral design would appeal to you, lol!
This is so lovely. My kitchen island always ends up covered in ‘stuff’ so there’s never any room. Anything I put there ends up being moved out of the way. It looks really great though.
I know all about “the stuff”, Carol! It’s a constant battle here as well! Thanks for stopping by!