A Vase Makeover Using Clay Paint
Most of us are familiar with chalk paint, but have you ever heard of clay paint? Dixie Belle recently launched Terra Clay Paint in a wide variety of the most beautiful colors! I tried it out for a vase makeover and would love to tell you all about it! But let me start with the story of the vases…
What I’m about to tell you next is so farfetched that you might not believe me! About four years ago, I bought two decorative vases in an end-of-season clearance sale. When the vases arrived (I shopped online), they were in a box with zero packaging material! Needless to say, it was a box filled with a thousand ceramic pieces!
As one does, I let the retailer know, and they replied that those two vases were the last ones left, and I was refunded. In a moment of madness, I decided I would fix them! Looking back now, I can only shake my head. Firstly, I can’t imagine why I liked these silver-painted vases so much and secondly, how I spent almost two solid days rebuilding them!
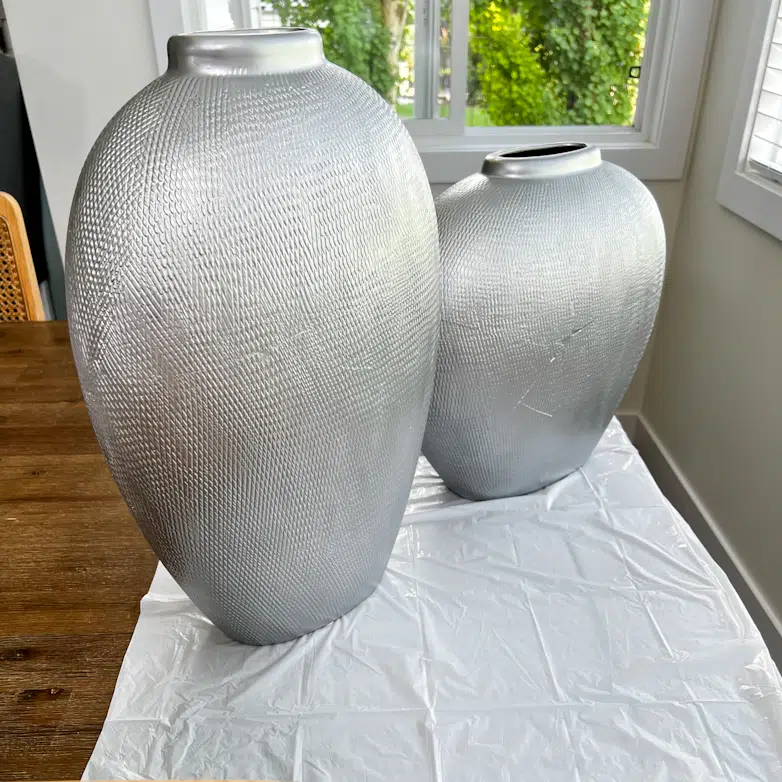
Given how smashed up they were, I think I did a pretty decent job putting the pieces back together. Each vase had one “good side” that could face forward, hiding most of the imperfections.
My love for them didn’t last, and they ended up in the storage room. You might remember seeing them on the top shelf when I reorganized the storage room earlier this year. I knew there might be a vase makeover somewhere in the foreseen future, and so it happened this week!
Changing The Texture Of The Vases
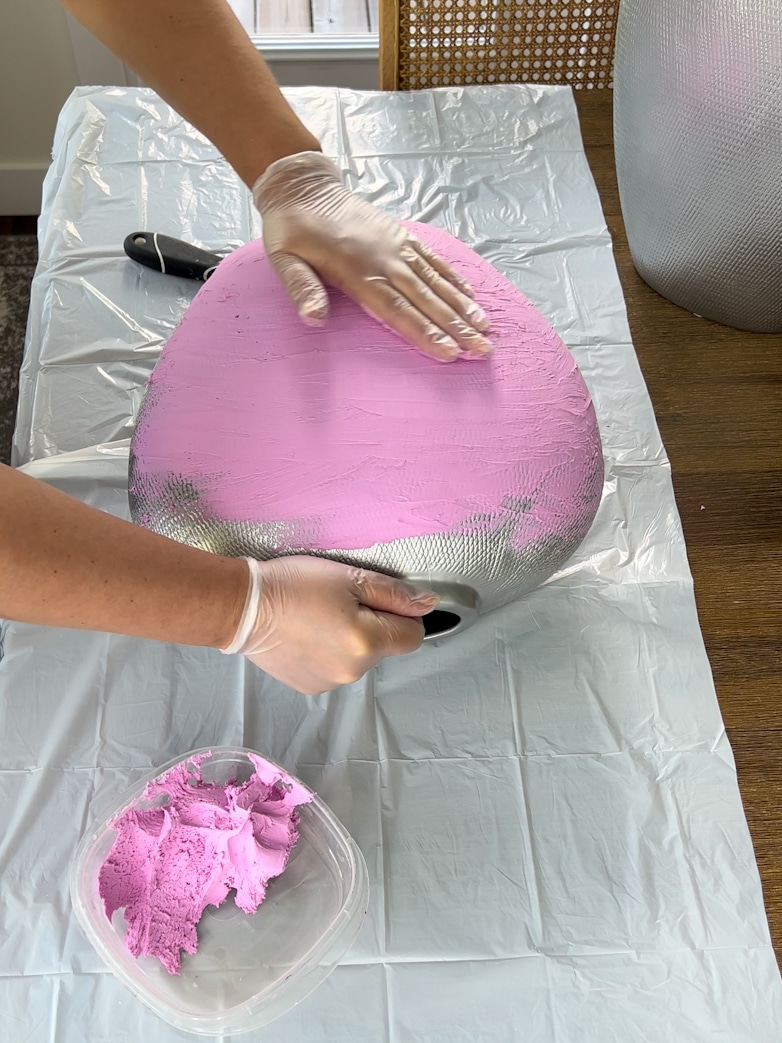
I always imagined that when I got to giving the vases a makeover, I would cover them in drywall compound to make them smooth and hide all the glued cracks.
During a previous project, I asked my dear husband to buy spackling, and all he could find was a massive tub. Since spackling dries much faster than drywall compound, I thought it would be perfect for covering the vases!
I used a putty knife to smear the spackling on, but it didn’t take long before I realized it would be much easier to use my hands! It’s a huge mess but a lot of fun.

Once the spackling was completely dry, I used a 240-grit sanding sponge to sand it smooth. I wanted it smooth but not perfect. The clay paint inspired me to give the vases a “clay pot” look with humps and bumps and imperfections.
Painting With Clay Paint
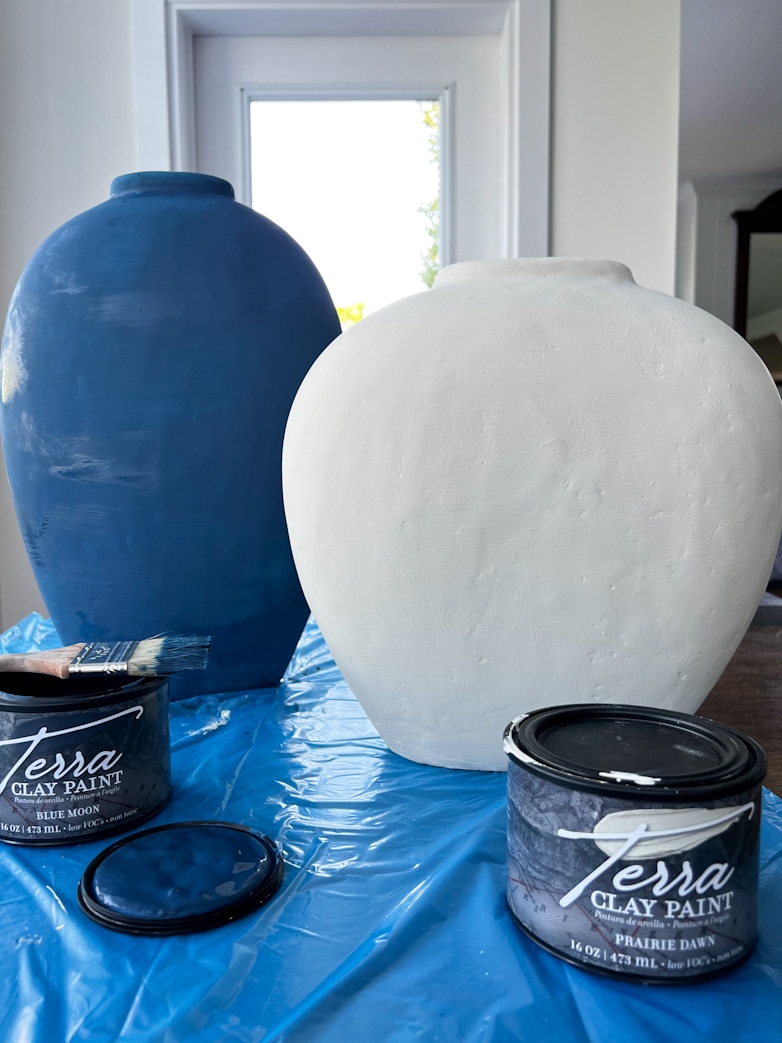
I used the color Blue Moon on one vase and Prairie Dawn on the other, mainly because I liked both and couldn’t decide which color to pick! In the end, the blue won, and I painted both vases blue.
This new paint had me really curious, and I couldn’t wait to try it out. My verdict? It is awesome! It is very similar to chalk paint, but you definitely experience the feeling of clay as it dries to a much lighter and dull color.
Sealing The Clay Paint
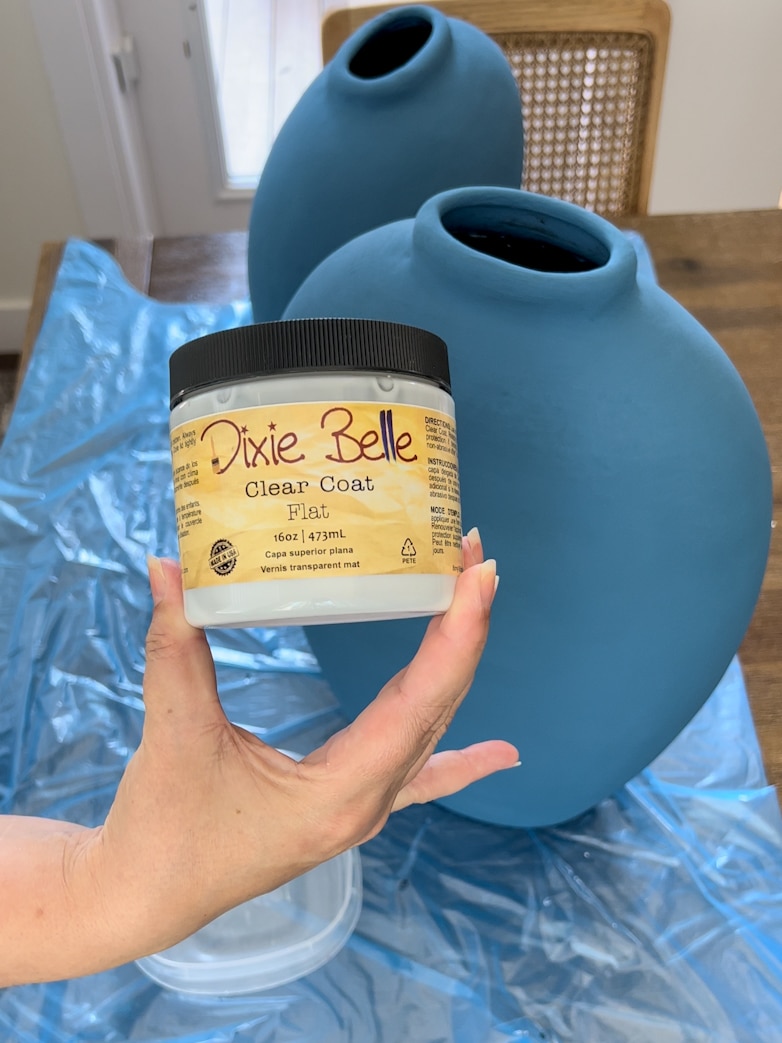
It is important to seal clay paint! The paint can be reactivated with water, no matter how well or long it has cured. I used a Flat Finish Clear Coat and applied one thick coat.

The water in the sealer changes the color back to its original vibrance.
The Vase Makeover End Result
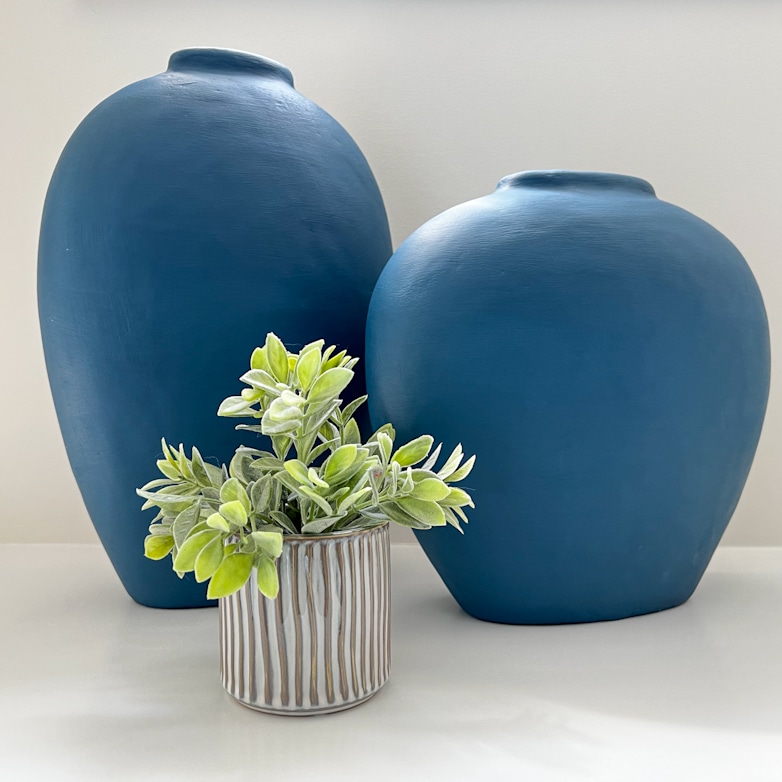
I can’t say that I’ve ever seen blue clay pots, but I like them! This blue doesn’t quite match all the other blue accents I have in the living area, but it is a gorgeous color nonetheless.

I will probably move them to the entryway or study where there are no competing blues.
I would love to hear what you think! If this blue is not your cup of tea, you must see the other colors you can get in Terra Clay Paint. I love so many of them, and I know you will too!
Until next time, happy painting!
Wow! You did an amazing job of these. You know, if I had seen those in a thrift store I would have walked past but now I want to go find some. They look wonderful. Thank you for sharing this.
This is a very practical makeover idea for pots that became outdated. ……of which I have a few! The blue is beautiful and unique. I’ll buy it! 👏🏼👏🏼
I can’t wait to see the colors available
Fabulous!!!
Totally using your idea🤩
Hi Kim!
Yay! I am so glad my project inspired you.
Happy weekend!
That shade of blue is beautiful. You did an excellent job bringing them back to wholeness. I just read an article in which a homeowner suggests that it’s ok to have different shades of the same color in one room. Too much matching detracts from the decorative quality of a room. Of course that was just her opinion but it gives you permission to allow for change. I really enjoy your site, it is very easy to navigate & find what you’re looking for.
Hi Sharon!
I’m glad you like them! I totally agree about using shades of the same color together.
The problem with my two blues is that they are equally “strong”. I took a few photos and they do not look good together.
It makes me SO happy to hear that my site is easy to navigate.
I appreciate this feedback more than you will ever know!
Happy weekend!
They look beautiful. Definitely prefer the finished product over the original.
Hi Suzie!
Thank you! I’m so glad you like them.
Happy weekend!
Wow – you are so creative – they look beautiful! Can’t wait to see how you style them. Thanks for the tutorial. I’m bookmarking so I can update some of my outdated beauties. 😊 Happy Weekend!
Thank you so much, Barbara!
Happy weekend!