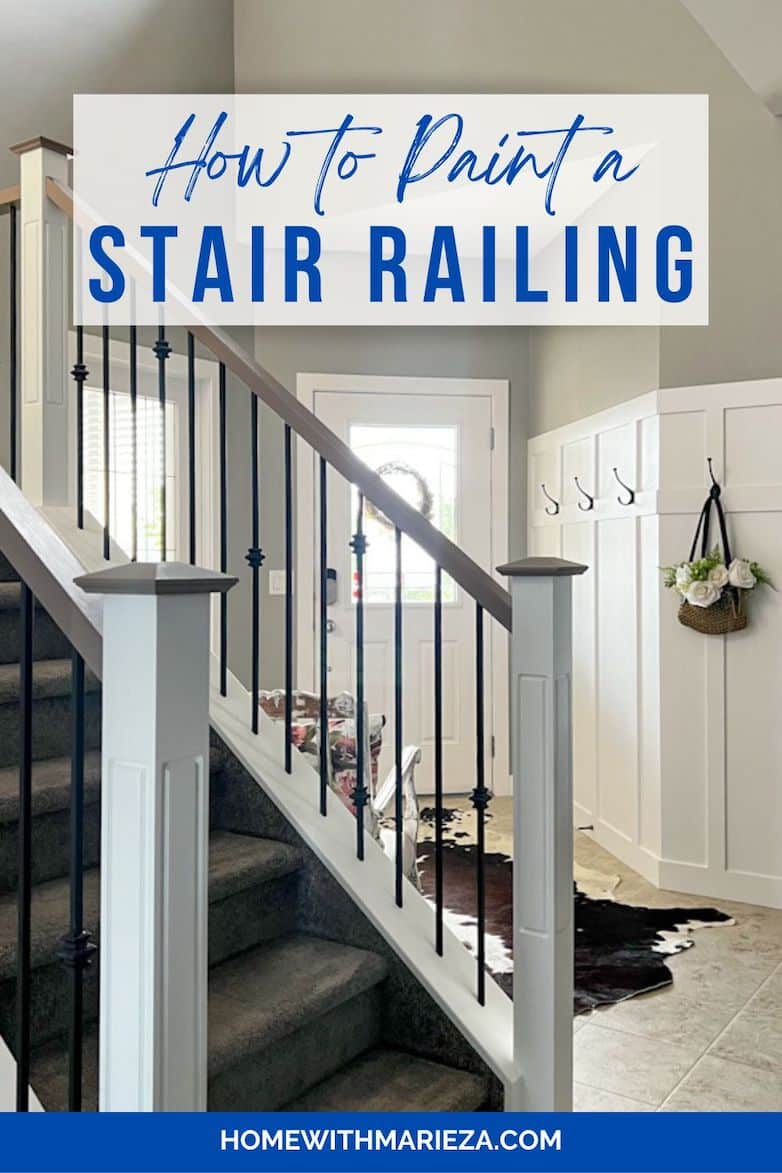
How To Paint A Stair Railing
The battle against all the reddish-brown stained wood in our home continues! I’m happy to say I’m on the winning side.
When I first painted and later remodeled our living room built-ins, I got rid of a big chunk of the dark wood finish. Let’s not forget the kitchen cabinets, now painted a lovely, serene light green color!
These past few weeks (yes, plural), I painted the stair railing! I painted ALL the woodwork, from the basement through the main floor and up to the upper level. The one-week project optimistic me envisioned turned into a two-and-a-half-week project!
If you, like many others, love this dark stain color, I get it! It’s just not for me anymore.
Planning To Paint The Stair Railing
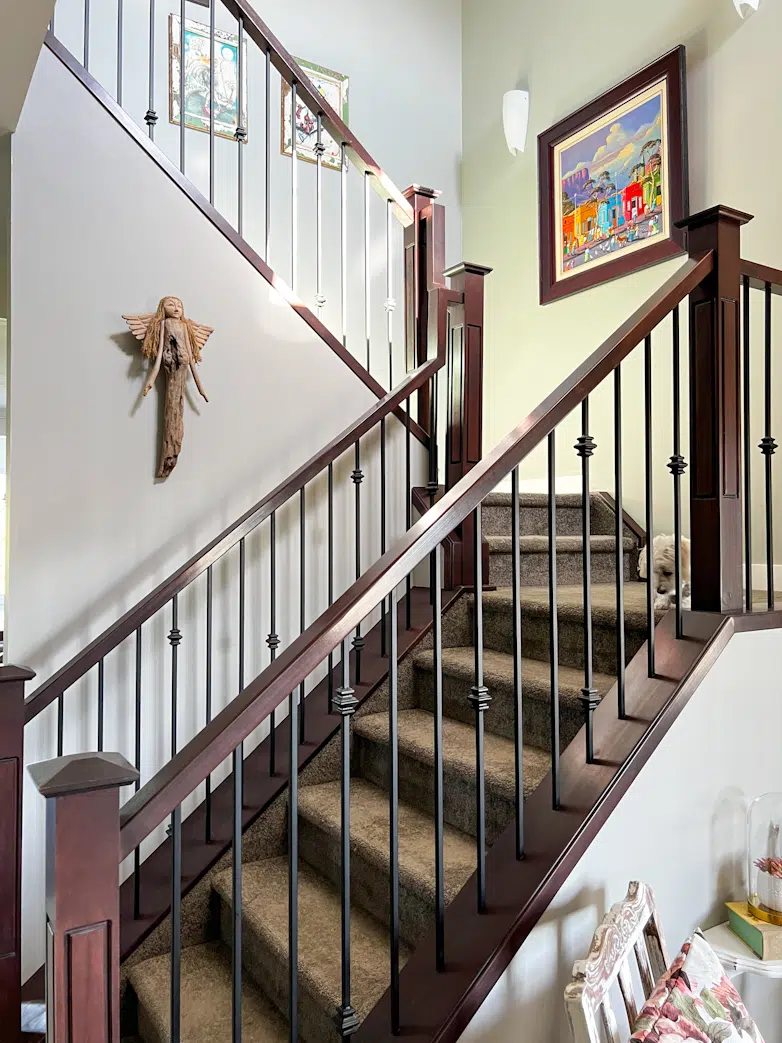
Planning this makeover began a long time ago. I refinished this small section leading down to the basement (as a test run) TWO years ago!
I stripped and restained the handrail and newel cap while painting the post and base a crisp white. My original plan was to carry this look through to all the other rails.
Removing The Old Finish
Sanding with the orbital sander indoors wasn’t an option. I also tried to avoid dealing with gloopy paint stripper and decided to remove the old dark stain with a heat gun. I imagined the old finish bubbling up beautifully, ready to be scraped away and then just giving the wood a very gentle hand sanding. Nope! That’s not how it went at all!
No bubbling, not even a little. All I achieved was burning one of my knuckles and setting off the smoke alarms twice! Can you picture the dog and cats running around hysterically, not knowing what’s happening? Sigh…
Plan B was paint stripper, which turned out to be not that bad at all. I managed to apply just the right amount to get the job done but little enough to make clean-up easy.
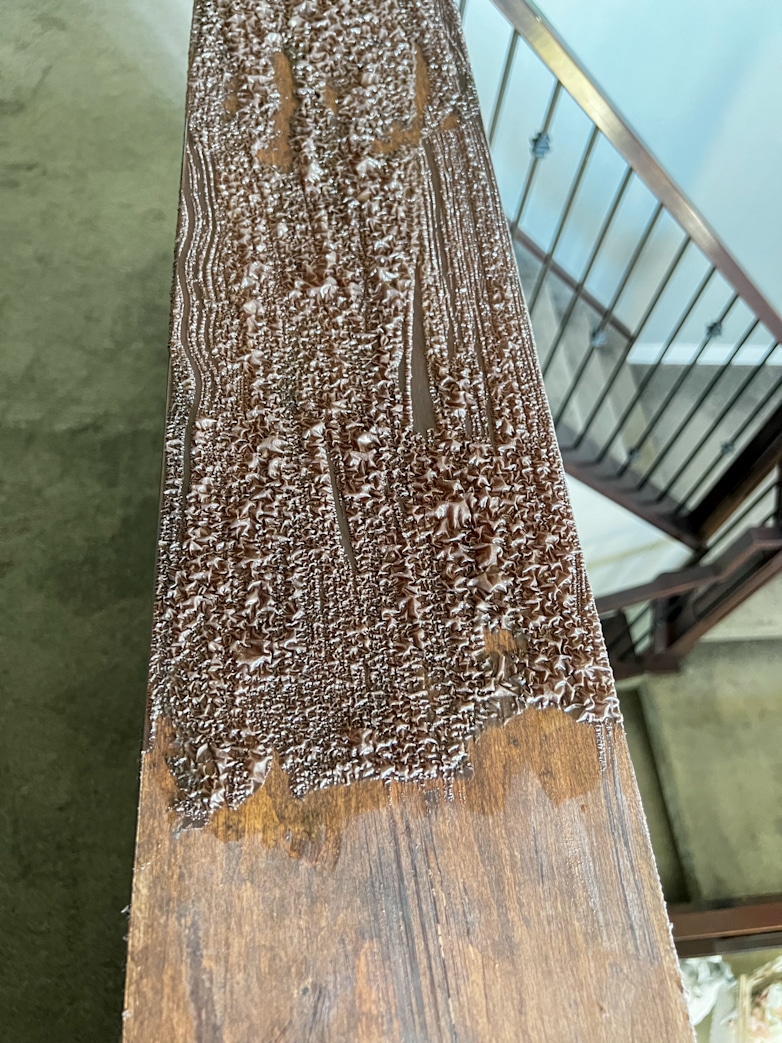
Would you look at that bubbled-up stain? It worked so well!
However, it stripped away most of the finish but left quite a bit of color on the wood. Cleaning the rails back to bare wood would have taken an awful lot of sanding, which I didn’t want to do.
I decided to save myself a lot of work and paint it a medium to light brown, resembling the color I would have stained them. Since handrails get a lot of daily traffic, I decided to strip away the top layer on all of them anyway before painting.
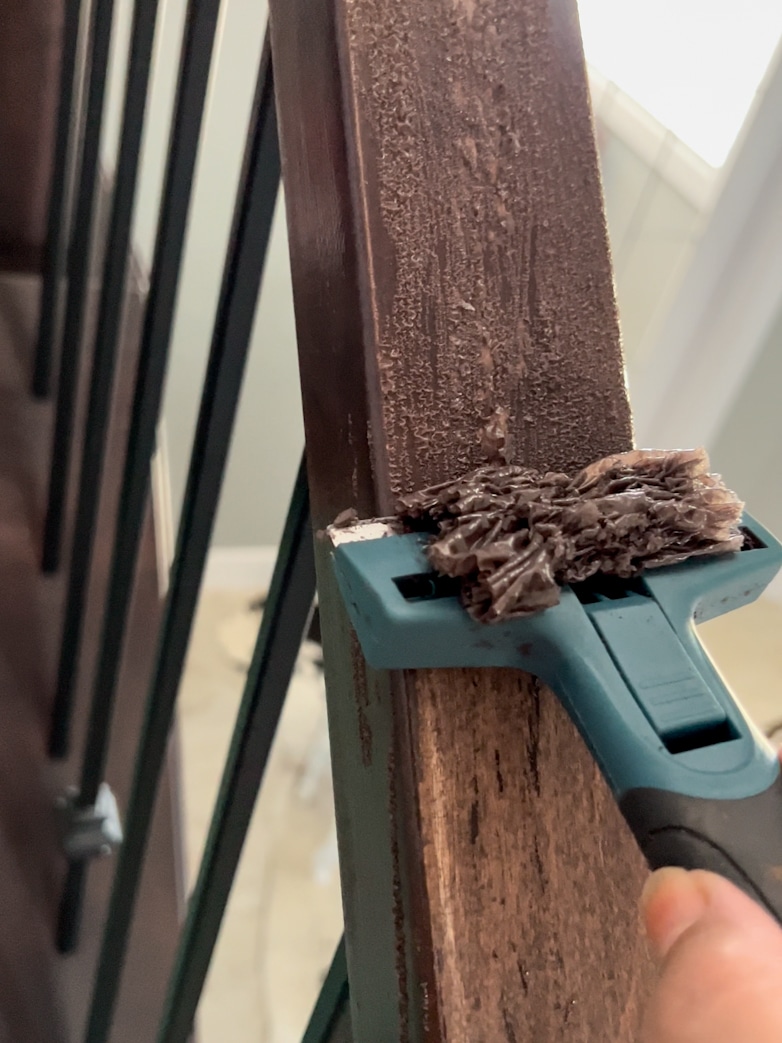
I found the neatest little tool at Home Depot to scrape away the bubbled-up top layer. It’s a 3-inch thin, sharp blade with a comfortable soft-grip plastic handle that made my work much easier!
After removing most of the stain from the handrails and newel caps, I gave them a light sanding. The newel posts and bottom sections were all lightly scuffed to give the primer a better grip.
Prepping Before Painting
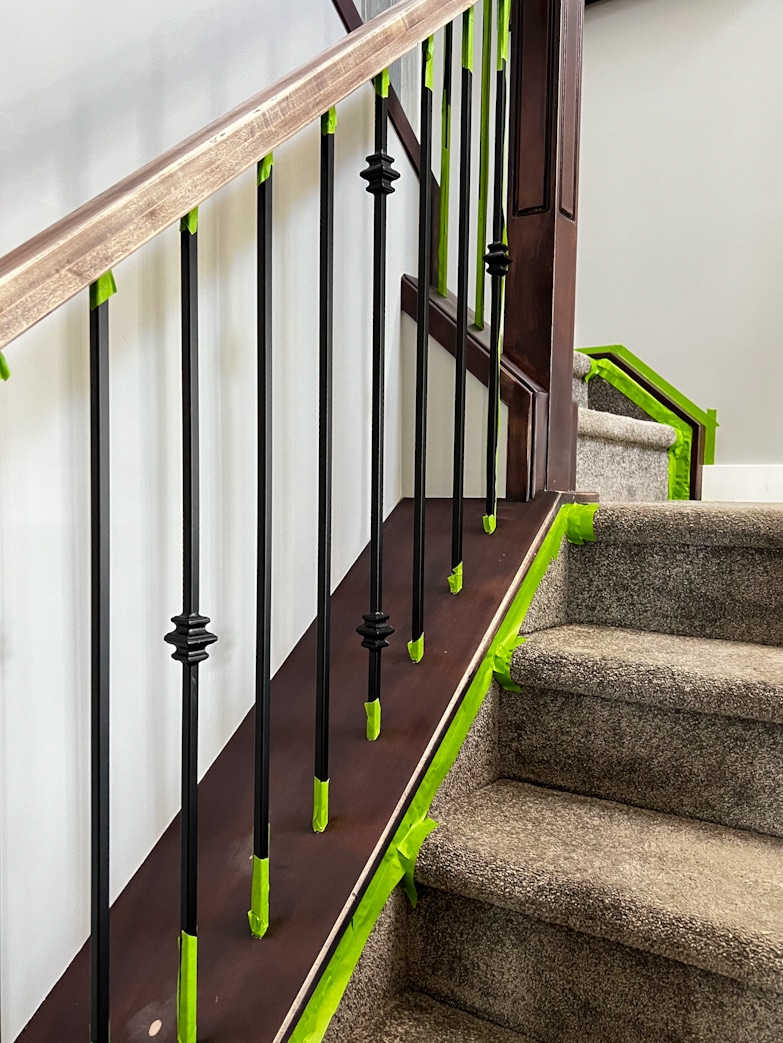
To protect the stringers covered with carpet, I carefully tucked painter’s tape between the wood and the carpet. I also taped around the top and bottom of each baluster. I didn’t count them, but it felt like hundreds!
For priming, I decided to use Dixie Belle’s Boss Primer for the first time, and I’m glad I did. The container states that this is a “problem solver” and that it is indeed. If you are painting wood that tends to bleed through the paint, you want to prime with Boss. It’s also great for old second-hand furniture with an unpleasant smell.
I didn’t need it for any of these problems, but, nonetheless, the application was easy-breezy, and it sticks like no other primer I’ve used before.
Products I Used To Paint The Stair Railing
I initially planned on using Behr’s Cabinet & Trim Paint, but then I remembered how impressed I was with the coverage when I used Dixie Belle’s white chalk paint when I gave the china cabinet a makeover!
It may sound unconventional to paint a stair railing with chalk paint, but with a top coat sealer, it has proven to be just as strong, if not stronger, than any other paint. I believe the key to durability lies in the primer and top coat or sealer you use.
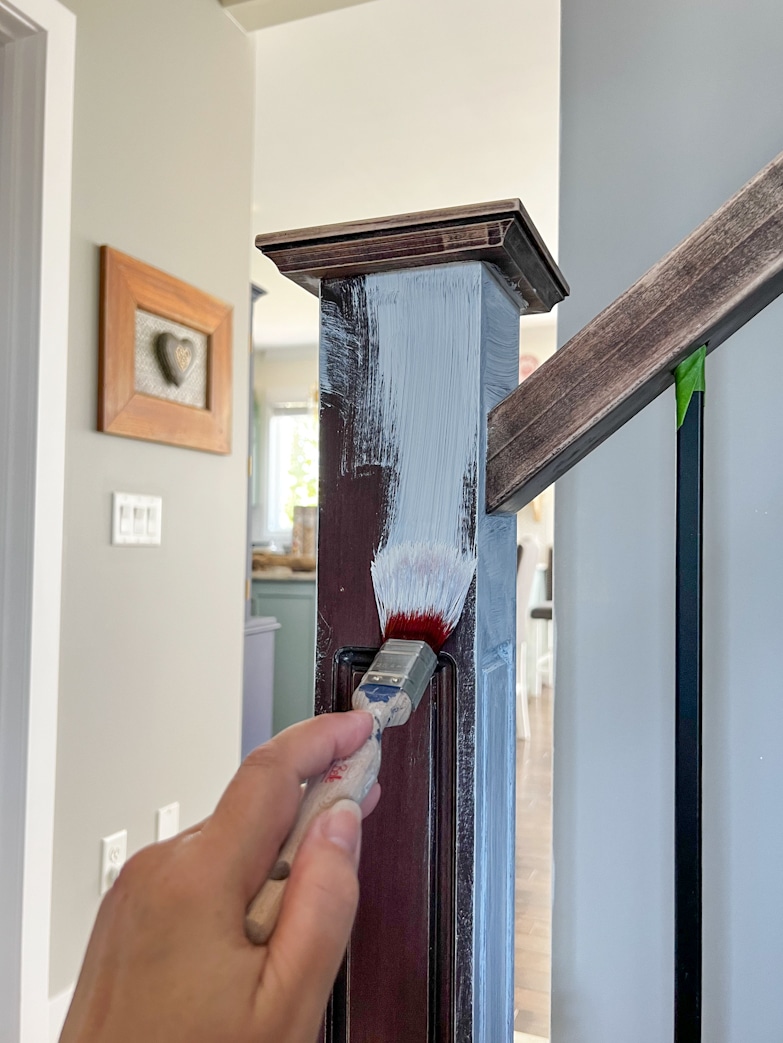
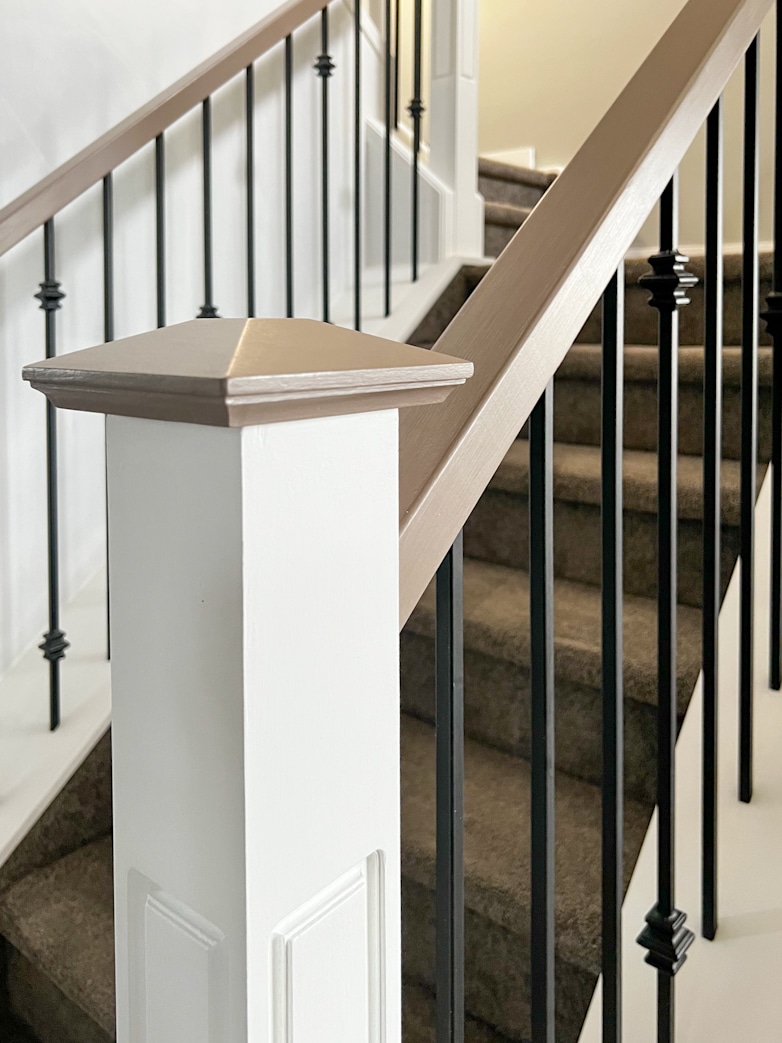
White For The Newel Posts And Stringer Caps

After priming with Boss, I started painting with chalk paint in the color Cotton. Some people find it too stark and prefer a creamier white, but I am a sucker for a crisp white, especially on trim work.
To avoid the thick brush texture associated with chalk paint, I constantly misted it with water to make the texture as smooth as possible. If you do end up with brushmarks, there is an easy fix. A quick once-over with very fine sandpaper will leave you with the smoothest surface ever!
It took two, in some places, three coats to get the perfect white coverage, but I am convinced the cabinet paint would have needed several coats more.
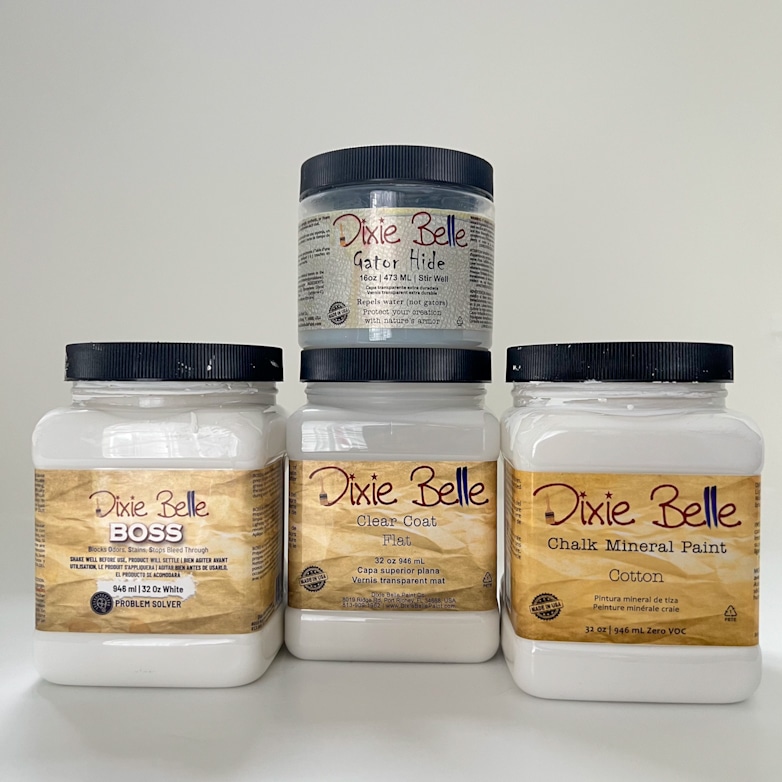
Dixie Belle’s super duper strong, water-resistant top coat, Gator Hide, hasn’t been available for a long time, but it is finally back, and I just had to try it out!
There is a bit of a learning curve to getting an even coat with Gator Hide. It has a slight sheen to it and shows streeks and brushmarks easily. The instructions suggest using an applicator sponge or brush with synthetic bristles and applying thin coats.
After spending two weeks on this project, my patience and time were running thin, and I reverted back to my tried and trusted Clear Coat Flat Sealer. The Gator Hide is a fantastic product, but I’ll have to take time and train myself to master a perfect coat.
You can use the following links to shop any of these amazing products. (These are affiliate links from which I can earn a commission at no extra cost to you.)
Brown For The Handrails And Newel Caps
I have a long list of projects to finish and decided on a whim to start painting the stair railing this particular week. Needless to say, I did not plan ahead and, unfortunately, didn’t have a suitable Dixie Belle brown on hand. (I order my paint once a month, and finding a shop that sells Dixie Belle would mean a rather long trip I did not have time for.)
After spending a very long time with the color swatches in Home Depot, I settled on three options and had them mixed as tester pods. Of all the colors, picking the perfect shade of brown is by far the most difficult for me.
I was shocked at how different the colors looked in our home compared to how they looked in the shop.
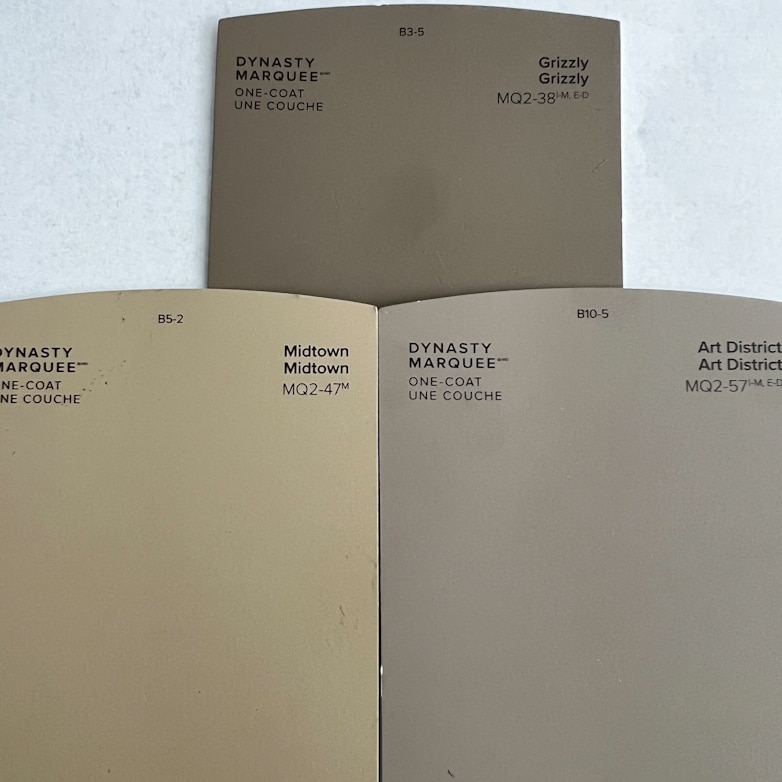
Midtown was too yellow, Art District looked completely gray on its own, and Grizzly was slightly too dark and showed a hint of pink! None of them was the perfect color!
Sometimes, my experiments turn into great solutions. I mixed all three colors together, creating the closest to what I wanted! Would that be enough paint, though? Adding a latex extender not only stretched the amount of paint but also gave it a much smoother consistency. It was slightly runny, but the coverage was so good that it barely needed a second thin layer. I once again sealed everything with Dixie Belle Clear Coat Sealer.
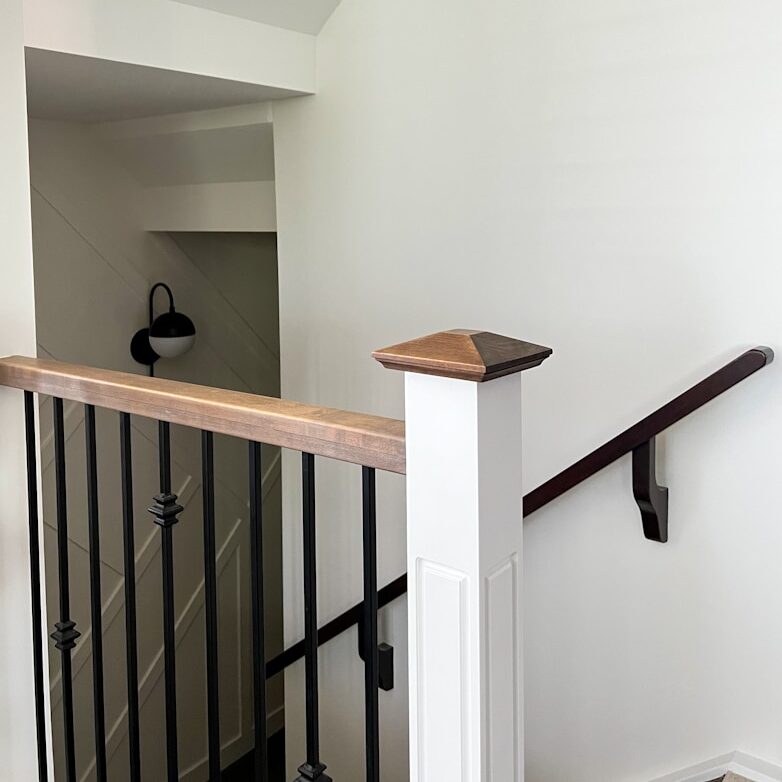
The Finished Painted Stair Railing
As I so often do, I underestimated how long this project would take. It was a lot of work, but I am glad it is done now. It instantly made the entryway way and stairs much brighter.
Just a side note: if you wonder if it’s a thick ridge of paint you see on the edge of the handrail, rest assured it’s not. It’s simply how the light reflects off the rounded edge.
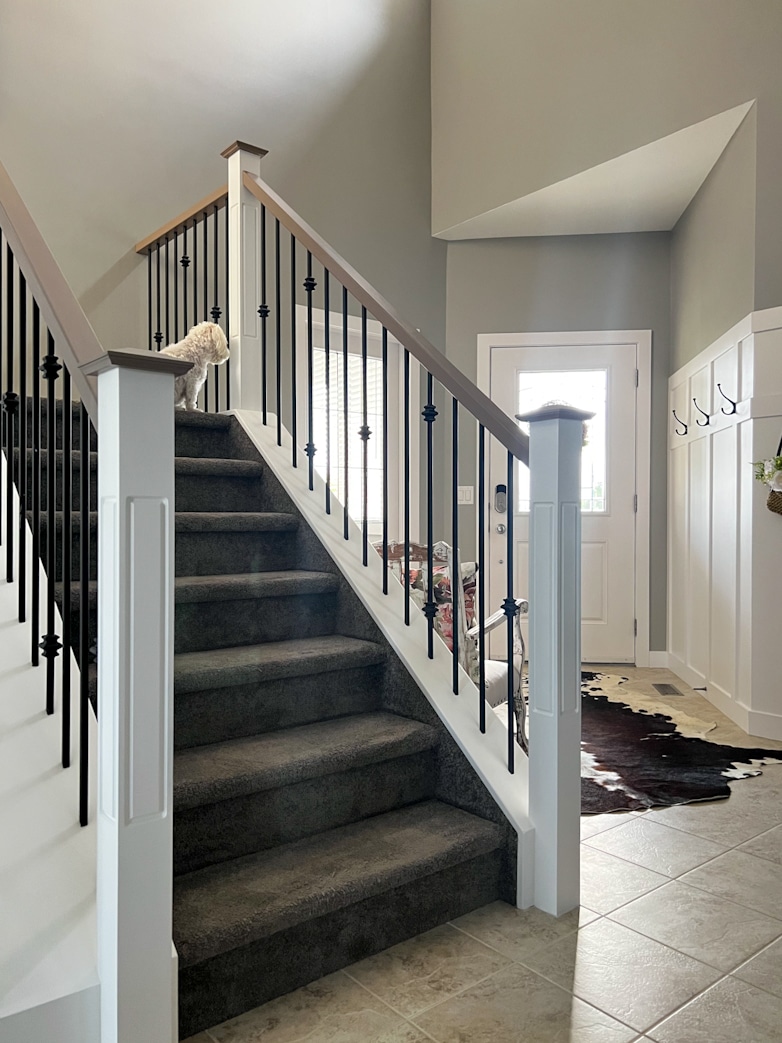
I am thrilled with this lighter and brighter look! I will be even happier when I decorate them for the holidays! (If you know, you know.)

It even gives a bit more life to the carpet!
If you think that the wall next to the railing looks lighter and a bit blotchy, you are not wrong. I painted a coat of white primer over the grey. Keep an eye out for a follow-up post in the next few weeks.
We all love a good before and after comparison, so here they are next to each other. I would love to hear which one is your favorite!
Before

After
Until next time, happy painting!
Pin This For Later!
How much of each paint color did you mix together? The color is absolutely beautiful.
Hi Sonia! It’s pretty much 1:1:1
You did a beautiful job!
Your stairs look absolutely amazing.