DIY Laundry Room Makeover
In my imagination, the house of my dreams had a full laundry room. There would be an area for folding laundry (my number one requirement), and somewhere I could easily hang all the clothes I don’t want to wrinkle.
Like most people, I’m not the biggest fan of doing laundry, so why not at least make it as comfortable as possible, right?
A Laundry Room Makeover Was Inevitable
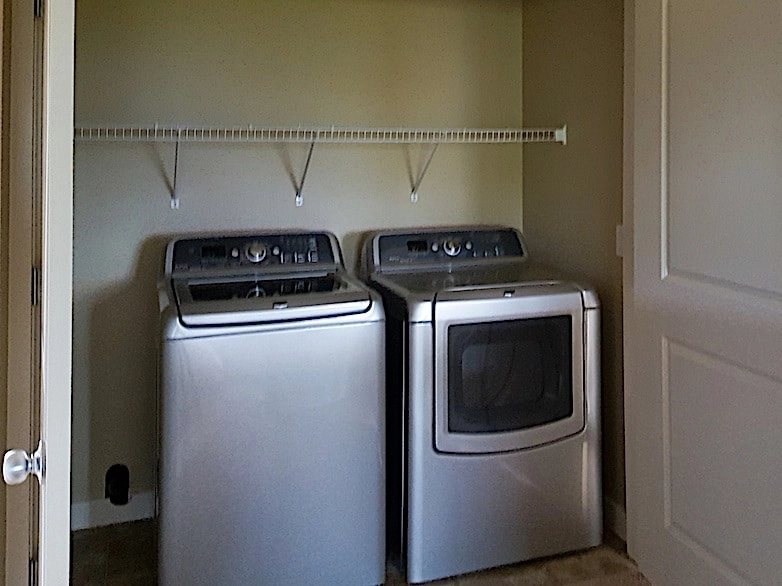
When we found our current home, it ticked ALMOST all the boxes. You can imagine my disappointment when there was no fabulous, full laundry room—only a washer and dryer in a hallway closet. The one good thing about it was that it was upstairs, near the bedrooms. That is, after all, where most of the laundry comes from.
That might have been a deal-breaker if I did not see the potential that presented itself here. To the right of this closet is the master bedroom, which has a sunroom/sitting area behind the laundry closet. A lovely area with a spectacular view that I knew we would never use.

This was absolutely perfect! My imagination ran wild with plans of what I could create here. I think our realtor thought I was a little crazy when I enthusiastically shared my ideas for this space.
The plan was to build a wall separating the sitting area from the bedroom. Removing the back wall of the laundry closet would create a long, narrow room, perfect for the laundry room of my dreams.
Planning The Laundry Room Makeover
I opened up the wall separating the closet and the sitting area to spec out the plumbing situation. This wall contained all the plumbing for the washer and dryer, and moving them was a little too advanced for my plumbing skills. I called a professional plumber to assess if my plan was at all possible.
The good news was that it was totally possible! We just had to apply for plumbing, electrical and building permits since it was a significant renovation involving major changes in all three areas.
My dear husband handled all the paperwork and drew up this cool floor plan, which he submitted with the applications—green shows new construction and red shows what had to be removed. Luckily, the wall we wanted to take down was not load-bearing. It’s crucial to determine this before ever removing any interior walls!

Demo day!
The plumber and I agreed that I would demo up to where he could just come in and move the water supply, drain pipe and dryer vent. This was the only labor expense for this whole laundry room makeover. Everything else was DIY.
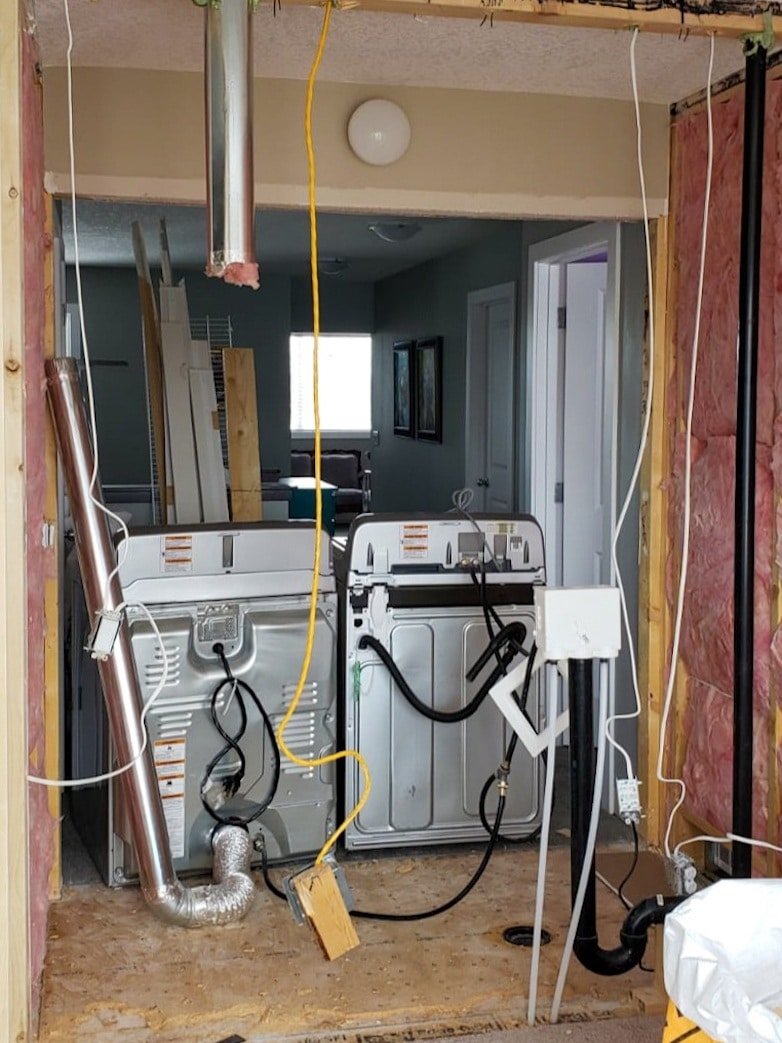
Here, you can see the wall opened up, exposing everything that had to be moved over to the wall on the right of this photo. I also took down the two closet doors and their framework.
Construction
We had to build new walls (two short ones forming a corner) to separate the laundry from the master bedroom.
Also, we wanted a wall with a single door where the two closet doors used to be.
We applied for a construction permit to do this, and it was approved. Relatively easy, straightforward construction.
Electrical work
Stephen (my husband) did all the electrical work. He moved and rewired some of the existing outlets and lighting and installed a few new electrical outlets.
It was a tricky job for someone who doesn’t do this for a living, but he passed the inspection with flying colors. It was also a great practice run for doing all the electrical work when we remodel our basement. (I do not recommend doing your own electrical work without the necessary knowledge and experience.)
Plumbing
As mentioned before, a qualified plumber moved all the plumbing for this laundry room makeover. After all three inspections were passed (construction, electrical and plumbing), we could hang the new drywall. This was my first DIY project, big enough to use several full-size sheets of drywall. I did need Stephen’s help to move those around.
Mudding and Taping The Laundry Room Walls
Once all the walls were covered, it was time to mud and tape. Not the easiest job if you don’t have the experience, but practice makes perfect.
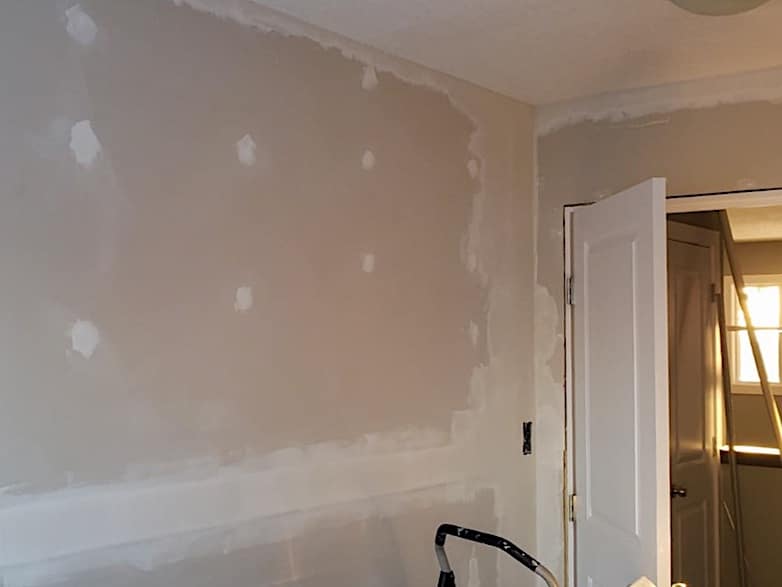
My work does not look professional during the process, but I keep going until it is perfect, even if it takes ten times longer. It’s a messy job, especially when you start to sand it smooth, but extremely rewarding when it’s all done.
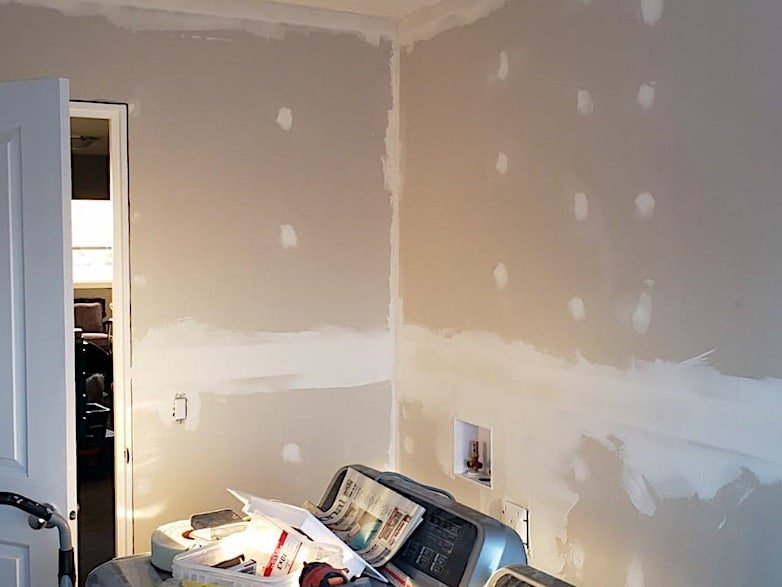
After what felt like endless weeks of work, the walls were finally seamless and smooth, ready to be primed and painted.
Flooring and Trim
For flooring, I chose luxury vinyl tiles. It kind of looks like a cement floor and not the usual wood look.
With the flooring installed, I could finish the baseboards and trim around the door.
Finishing Touches
The appliances that came with the house were still in excellent condition. With them in place, I could finally work on my long-awaited folding area! I repurposed a vanity I removed during an earlier bathroom makeover.
I only kept the cabinet part of the vanity and got rid of the top. As a replacement, I used a bamboo countertop. I had it cut to length by Home Depot. It was only about 18 inches too long. I also stained it slightly darker as the natural bamboo was too yellow.
The vanity cabinets were stained dark brown (like everything else in this house) and I decided to lightly sand and paint them. The grey you can see in the photo below is a combination of leftover dark grey and white paint mixed together. I replaced the old chrome hardware with new black door handles.

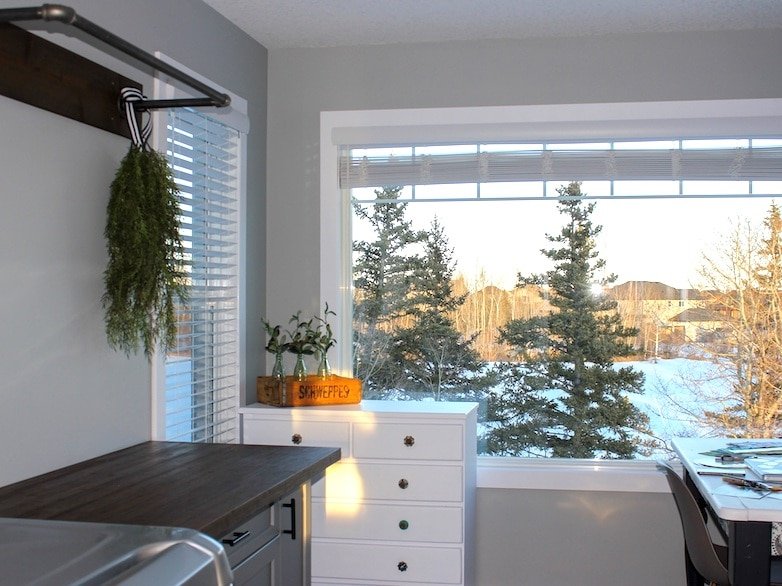
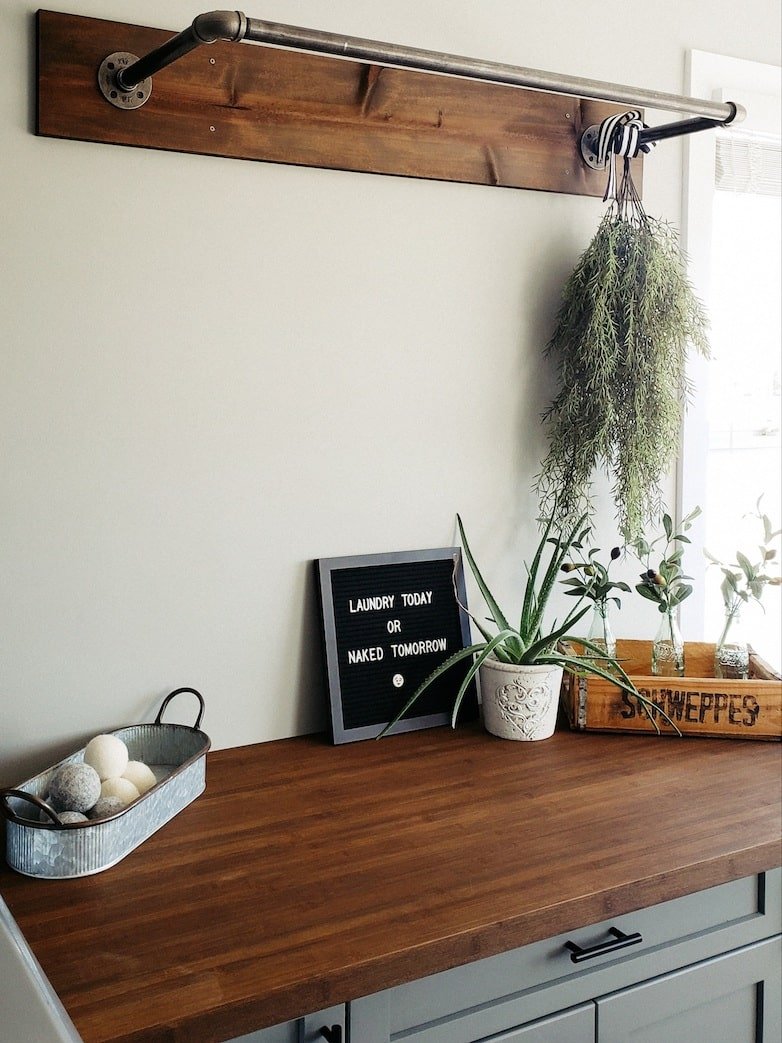
I built a small shelf to cover the gap behind the appliances. It works great for preventing socks and small laundry items from finding their way back there.
The clothes rail is galvanized pipe and fittings mounted on a piece of wood. It looked better than just the bare rail, and this way, I could secure the wood to the wall, anchored by the studs behind the drywall.
This laundry room makeover meets all my needs and wants, BUT… there was some extra space in this newly built room…
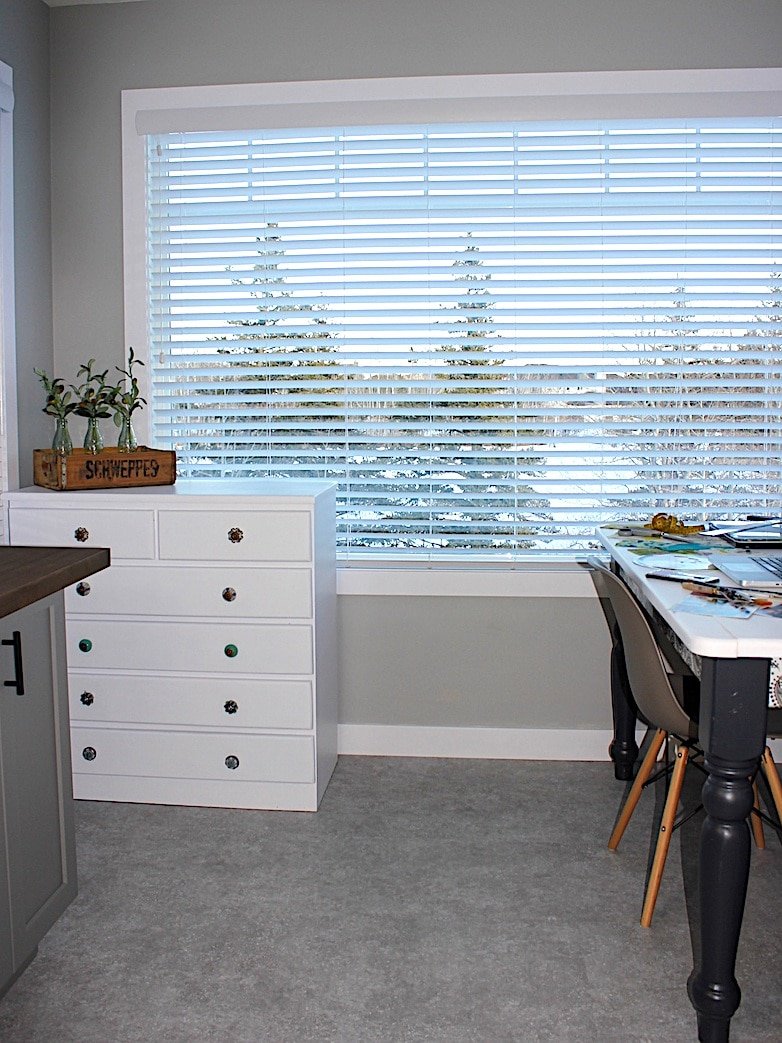
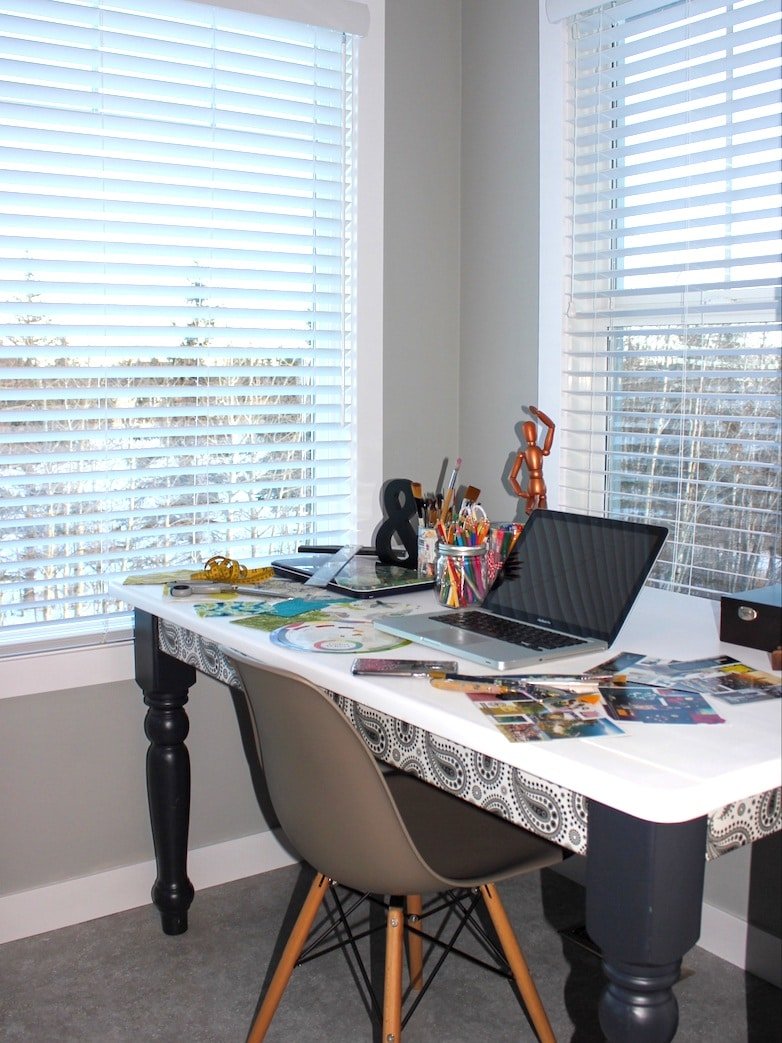
Added Bonus: A Crafting Area
How lucky could I get! In front of the windows was a corner big enough for a large desk and a chest of drawers to store some of my art and craft supplies.
The rest of it has a spot in the cabinets at the bottom of my folding area. As I’m typing this, I am sitting at this very desk, and it is just the most wonderful area to work in. The view doesn’t suck either.
One year after this project, I still love my laundry room makeover and bonus craft area. It was a lot of hard work, but that is how you make your dreams come true.

Posts Related To The DIY Laundry Room Makeover
- DIY Basement Bathroom
- DIY Dry Bar For The Basement
- How To Replace A Kitchen Faucet
- A Powder Room Makeover With Wallpaper
- Inexpensive Wall Decor Projects
- DIY Entryway Makeover
- More Laundry Room Makeovers
This has been featured on craftivitydesigns.com
2 Comments