DIY Open Shelving in the Kitchen to Replace Ugly Cabinets
Do you love open shelving in the kitchen instead of cabinets? Not sure if it will be practical? Let me show you how I created the best of both worlds!
This post on open shelving in the kitchen is part 5 of the Budget-Friendly Kitchen Makeover series. In case you’ve missed the previous four:
- How to Prep Cabinets for Painting
- Painted Kitchen Cabinets
- Replacing a Kitchen Faucet
- Updating Kitchen Lighting
Why Open Shelving in the Kitchen Isn’t Always Popular
People tend to have strong feelings about open shelving, and I get it. It looks amazing, but is it practical? I guess it could be if you are a minimalist, but most of us have too much stuff that we prefer not to put on display.
If you have kids, you probably also have a neverending supply of plastic cups and bowls. My kids are grown, and I still have those around! Closed cabinets may not be as pretty, but they hide the necessary clutter.
Additionally, open shelving collects dust and dirt more easily than closed cabinets. Are you willing to add more regular wiping and dusting to your cleaning routine?
My solution to these problems? Why not try to have the best of both worlds? I only removed a small section of the upper cabinets. A unit that didn’t make sense to me anyway. It wasn’t essential storage, and my new open shelves will be purely decorative.
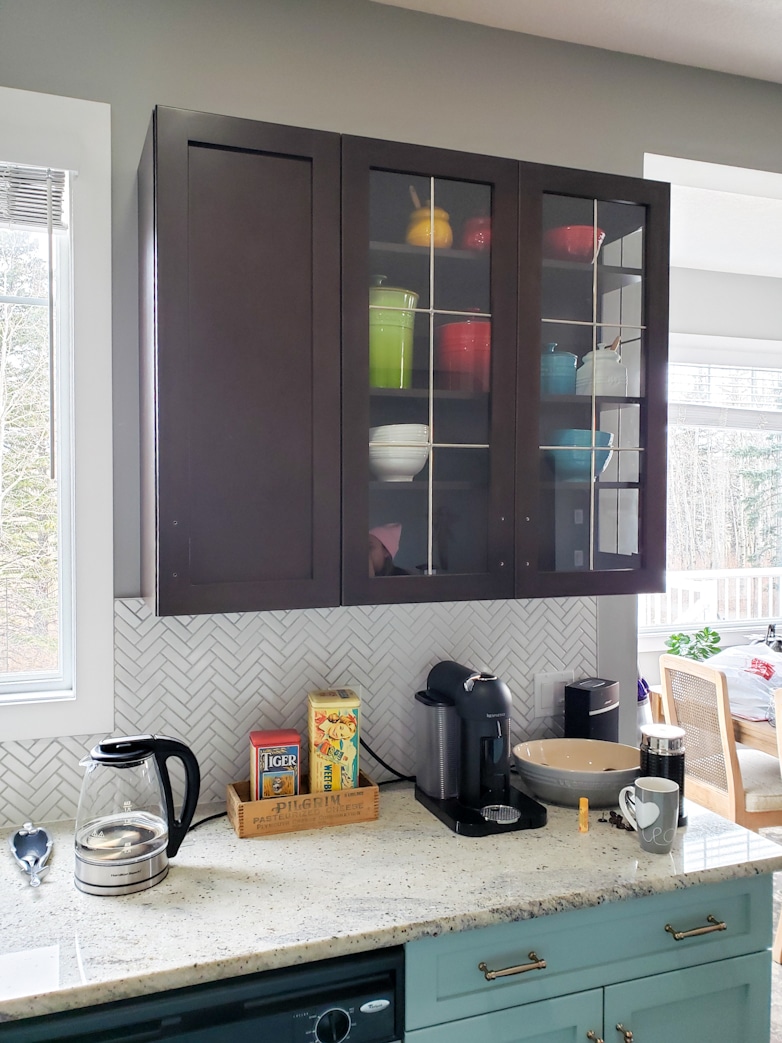
This is how it looked before I removed the small section of upper cabinets. At this stage, all the remaining cabinets were already painted.

Here, you can see the bare wall where the cabinets used to be, next to the window.
DIY Open Shelving
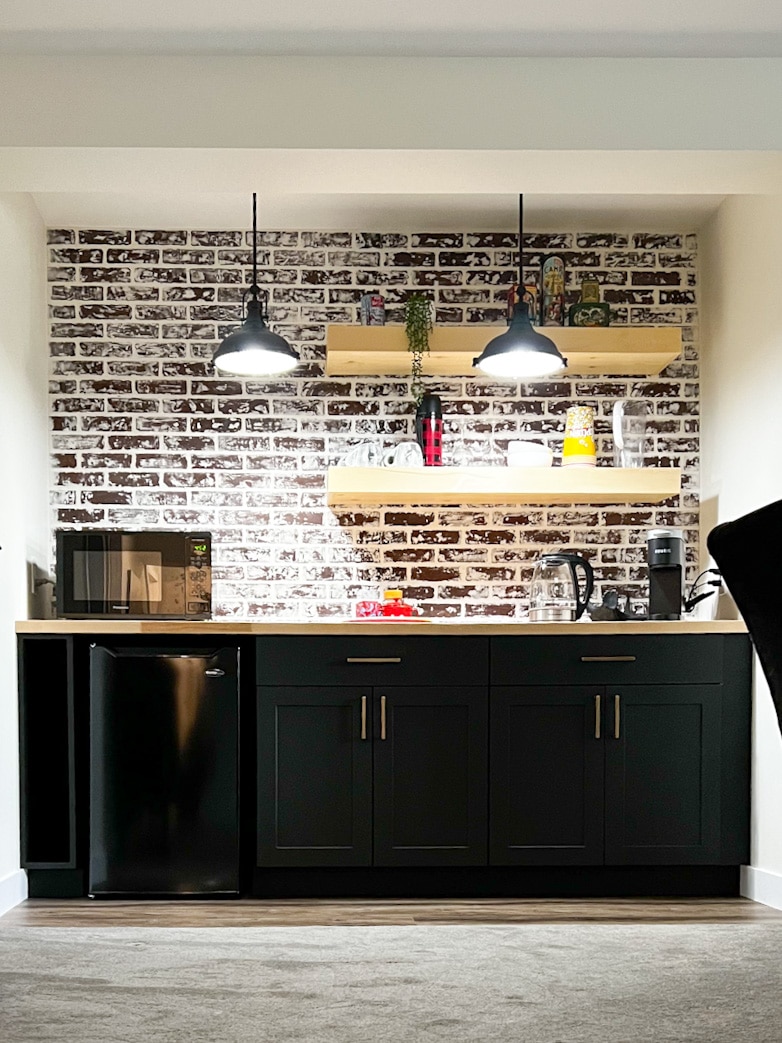
In my previous post, Decorating the Basement, I showed how I gave this dry bar area a mini makeover. I repurposed the wood from these floating shelves for the open shelving. I sanded all pieces back to bare wood and cut them to size.
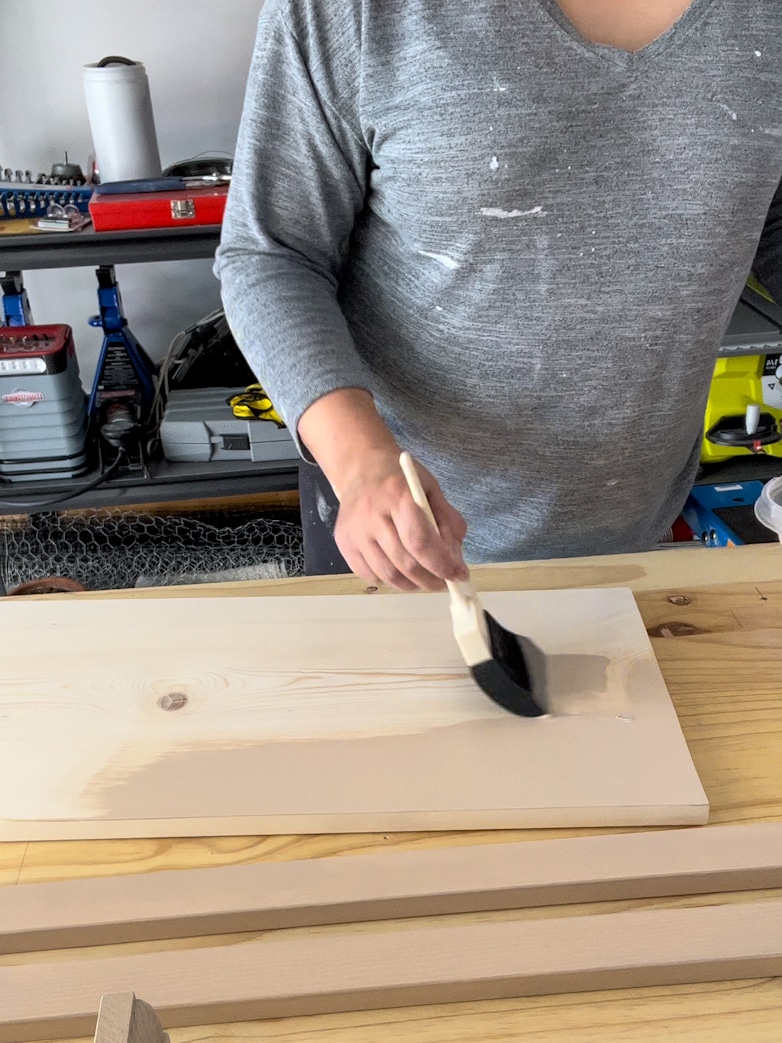
It took me forever to decide if I wanted to paint or stain the open shelving. I decided to stain the wood because it can easily be painted later, but not the other way around.
Staining the individual pieces of wood is easier than staining the completed project.
I used Dixie Belle’s water-based Voodoo Gel Stain in color Au Natural and sealed everything with a clear coat sealer.

The stain opened up the woodgrain, leaving all the stain pieces rough and prickly. One light sanding with fine sandpaper, and you will have the softest, smoothest surface ever.
This one easy step that makes stained or painted wood super smooth after being so rough is one of the most satisfying things ever!
Installing the Open Shelving in the Kitchen

The wooden brackets have these metal pieces to hook over two wall screws. I had to measure carefully to hang each bracket securely, straight, and level. I used heavy-duty drywall plugs with the screws.
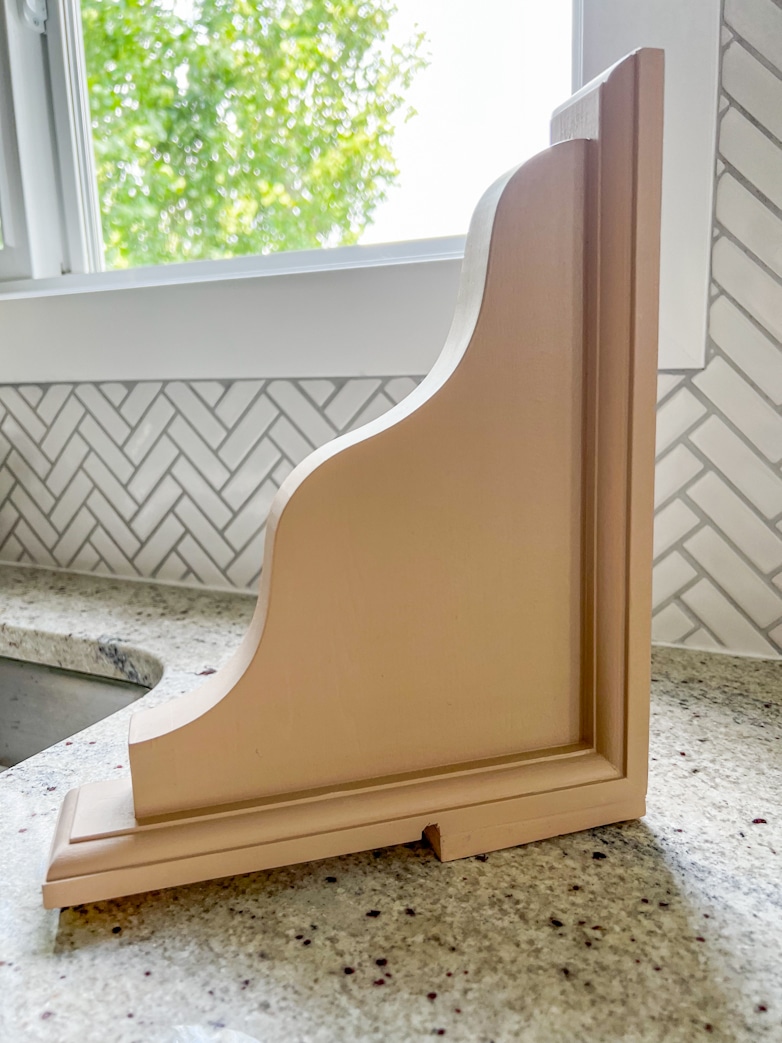
The two brackets from the bottom shelf fit halfway over the backsplash tiles, and I had to get creative to ensure a perfect flush fit. I cut a small groove in each bracket to fit over the metal strip that isn’t flush with the tiles (as it’s supposed to be).
Above those grooves, I built up the brackets with small pieces of wood to ensure they fit flush with the tiles AND the wall. This step caused a lot of headaches!
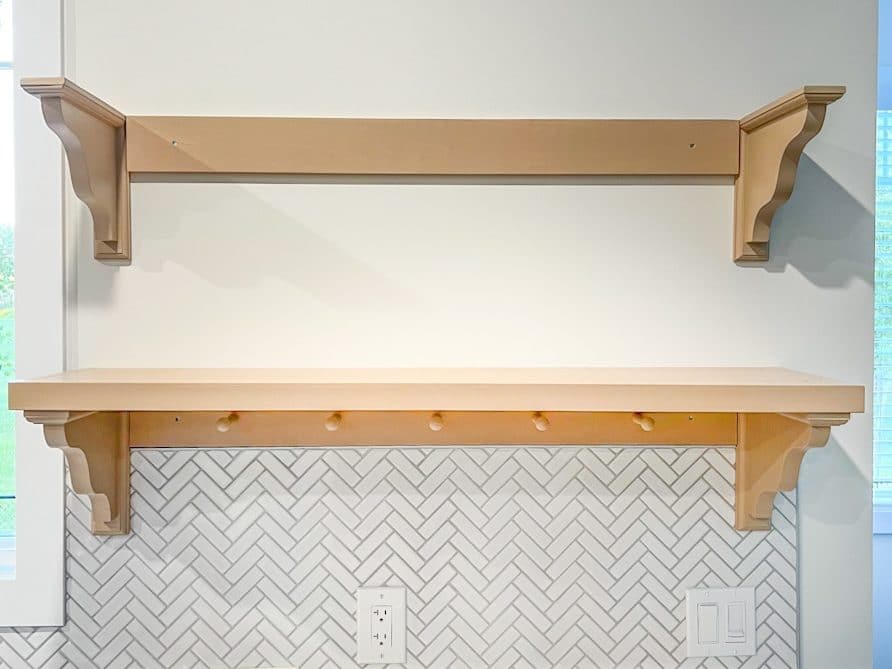
Each shelving “unit” consists of two wooden brackets with a 4-inch back piece between them. These are the support pieces. The shelf itself is two pieces of wood I joined together to form a one-and-a-half-inch think shelf. I framed an edge around each shelf to make it look like one solid piece of wood.
Each bracket hangs from two screws, and each back piece is secured to the wall with two screws.
I used two screws on each side, driven in from the top, to attach the shelf to each bracket. The back of the shelf is also screwed to the back piece in three places.
These shelves are so sturdy and secure, even I am surprised!
I added five wooden pegs to the bottom shelf’s back piece, and now we also have a peg rail!

Once all the pieces were joined, I filled the screw holes and added a bit of wood filler to all the seams. A quick touch-up with the wood stain and sealer and the shelves are all done!
Shelf styling
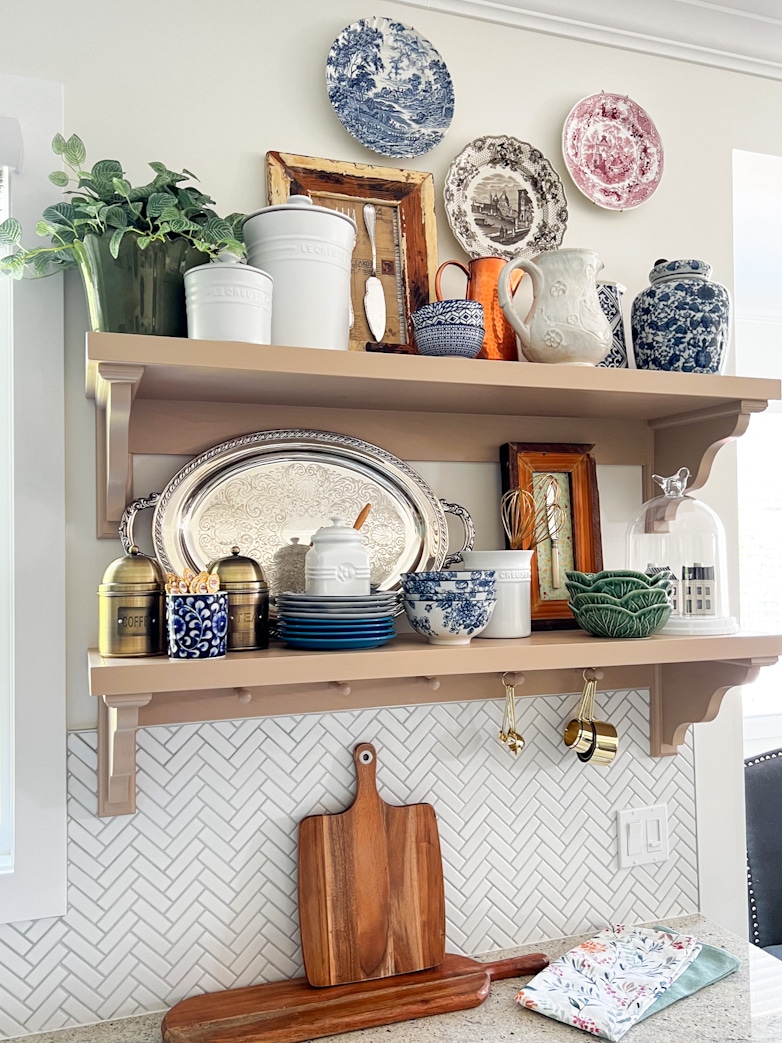
I can’t even begin to describe how much fun it was to style and decorate these shelves. For almost two years, I had dreamt of this moment. Collecting a few special pieces, especially for this display.
Every time I walk into the kitchen, I can’t help but smile. This project was full of hiccups and way more difficult than I imagined, but oh so worth it! I love the look it gives the kitchen.
I am one step closer to my dream of a cottage kitchen! These shelves definitely look the part.

Update: Open Shelving in the Kitchen 18 Months Later…
I still love my open shelving section! I would not recommend replacing all your upper cabinets with open shelves, but having just a little area to play around with is fun. However, I have, in the meantime, decided to paint the shelves white!

The white makes everything on the shelves pop. Definitely the better choice, don’t you agree?
Your kitchen is absolutely looking “cottagie”. Love the color of your cabinets, the back splash, the open shelving…everything is beautiful! You are so very talented and have a great eye for style and color. I’m a new follower and looking forward to reading your posts! Thanks so much for sharing!
Welcome, Karolyn! Thank you for following along and for your kind words! I appreciate it SO much!
The shelves looks so pretty!
Thank you, Linda!
This is so pretty. You did an amazing job.
You have pretty pieces there and nit cluttered
I am so glad you like it, Cindy!
What an upgrade, you have a great eye for style!
Thanks, Rachel! I appreciate it!
Great job Marieza! Your kitchen is looking really beautiful. I also like closed cabinets with a bit of the open shelves to show off some pretty things. I really love the pegs you added!
Thanks, Marie! The pegs are so fun!
You are so fortunate to have such a perfect spot in your kitchen to add open shelving! You did a great job, they look fabulous! You are going to have so much fun styling them for different occasions! Take care, Donna
Thank you, Donna! I can’t wait to change it for every season!
I do like how you decorated your shelves. I like open shelves in the kitchen only if they are no where near the stove!
Thanks. Linda! I 100% agree with you!
I love the shelves in your gorgeous kitchen, it all looks so beautiful and fresh. I have thought about open shelving but decided not to bother, for me its a no no but I love to see it, if that makes sense.:).xx
It makes a lot of sense! Thank you, Janette!
You are amazing Marieza! What a brilliant idea to cut the little ridge in your brackets – you inspire me at every turn! And the result is wonderful. I can see why you smile every time you go into the kitchen now. Thanks so much for the tutorial. It’s great following along with your fabulous project!
You are the absolute sweetest! Thank you, Barbara!
Your new shelves look amazing. I would have loved open shelving in my kitchen but I didn’t have any wall space to put them. Great tutorial, very good explanation. Thank you.
That is so very kind of you! Thank you, Carol!
The open shelves are beautiful. Once again you did a splendid job of making and styling the shelves. I love the items on display.
I am so glad you like them! Thanks for reading!
I love your idea of just replacing a small section of cabinets with the open shelving. That way you can have the best of both worlds. I’ve never been into the open shelving concerpt for the reasons that you listed but this really does solve the problem. Thanks for sharing.
I’m so glad you like the idea! Thanks for stopping by, Janet!