DIY Blue & White Chinoiserie Pumpkins
This DIY chinoiserie pumpkin craft is a quick and easy decoupage project that will compliment your blue and white fall decor perfectly.
I have to confess; I have been a little obsessed with blue and white chinoiserie lately. It is also pumpkin season, so what could be better this week than making chinoiserie pumpkins?
What Is Chinoiserie?
According to Google, it is the imitation or evocation of Chinese motifs and techniques in Western art, furniture, and architecture, especially in the 18th century.
In other words, like china, but not china. Also, not to be confused with the original blue and white ceramics from Delft in The Netherlands. When I was little, my mother collected “delft,” as it was called. She had an extensive collection!
I digress. You are here to read about the DIY chinoiserie pumpkins I made.
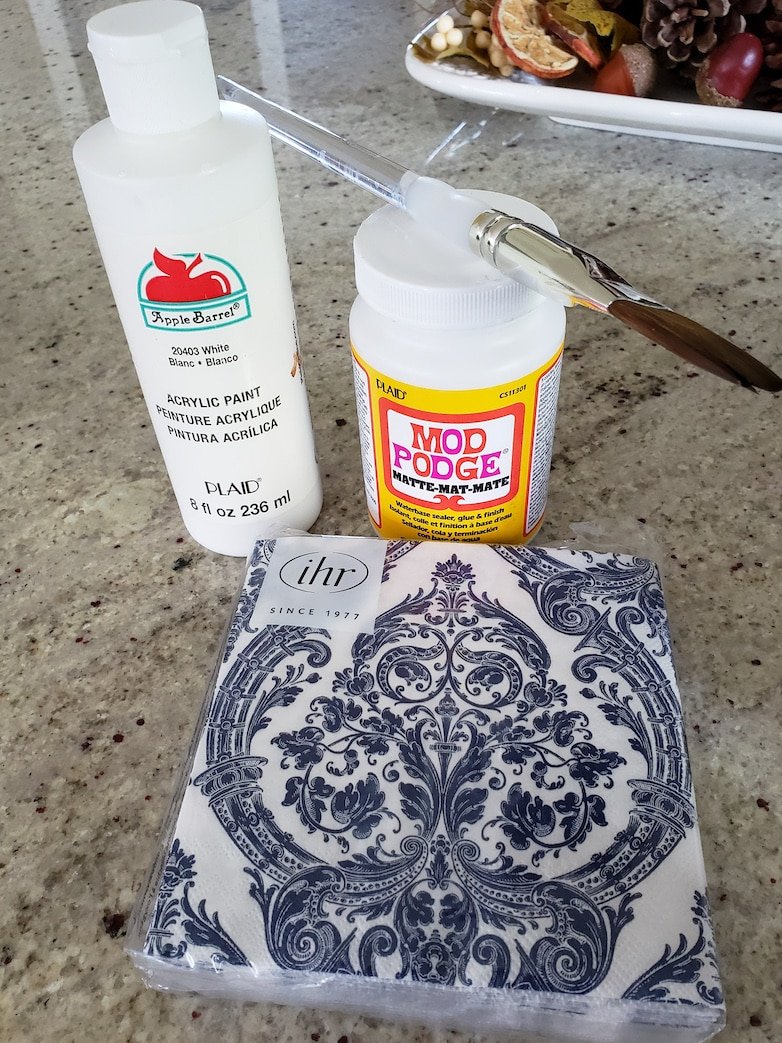
Supply List to make Chinoiserie pumpkins
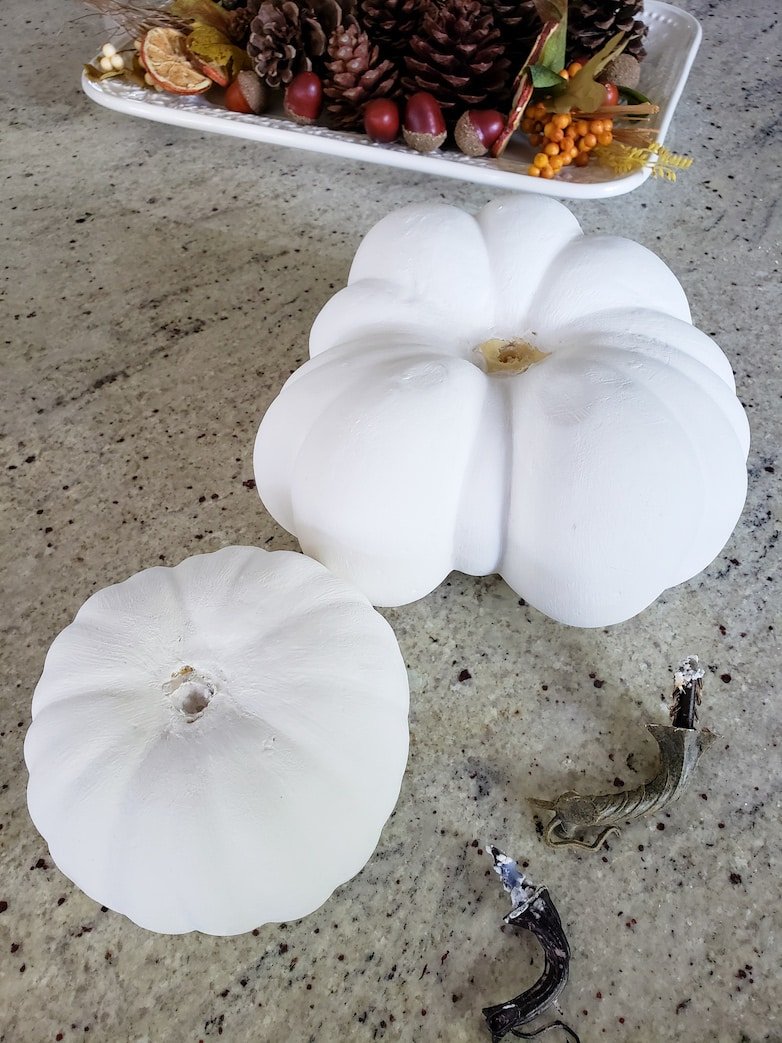
- Faux pumpkins with the stems removed. (You’ll need to twist and turn a bit to get them out.)
- White acrylic paint if your pumpkins are not already pure white.
- Mod Podge
- Paper napkins with a blue and white pattern
How To Make Your Chinoiserie Pumpkins
If your pumpkins are not perfectly white, paint them with white acrylic paint. Any other color will show through your decoupaged napkins.
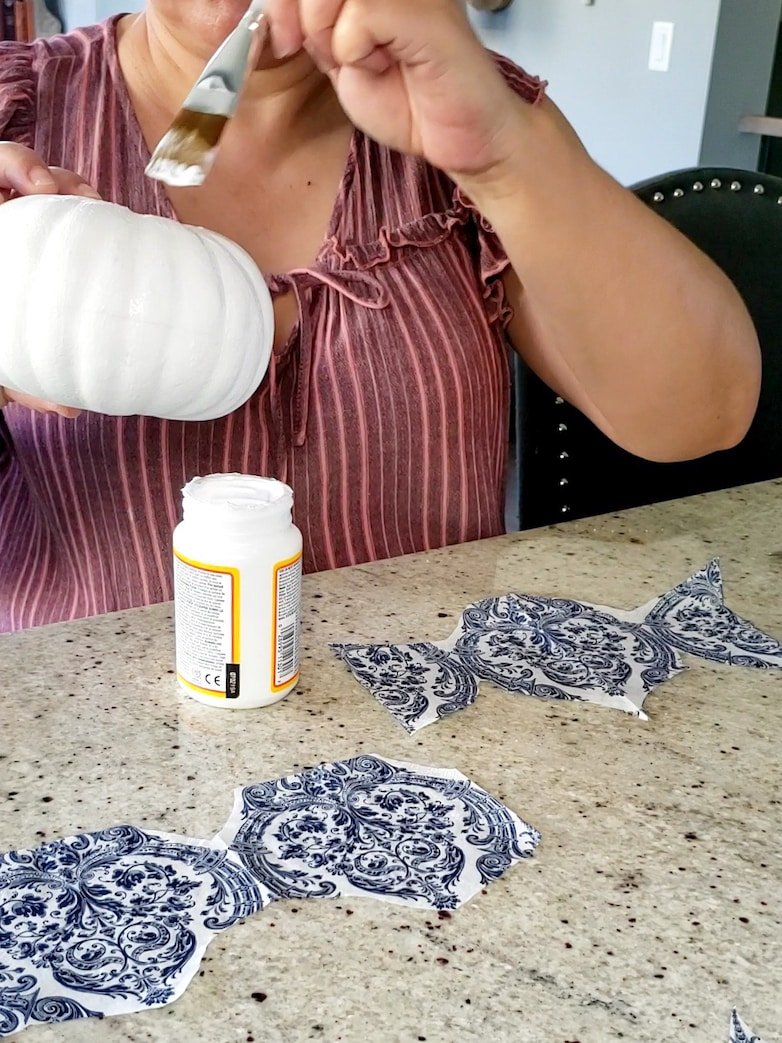
Pull the layers of your paper napkins apart. You only want to use the top printed layer. The second and third white layers will add unnecessary bulk.
I cut out some of the patterns for the smaller pumpkins to avoid too much overlapping and big bulges of paper. Some people would say not to mind that, but it bothers me.
Let me just add, decoupage has never been a favorite of mine! As the paper gets wet with Mod Podge and shrivels up, my OCD takes over and wants to get everything smoothed out.
This time I prepared myself mentally for the process!
Paint Mod Podge all over one side of your pumpkin before laying down your napkin.
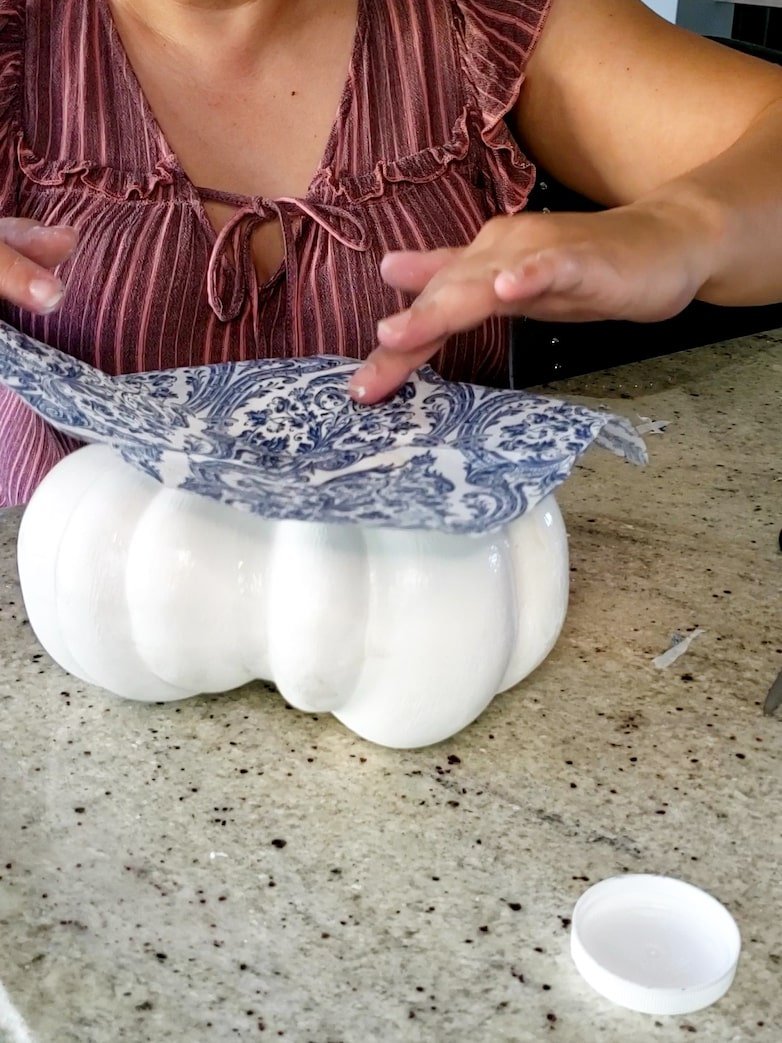
Lightly shape the paper around the curves of the pumpkin with your palms. Laying it flat, just touching the highest parts, will cause it to tear as you work it into the lower areas.
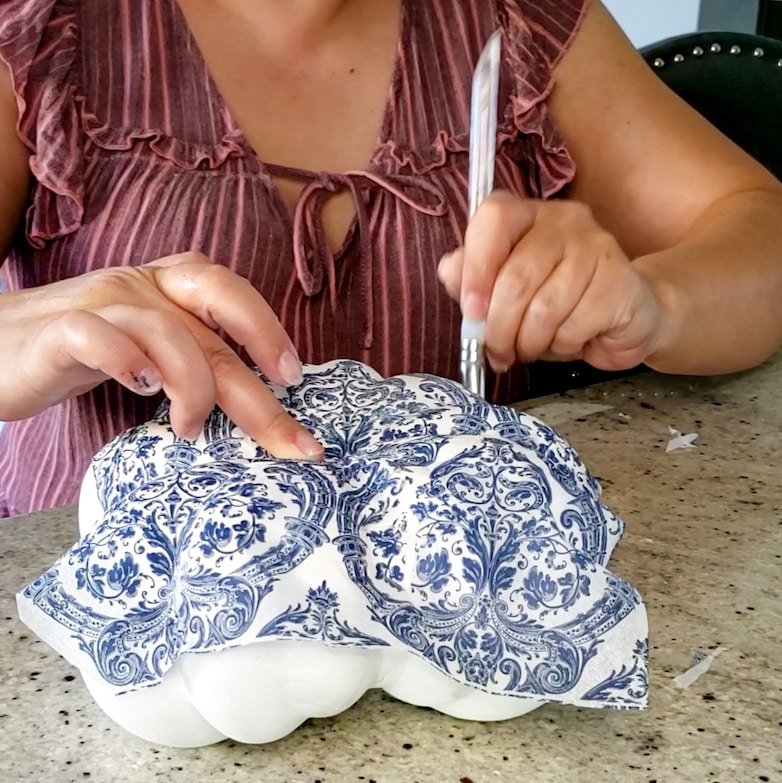
Paint more Mod Podge over your napkin layer and use your brush to push it into all the grooves.
Wait for one side to dry before starting the other side. If your fingers get sticky from touching wet Mod Podge, you will rip holes in your wet paper and ruin your beautiful pattern.
I was surprised to find out that the pumpkins with more curves were easier to decoupage! I honestly thought the smoother ones would be easier.
Once the whole surface of your pumpkin is covered and dry, paint at least one more thick layer of Mod Podge over everything.
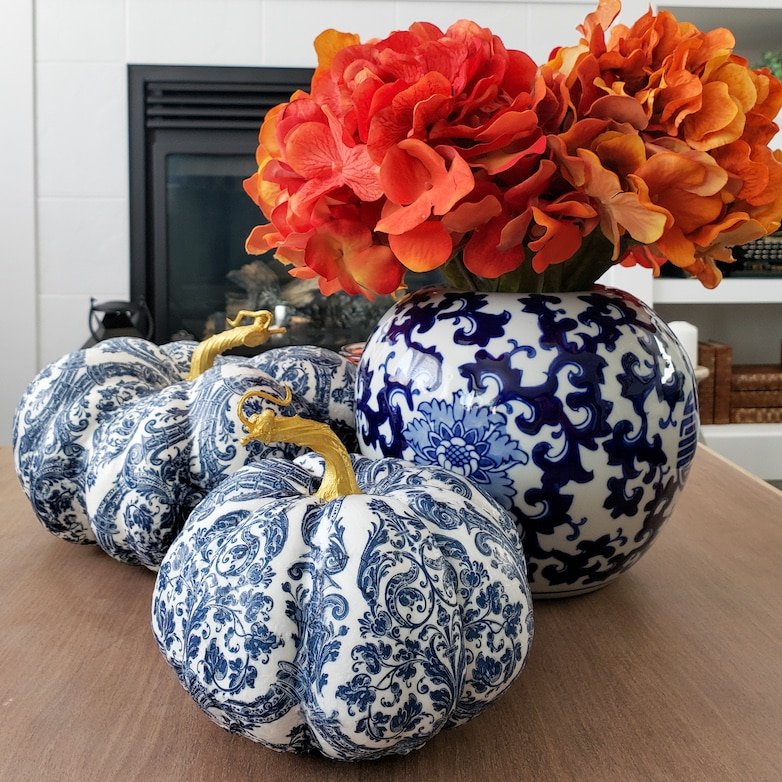
Glam Up Your Pumpkin Stems

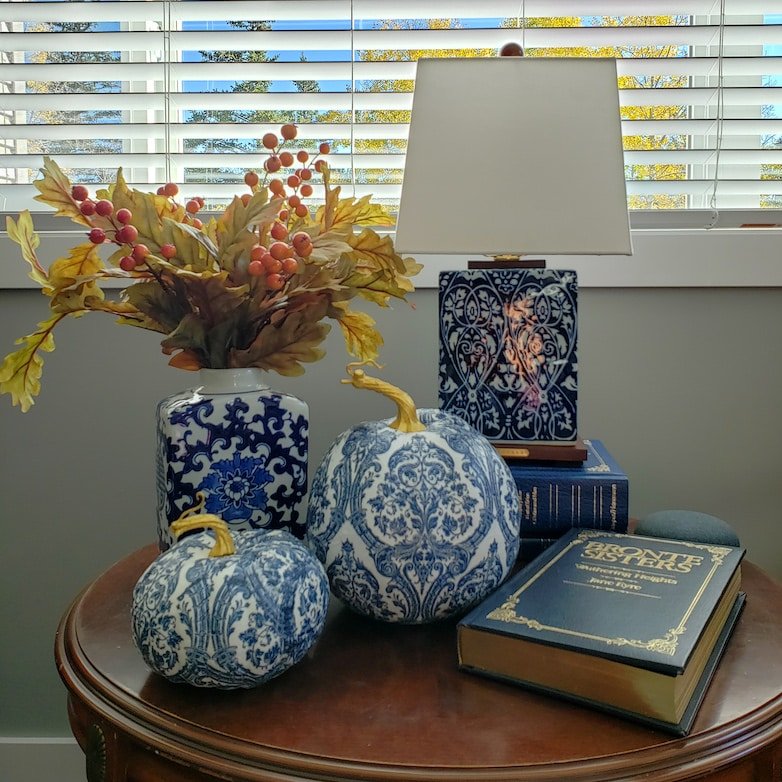
To give your pumpkins a glamorous look, you can gold leaf the stems.
In all honesty, I have gold-leafed a few things in my life, but these stems gave me a run for my money. It just did not want to stick to the plastic stems!
I am going to say these stems are covered in gold leaf because they are, but most of what you see is gold acrylic paint I used to touch up in between and over the gold leaf.
Despite the stems not fully cooperating, I am super happy with the outcome!
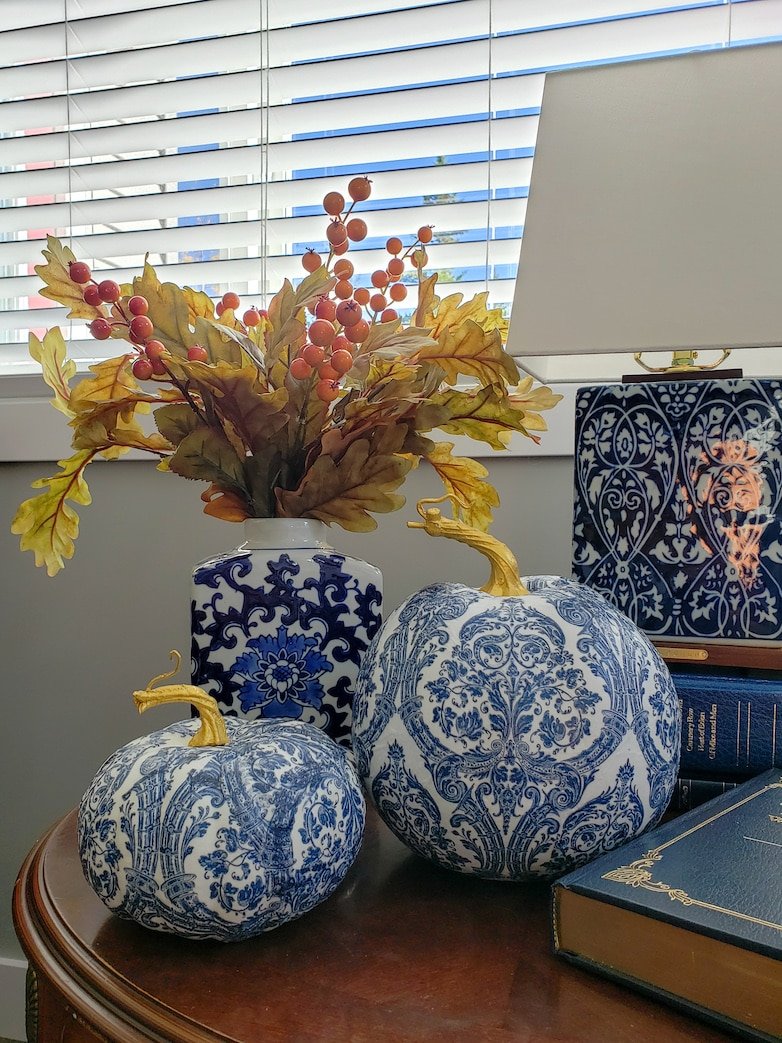
Aren’t they just the cutest pumpkins you have ever seen?
The pattern might be a bit too fine to match the first chinoiserie decor I recently bought perfectly, but I’m still happy with the look.
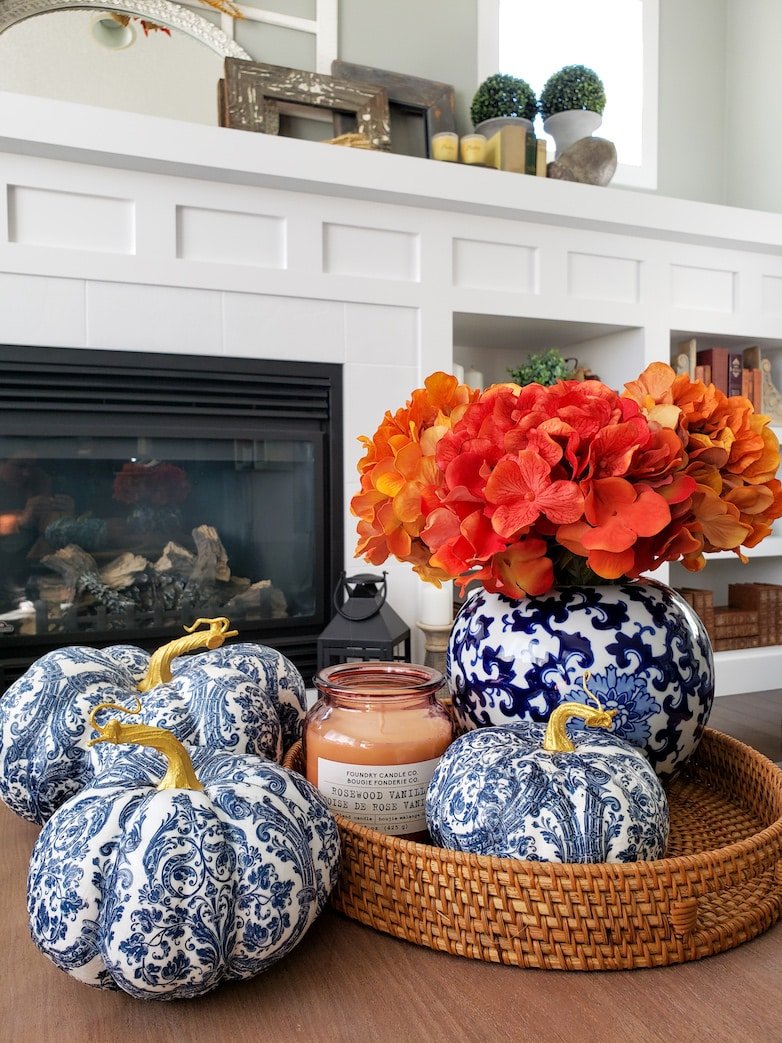
I decoupaged four pumpkins in total, and I must admit, it was fun! Not as frustrating as I remember this craft to be at all! I might just do it again when it’s time for Christmas projects.
Blue has never really been my color, but I must admit that it is rapidly growing on me. Am I finally grown up mature? Who knows…
If you are still reading, I appreciate you! And if you are royally sick of the word chinoiserie by now, I totally get it! I won’t mention it again soon, I promise.
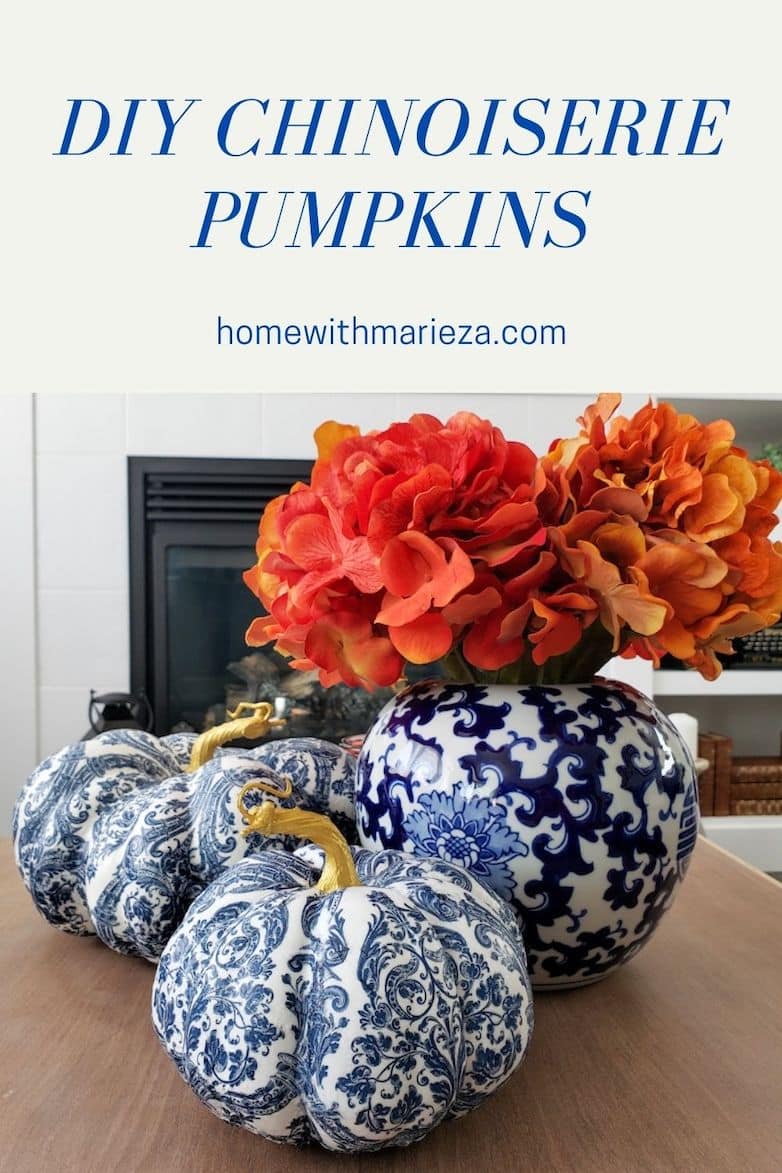
Pin This For Later!
I adore decoupage pumpkins and ours are beautiful! The gold stem is the perfect touch! Happy Fall, Donna
Love this idea – and I love blue and white! I linked to this post in my weekly Saturday Spotlight blog post. Enjoy your weekend!
Shelley
Thank you so much, Shelly! I really appreciate it!
You’re so crafty … what a fun project. If there’s anything I love more than blue and white, it’s blue and white with a pop of orange. So pretty! xo
I just love these pumpkins. Blue and white is my thing and goes with my coastal theme. Will definitely be making some of these.
These are incredible! I love that they’re definitely fall, but so classic!
Thank you so much, Jen!
Love them! They look great, and so smooth. Sometimes my decoupaging does not always look as smooth as you have gotten yours. Loving the blue and white as well, my mother always had it in her home and I was against it for so many years… I am slowly warming up to the idea. LOL. Thanks for sharing!
Haha! You must also be “maturing” then, just like me! I must say, I was surprised by how smooth these came out. No special skill I can take credit for!
Love your blue and white pumpkins. Setting buy the pretty lamp and wiht orange florals…perfect!
That is so kind of you, thank you, Linda!
Your chinoiserie pumpkins are beautiful! The gold stem is perfect.
Thank you so much, Paula!
These turned out so pretty and they look great with your existing décor. Pinned!
I’m glad you think they go together well. Thank you, Marie!
Gorgeous project Marieza! I would never have the patience to get the napkin to lay so perfect on the pumpkin. So A for design and A for patience!!!
Thanks, Crystal! It really isn’t such a delicate job. Somehow this pattern is very forgiving and seems to flow together well no matter how it is laid out.
Marieza, this is so beautiful! Absolutely love the look and the blue, so elegant.
Aw, thank you so much, Melba! I really appreciate it!