Hutch Makeover – Before and After
This 1980s hutch originally had a honey oak finish until I painted it, and painted it again, and again. See the hutch makeover before and after this time.
When we moved into our current home, I wanted teal accents everywhere. This hutch was also painted teal. I knew I would get tired of the look sooner than later, but it’s just paint, right? Since I’ve owned it, it has been blue, grey, blue(teal) again and now it is white! Let me tell you about makeover number four!
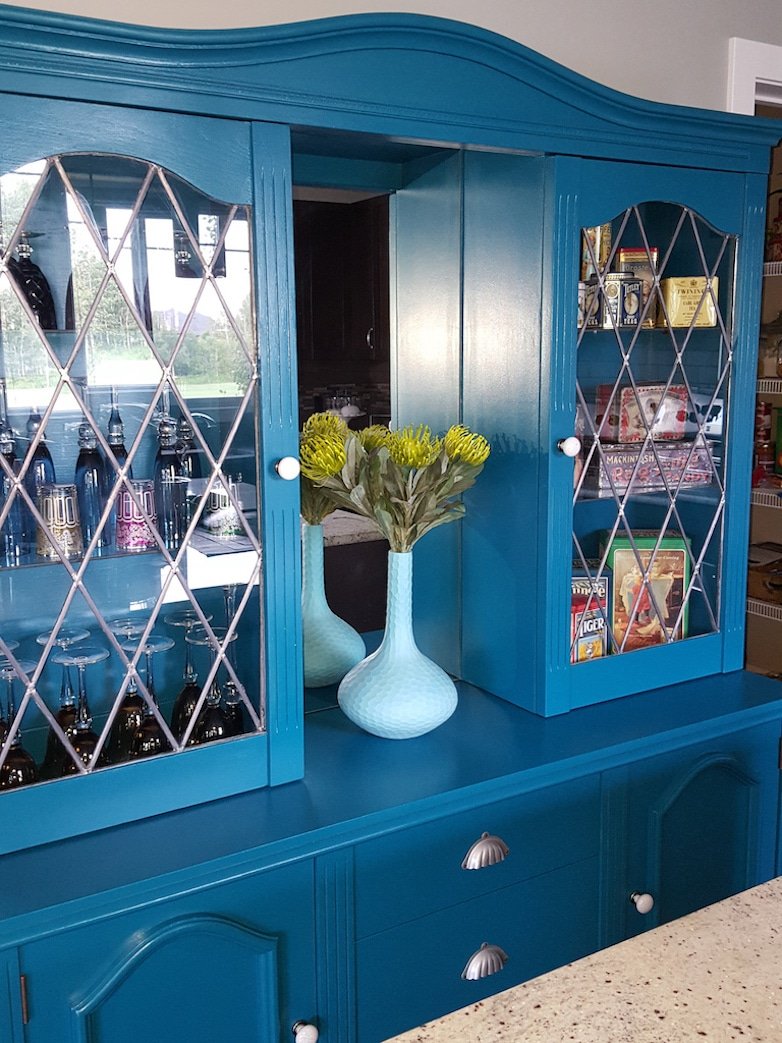
The color you see in the photo is not true to what it really looked like. No matter what I did, I could never capture the true color in a photo. The hardware has also been replaced more than once. It’s such an easy way to give a new look to something old.
The Most Recent Hutch Makeover
For the last few months, I have been all for light and brightness in our home. The house has so much dark wood that sucks up light, and I’m slowly but surely getting rid of all that. The teal hutch was unique and beautiful but too dark. I crave white! Reflecting light.
To break the very painted look, I decided that the top of the bottom piece (does that make sense?) needed to be natural wood. Yes, I stripped three colors of paint away to get back to the golden oak!
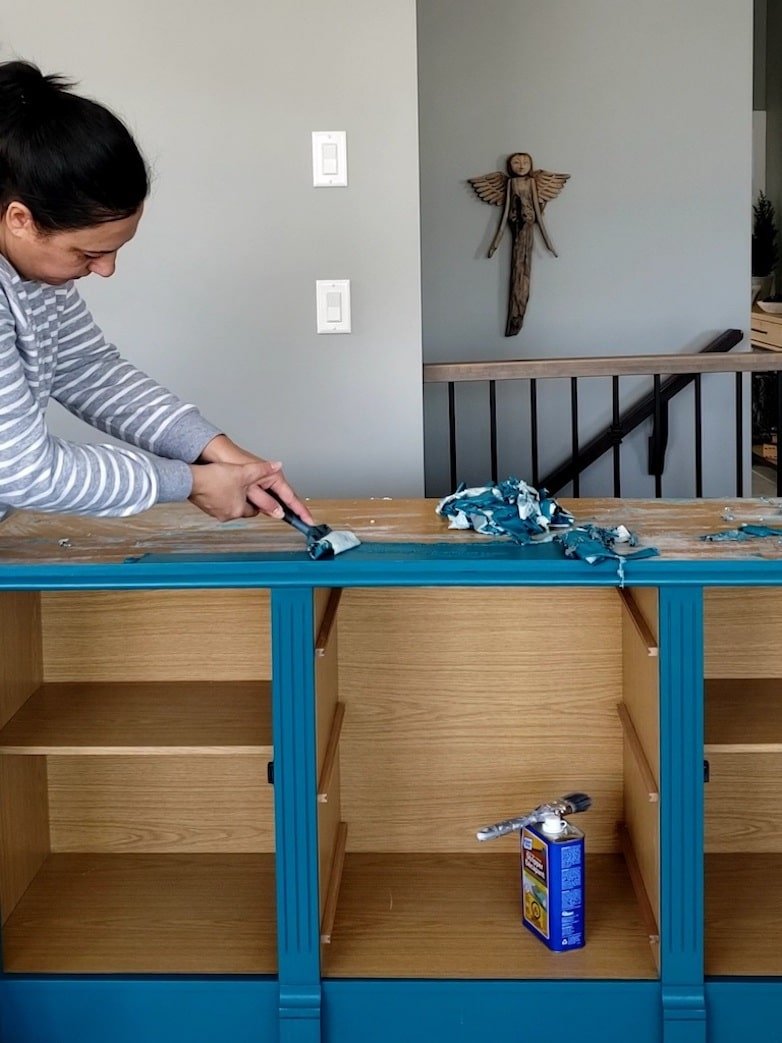
I used a paint stripper and a putty knife, just like I did with this chair makeover. After the top was stripped clean, I sealed it with white wax to tone down the yellow slightly.

Painting
I gave the remaining paint a quick sanding to give the new paint something to grip on. Fusion Mineral Paint was my go-to for this project. It was my first time using this product, and I was excited to see if it was as great as everyone had said. And was it? Oh yes! It glides on, doesn’t have a strong smell, and has excellent coverage.
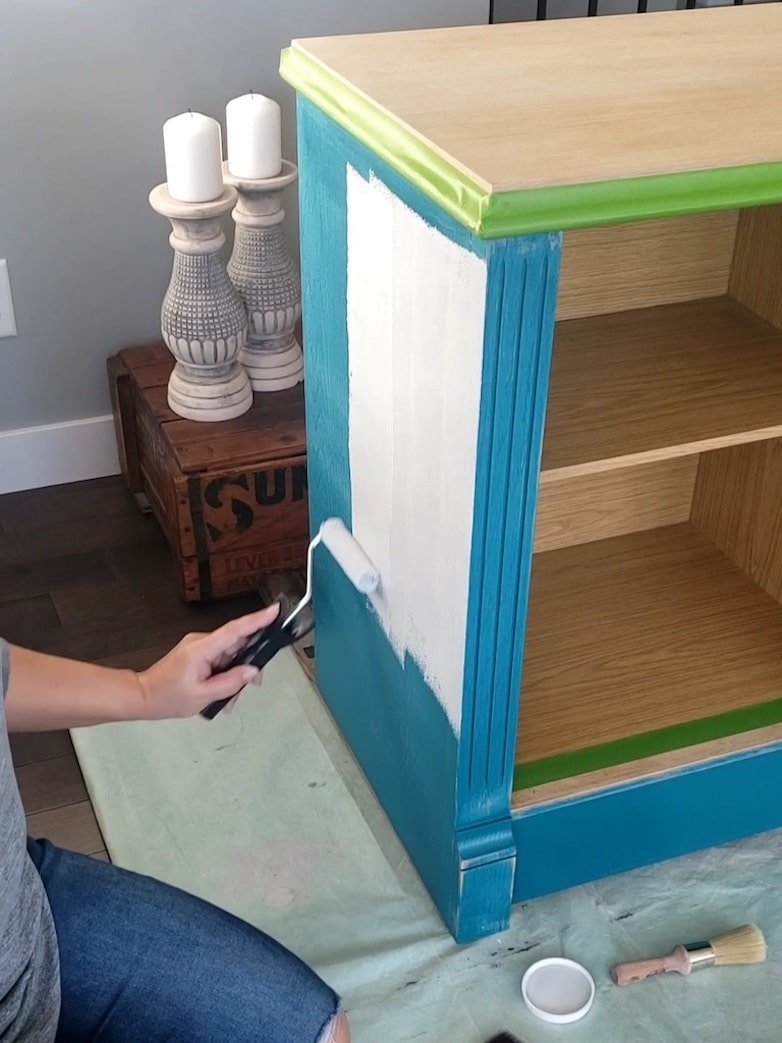
The shop I bought it from suggested I start with a light grey to cover the teal well before painting it white. My first choice of white was “Raw Silk” because it is such a popular color, but I did not like it one bit. It was way too beige. I tried the color “Picket Fence,” and that was just what I wanted.

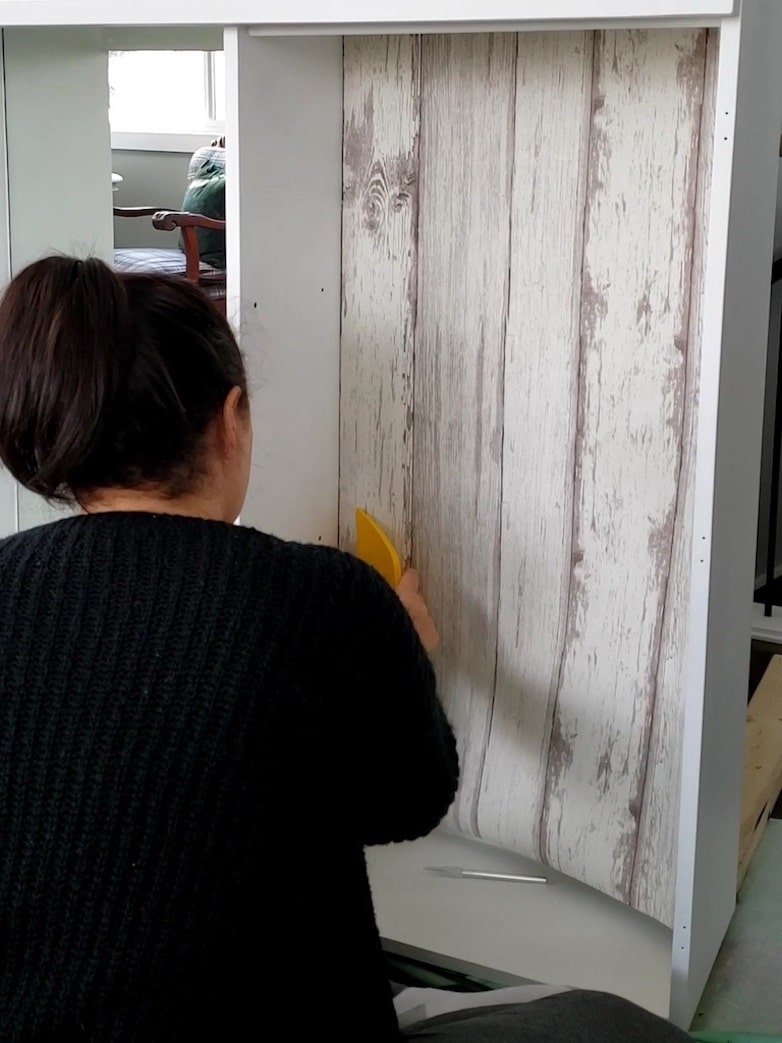
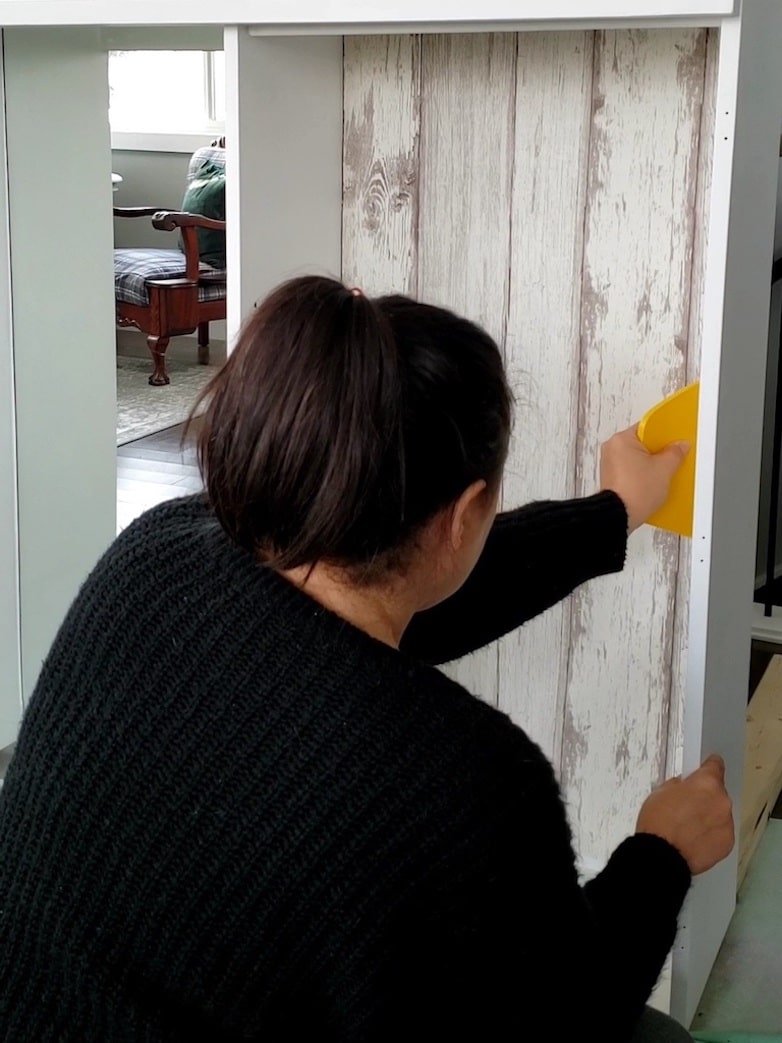
After everything was painted, I decided to add a bit of detail to the inside of the top cabinet. I used peel-and-stick wallpaper that looks like shiplap. I absolutely love how it looks!

It was also my first time using peel-and-stick wallpaper. It’s effortless to apply and works just like contact paper. I smoothed it out with the tool I bought when I did the wallpaper in my powder room.
New hardware also adds to the new look of the hutch. The black looks gorgeous against the white.

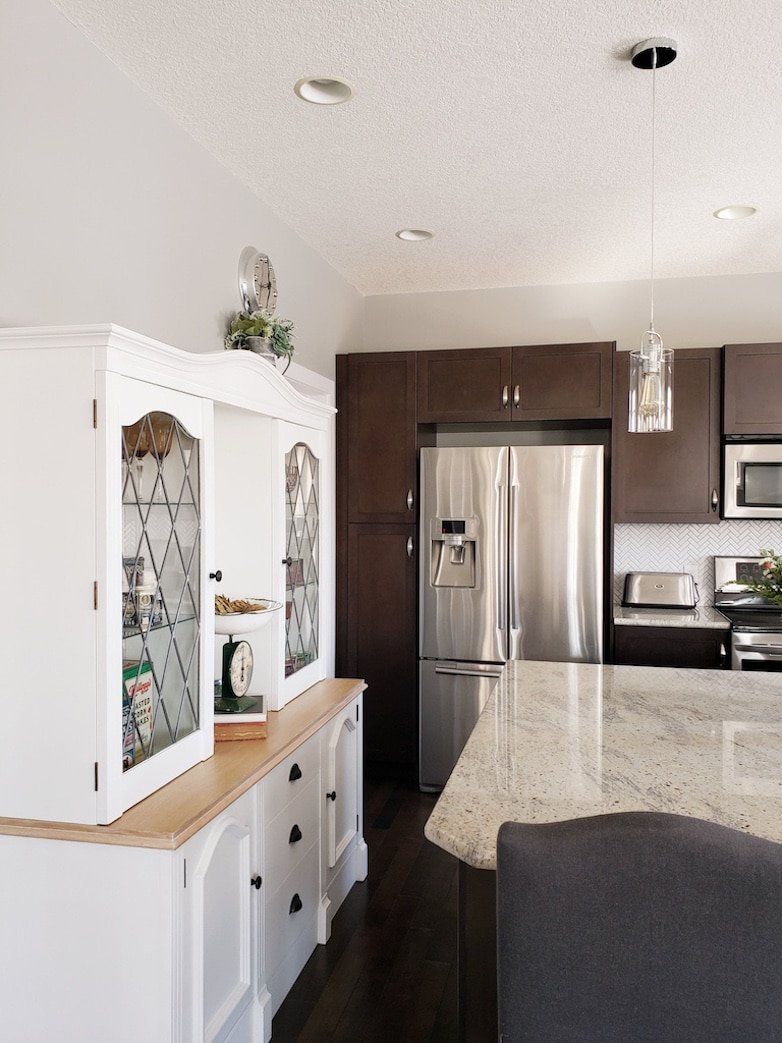
Here, you can see the hutch after its makeover back in its spot in the kitchen. I’m so glad I decided to paint it white! It gives the kitchen a more tranquil and airy feel. A step in the right direction until I get to paint all the kitchen cabinets.
It was even more enjoyable to style the hutch after its makeover!
Curious about some of the vintage finds displayed in this hutch? Read all about them in my post Decorating with Vintage Finds.

Products I Used For This Makeover:
(These are affiliate links from which I may earn a small commission at no extra cost to you)
- Peel and stick wallpaper
- Fusion Mineral paint
- White finishing wax
- Chalk paint brush
- 4-inch foam roller and tray
Happy painting!

Wow that turned out great! But I did notice you didn’t prep with a primer, hope there’s no bleed thru.
Your hutch is beautiful I love it, I have one, old maple, orange tinted to it my mothers want to paint it white along with the buffet table but afraid to do it
Thank you, Debbie! I know painting furniture for the first time can be scary but it can be so rewarding. Let me know if you need any pointers.
White looks refreshing!!
I totally agree, Sonia. Thanks for stopping by!
Is the fusion mineral paint in the paint department of hardware stores or is is a special order?
The hutch is beautiful!
Hi Mary! Hardware stores do not sell Fusion, unfortunately. I’ve only seen a few smaller decor shops that are distributors. The easiest way to find it would be on Amazon. I have a link for you in my post!
Wowsa!! What an amazing transformation to this cabinet!! Stripping paint can be such a pain but you make it look soooo easy!! I love the lighter color you chose. Great job! Thanks so much for sharing our post! Pinning!!
Wow! What an impressive makeover.
Thank you, Liberty! That is so kind of you!
Such a dramatic makeover. I love it. The wallpaper in the back of the cupboards looks amazing – really nice finishing touch.
Wow! It is fabulous. I dont even recognize it. I’ve got two pieces that I want to redo badly. SO much inspiration.
Thank you, Jennifer! I’m so glad it inspired you!
This turned out so pretty! I love the white!!!
I also think it looks so much better in white!
Such a beautiful piece! I love it!
That’s so kind of you! thank you, Christin.
This looks just beautiful! I have some Fusion Mineral paint that I need to get around to trying!
The doors really are beautiful. How nice that you got this from your in-laws!
Thank you Marie! It really is special having furniture with a family history.
Such a great transformation from the blue color. I also love the peel and stick paper you used. What a great piece for that space!! Great job, Marieza! ??
Thanks Kim! I also love the new look.