Home Office Built-ins that are Custom Designed & Built DIY
During the first week of April, I started working on a home office makeover/creation as a participant in the spring 2023 One Room Challenge®. The challenge was to finish a room makeover in eight weeks. During that time, I completed all but the wall of built-in cabinets, bookshelves and a desk area. It is a rather substantial chunk of work that I grossly underestimated. By the end of week eight, I had the base cabinets built and installed, but I never shared any of it, wanting to keep it a secret until the big reveal.
Four months later, here we are, and I can finally share the result. Let me walk you through the evolution of the home office built-ins that I was brave (or stubborn) enough to build from scratch.
Designing the Home Office Built-ins

It all began with this design I created after measuring how much space I had to work with and determining my needs regarding workspace, storage and display area. I mulled over these details for a long time before finally drafting the design. I have never built something this big and complex, but I was determined to make it work – somehow.
Knowing this design would require A LOT of building material, I had to be frugal, making sure I didn’t buy too much wood but not too little and having to pay for numerous deliveries.
I dissected my design, breaking it into units and every unit into individual components. It was a LONG list! I roughly (but to scale) drew a few rectangles resembling 8′ x 4′ sheets of plywood. Starting with the biggest components on the list, I tried to fit them onto the sheets as economically as possible. These ad-lib calculations were actually not far out.
I ordered:
- Six sheets of 3/4” thick smooth/sanded birch plywood
- Two sheets 1/2″ thick smooth/sanded birch plywood
- Two sheets 1/4″ thick smooth/sanded birch plywood
Towards the end of the project, I had to buy one extra 3/4″ sheet. Not too bad for an amateur, eh?
Building the Base Cabinets and Drawer Units
I built the four units/boxes individually before bringing them inside and attaching them to the wall, each other and a 4-inch high base.
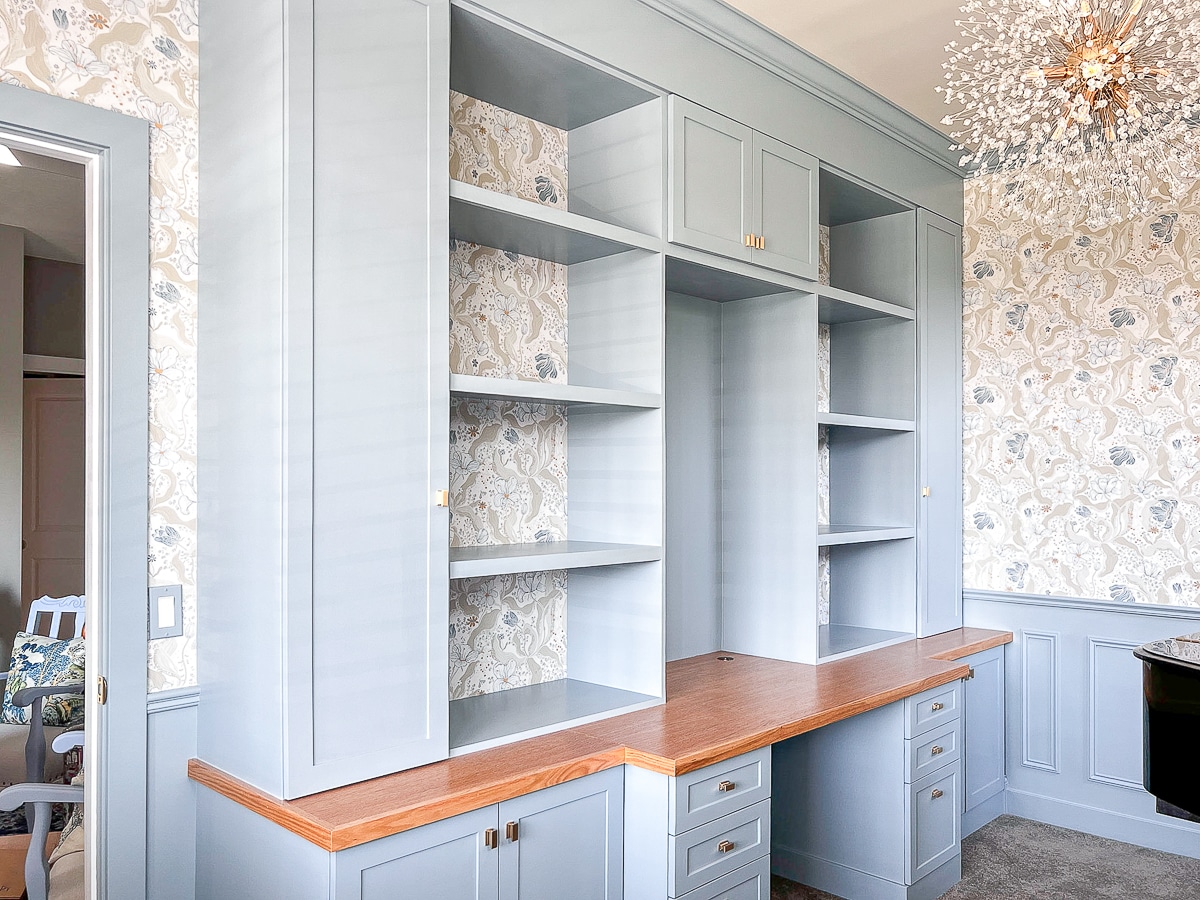
Between the bottom cabinets is a 30-inch opening I made big enough for any office chair to fit and move freely. On either side of the leg space is a narrow drawer unit 15″ wide and 28″ deep. The drawer units are flanked by 2-door cabinets. Each outer cabinet unit is 30 inches wide and 22 inches deep.
The drawer units are six inches deeper than the cabinets with doors. I designed it that way to create a bit of visual interest and also to maximize the desk area.
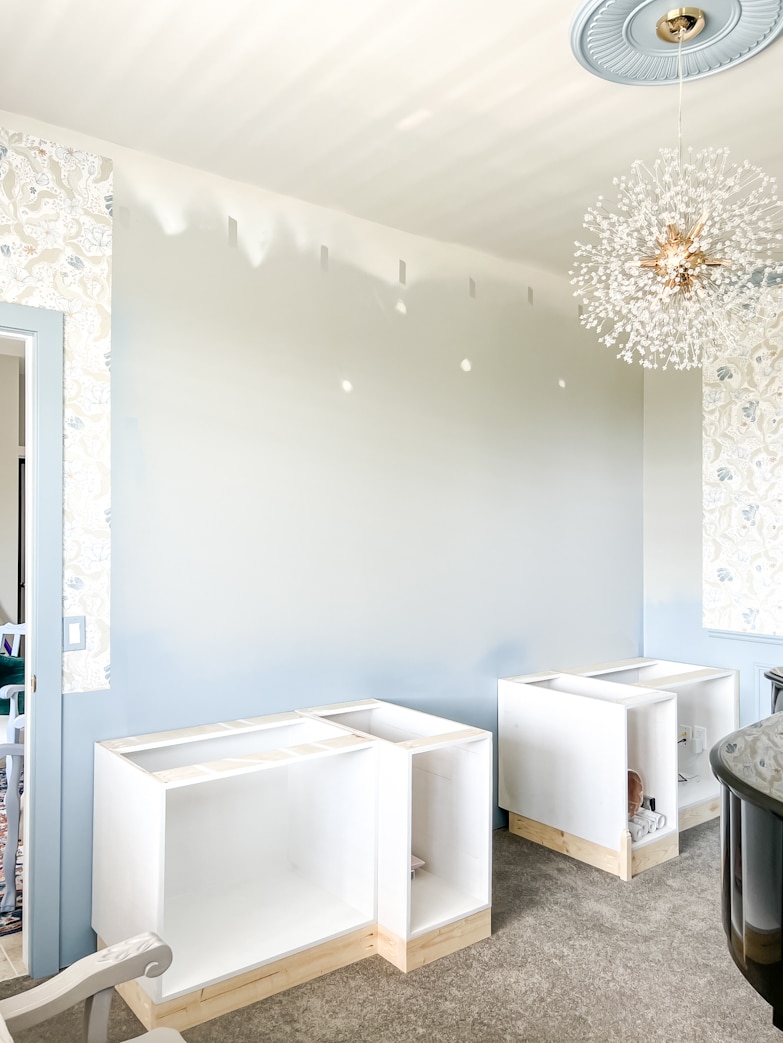
This is how things looked at the end of the official eight-week challenge. I remember thinking that I just needed two more weeks to finish everything. Ha ha ha! How naive I was…
Constructing the Extended Desktop
The extended desktop consists of two layers of plywood and a layer of oak veneer.

For the first layer, I cut three pieces of plywood one inch deeper than the cabinets they are resting on. I drilled pocket holes on the underside of the middle piece (seven on each side).

Once the tree pieces fit perfectly, I flipped them up against the wall and screwed them together.

The three pieces now formed one solid, sturdy piece, each joint kept together by seven screws. For the second layer, I flipped the first layer over completely and attached various off-cut pieces to the bottom with glue and nails. Using solid pieces of plywood for both layers would have been a waste.
By staggering the joints of the two layers, I created one piece as sturdy as a butcher’s block. Can you imagine how much fun it was flipping the 122-inch long double layer back?
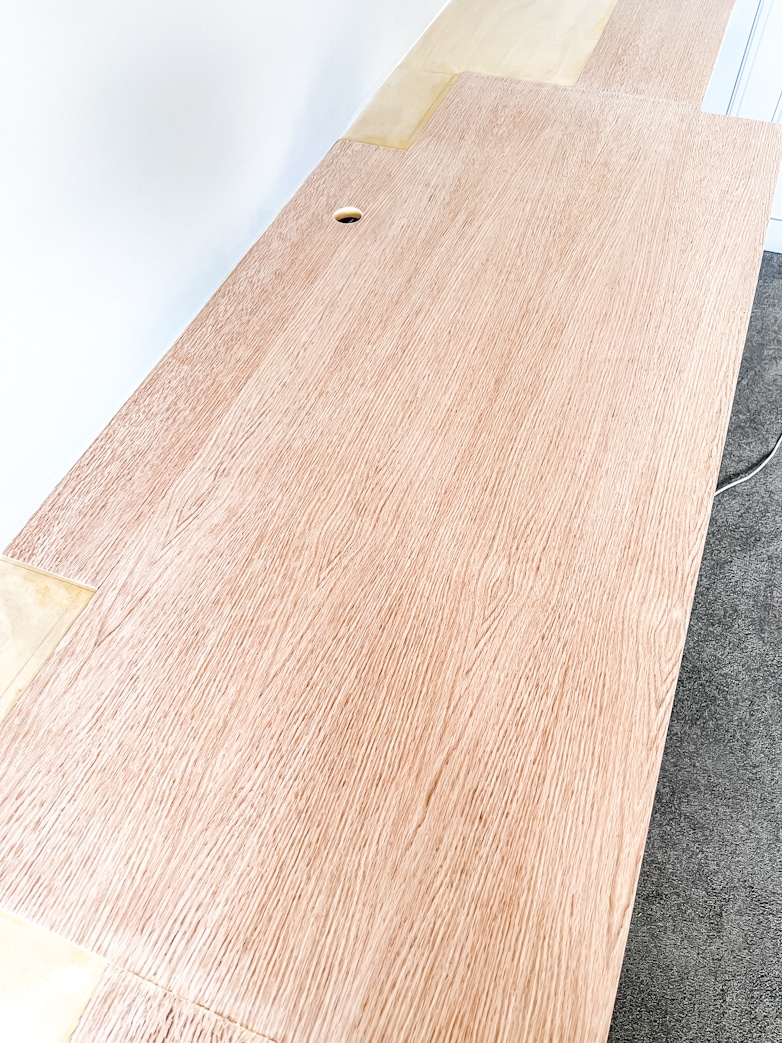
Applying a Layer of Oak Veneer
I have never worked with new wood veneer before, and let me tell you, it was a challenge! The sheets are sold loosely rolled up, and as you can imagine, they want to stay rolled up! Unlike paper or a rug, it can’t be rolled in the opposite direction to flatten it out.
It was all good and well until I realized I had to apply contact glue to both the plywood AND the veneer. Gluing every square inch of a thin, fragile layer of wood that keeps rolling up is not my idea of fun.

Just before bedtime (my most productive time), I glued the veneer down, applied pressure with a roller over the entire surface, and placed a few heavy objects onto it to cure overnight. The following day, I was nervous and excited to check on the veneer. Oh, shock and horror, there were air bubbles everywhere!
After the initial panic and searching for every possible solution, I began making a tiny hole in each air bubble, inserting a small amount of superglue and then pushing that bubble down. It was painful, but it was worth it. I managed to get rid of all the air bubbles.
A seam or joint was inevitable since the top was 122 inches long, and the longest piece of veneer I could find was 100 inches. I also wanted to buy only one roll because they were not cheap. By cutting out the bits where the bookcases and top cabinets stand and creating two symmetrical joints, one roll was enough.

I used 1″ x 2″ solid oak pieces to create a nicely finished edge. After filling all the nail holes and seams in the veneer, I sanded down the whole surface, followed by two coats of polyurethane sealer. The oil-based sealer changed the color of the wood. It’s pretty much golden oak now, but that’s okay. I think it works.
Adding Bookshelves and Upper Cabinets
Once the sealed veneer was dry and cured, the bookcases and tall cabinets could go on top. Instead of adding wallpaper to the area between the bookcases, as I had initially planned, I added wallpapered panels to the backs of the bookcases.

For the top and bottom doors on the right side to open without banging against the wall trim, I had to add 2-inch “spacers” between the cabinets and the wall.
Building Cabinet Doors
By this time, it was already clear that I wouldn’t have enough 3/4” thick plywood to build the doors as planned. I took a chance and made them in an unconventional way.
I used 1/2″ plywood to cut full-size, solid doors. To create a shaker-style look, I used 1/4″ plywood strips (2 inches wide) to build a border on the front of each door.
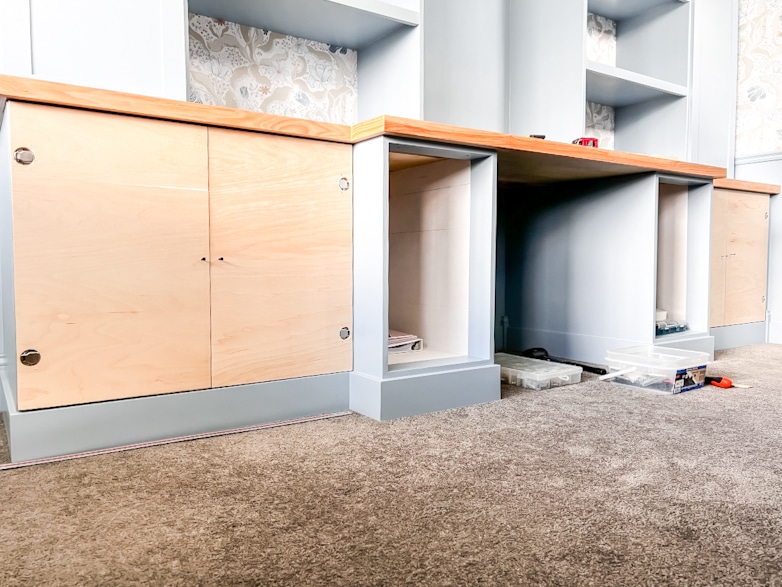
Here, you can see the doors before I put the borders on. Because it’s only half an inch thick, the holes for the hinges were drilled all the way through. It looks terrible, I know. I hung the doors first to make sure they were the correct size. If I had to cut them smaller, I wanted to do so before building the borders.

This is how it looked with the borders on. No professional would ever do it this way, but no one can tell the difference now that they are filled, finished and painted.
The drawer fronts and two small doors above the desk were built correctly. I am planning a separate post about building and installing the drawers, in which I will also cover the drawer fronts.
Building a Header Above the Bookcases
During the last touches on the drawers, I severely injured a finger, and the project stopped for a few weeks.

Stephen tried to get things moving again and built these supports for the header extending to the ceiling. He also built most of the small cabinet between the top of the bookcases, but it was such an overwhelming time that I somehow forgot to take any photos! I don’t have a single image showing the progress of the middle cabinet, the header or the crown molding being installed.
The Home Office Built-ins All Done
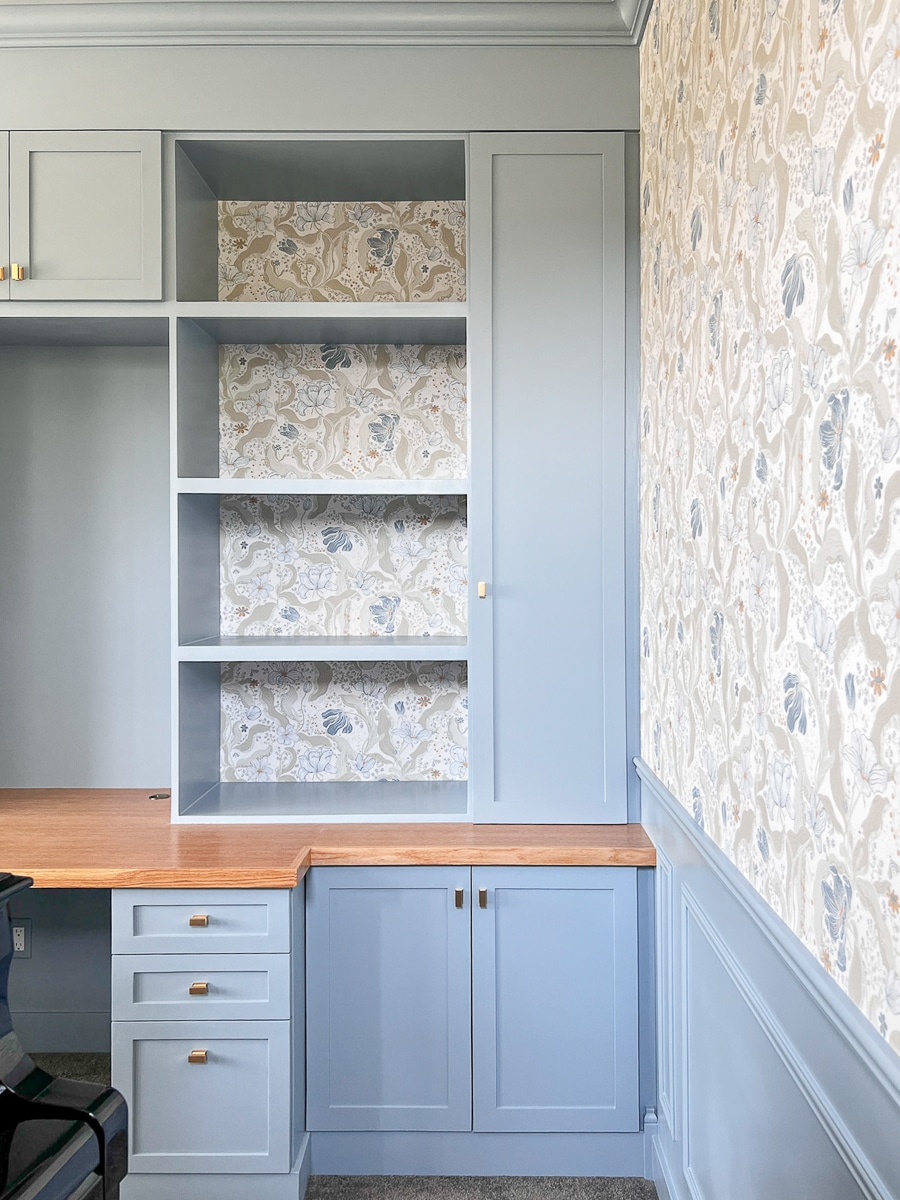
I cannot tell you how happy I was after installing that last piece of hardware. This project was highly challenging, but I loved it. I enjoyed the woodwork even though it was messy and time-consuming, and at times, I didn’t know what I was doing. There definitely were times when I felt like giving up.
Despite all that, plus almost losing a finger, I would love to do this again! Probably not soon, but definitely again.
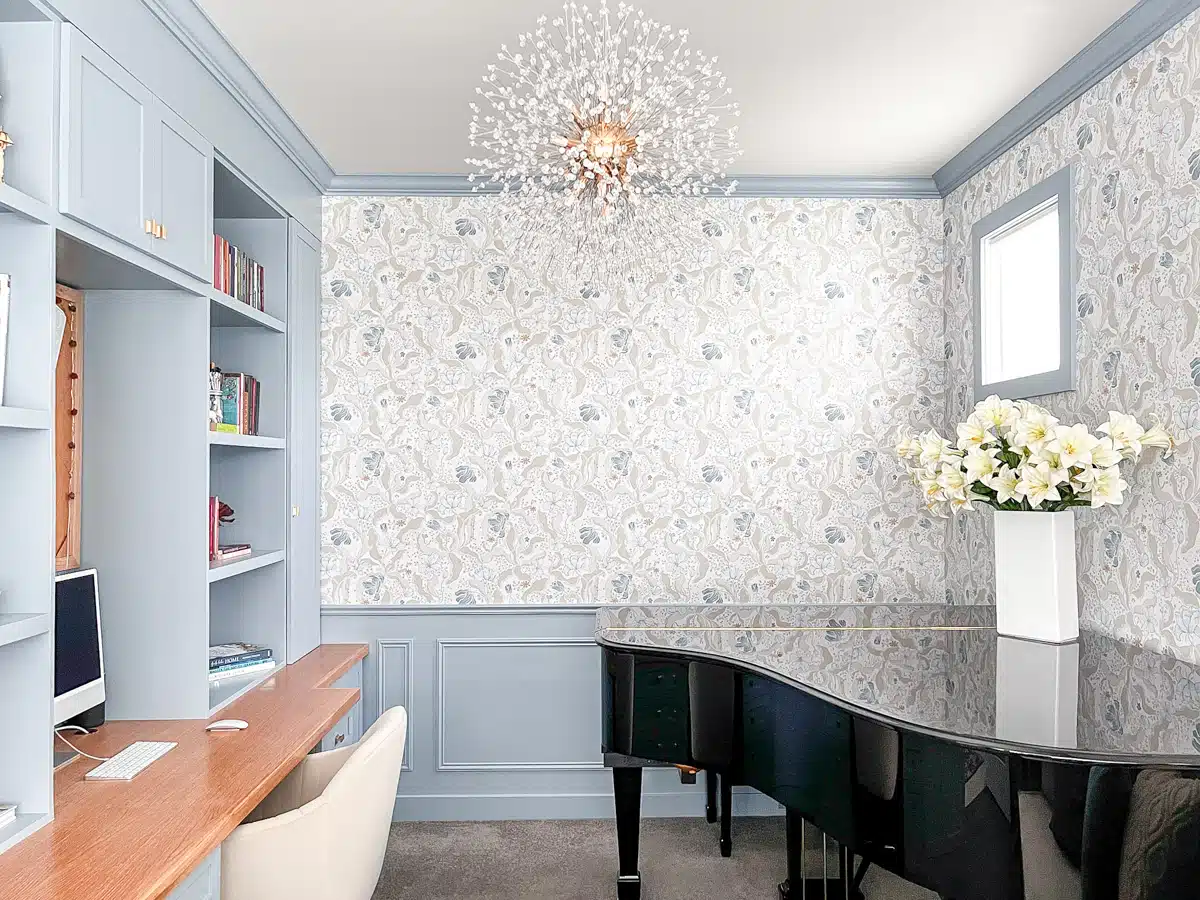
This home office and built-ins are everything I wanted and more. It truly is my happy space where I can work and be creative all day.
I would love to hear what you think!

If you want to see how I decorated the shelves, I’ll share lots of photos showing everything soon.
Below, you can compare the before and after side by side. (If you are reading on your phone, they won’t be next to each other, but I’m sure you’ll get the idea.)

Before
After

Hello! Do you have the name of the paint color you used?
Hi there! The color is Winter lake by Benjamin Moore.
Gorgeous! What an awesome job you did. Function and beauty combined.
Deborah, hearing this makes me SO happy! Thank you!
It is absolutely gorgeous! I love everything about it, the wallpaper, the paint color, the amazing chandelier, and the cabinets. Magazine perfect!
Thank you so much, Pam! This makes my day!
Dit lyk stunning
Thanks, Walter!